Using SDE VMs#
Each SDE environment includes preconfigured virtual machines (VMs) in several projects. See the Projects page for details on the resources in each project and intended use cases.
This page outlines instructions on how to:
Start a VM: Launch your virtual machine
Connect to a VM via SSH-in-browser: Establish a command line connection to your VM in a web browser window
Connect to a VM desktop environment: Connect to a VM with a remote desktop or screen sharing application to use GUI applications
Stop a VM: Safely stop your VM when you are finished so you can return to it later without losing any data or configuration.
Start a VM#
Connect to the Google Cloud Console in the web browser on your computer to access the SDE environment.
Navigate to the Google Cloud Console VM Instances Page .
Make sure you’re in the correct project (check the project selector at the top of the page) for the VM you want to connect to.

You’ll see a VM listed on that page. Check the status of the VM. If the icon is a gray circle icon containing a square inside, the VM is currently stopped. A green check mark indicates that the VM is already running.
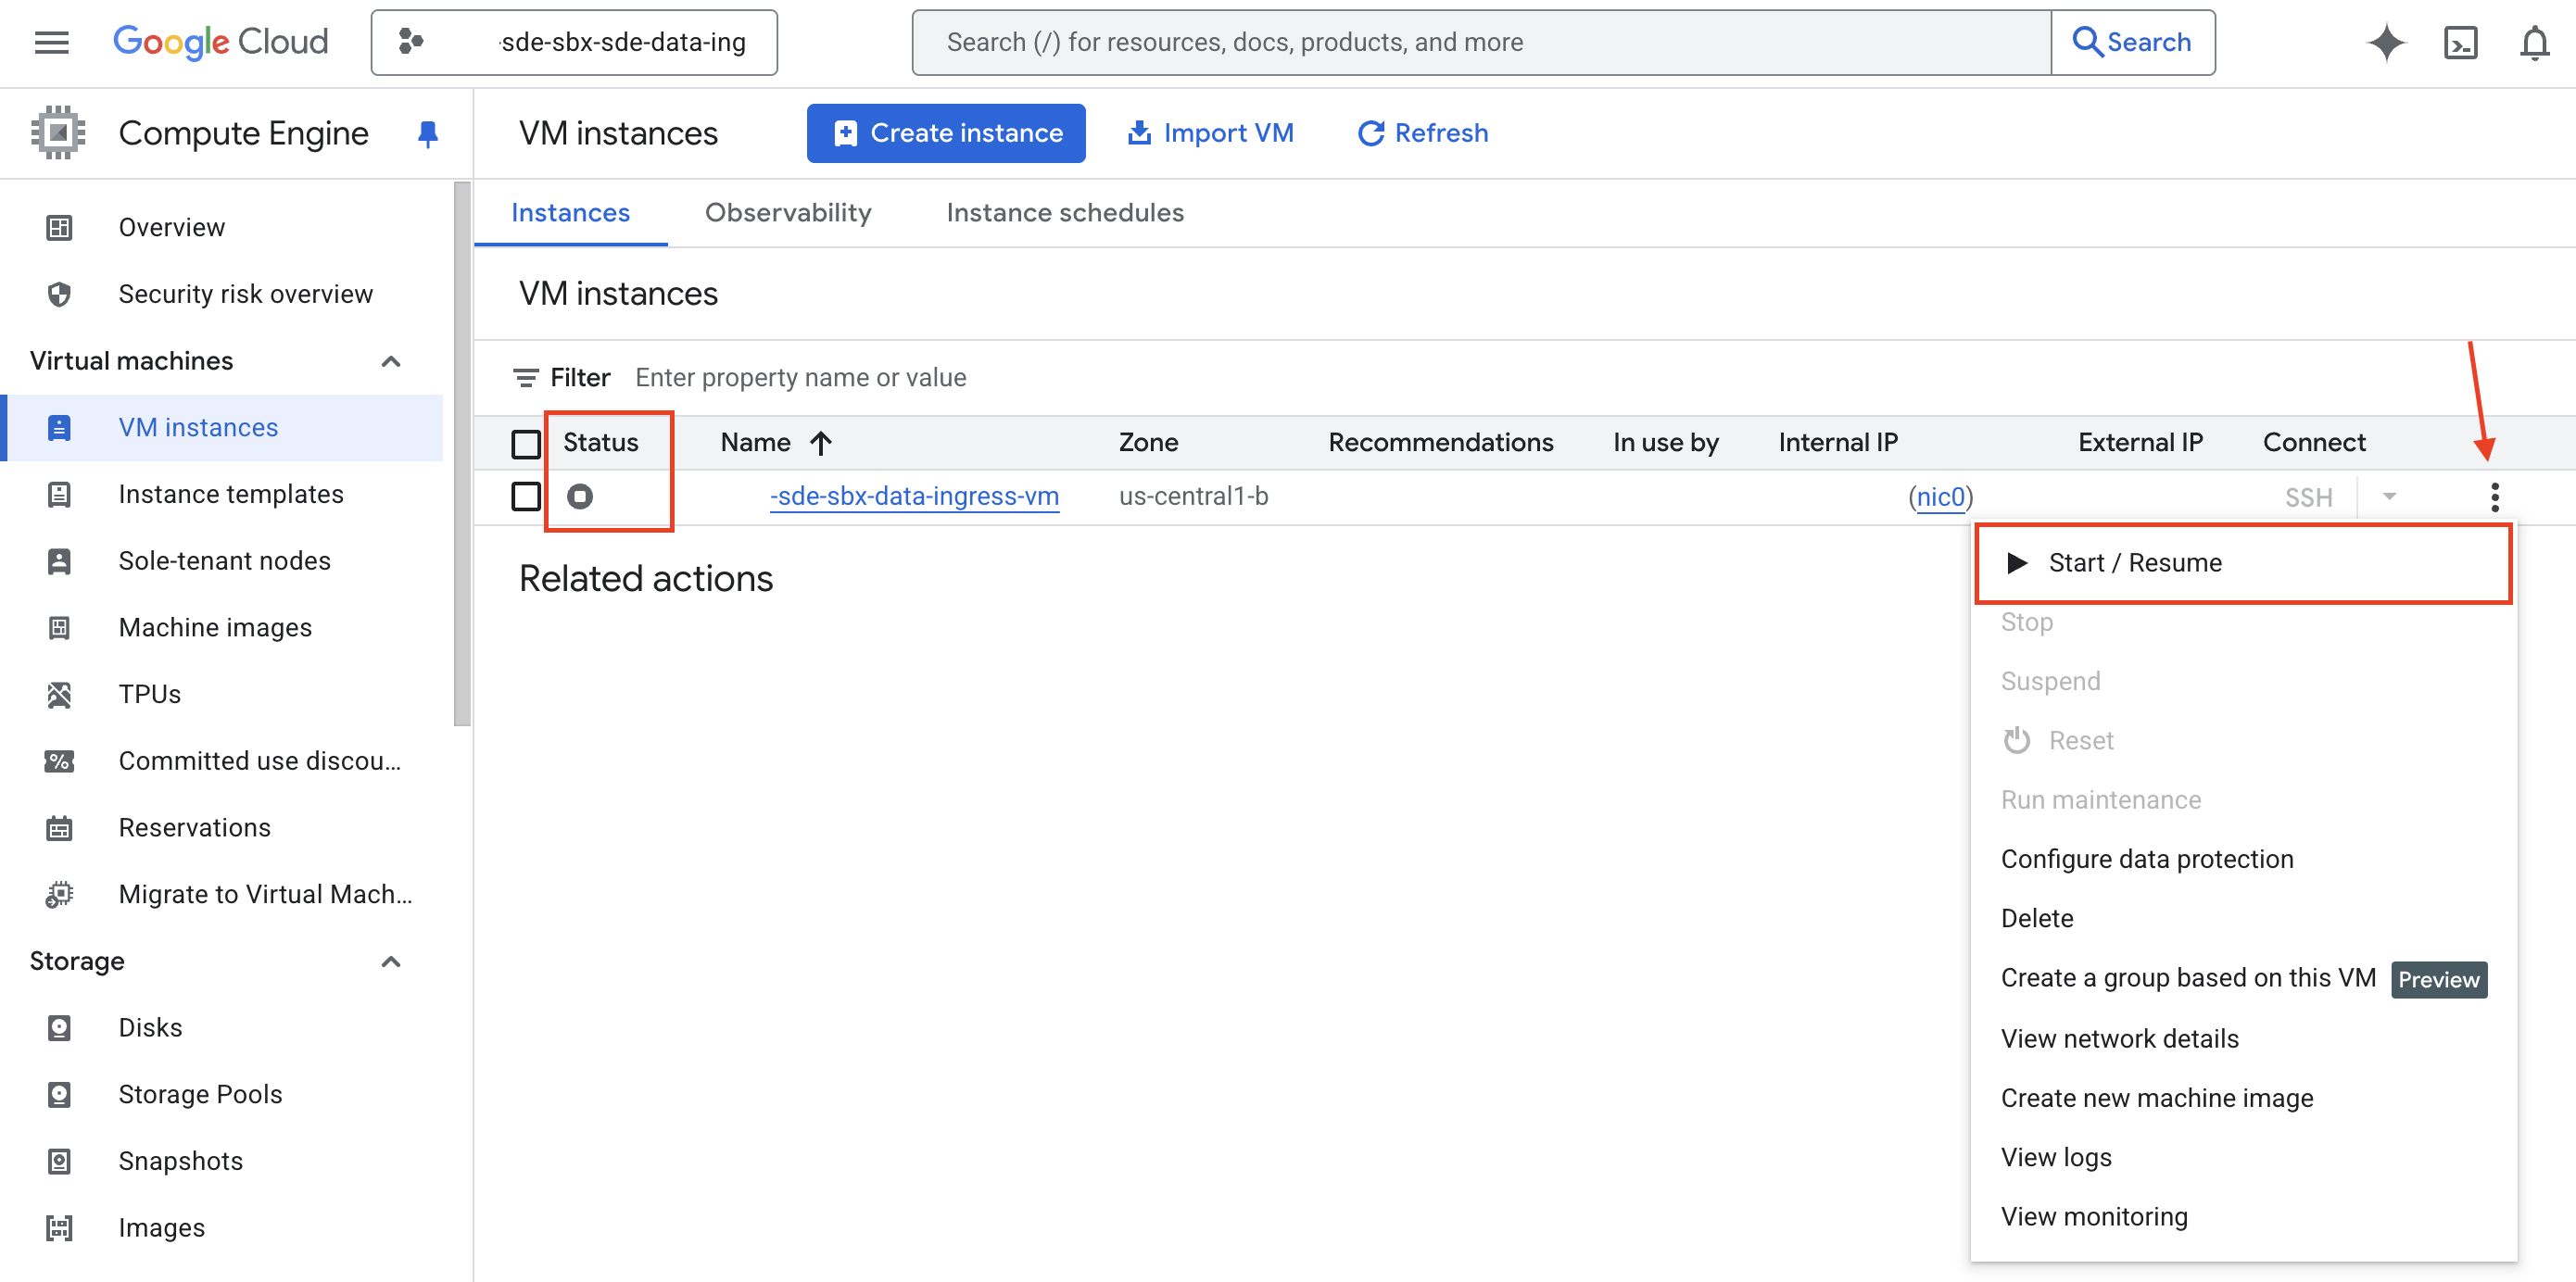
If the VM status is stopped, click the three-dot icon on the right to open the “More Actions” menu.
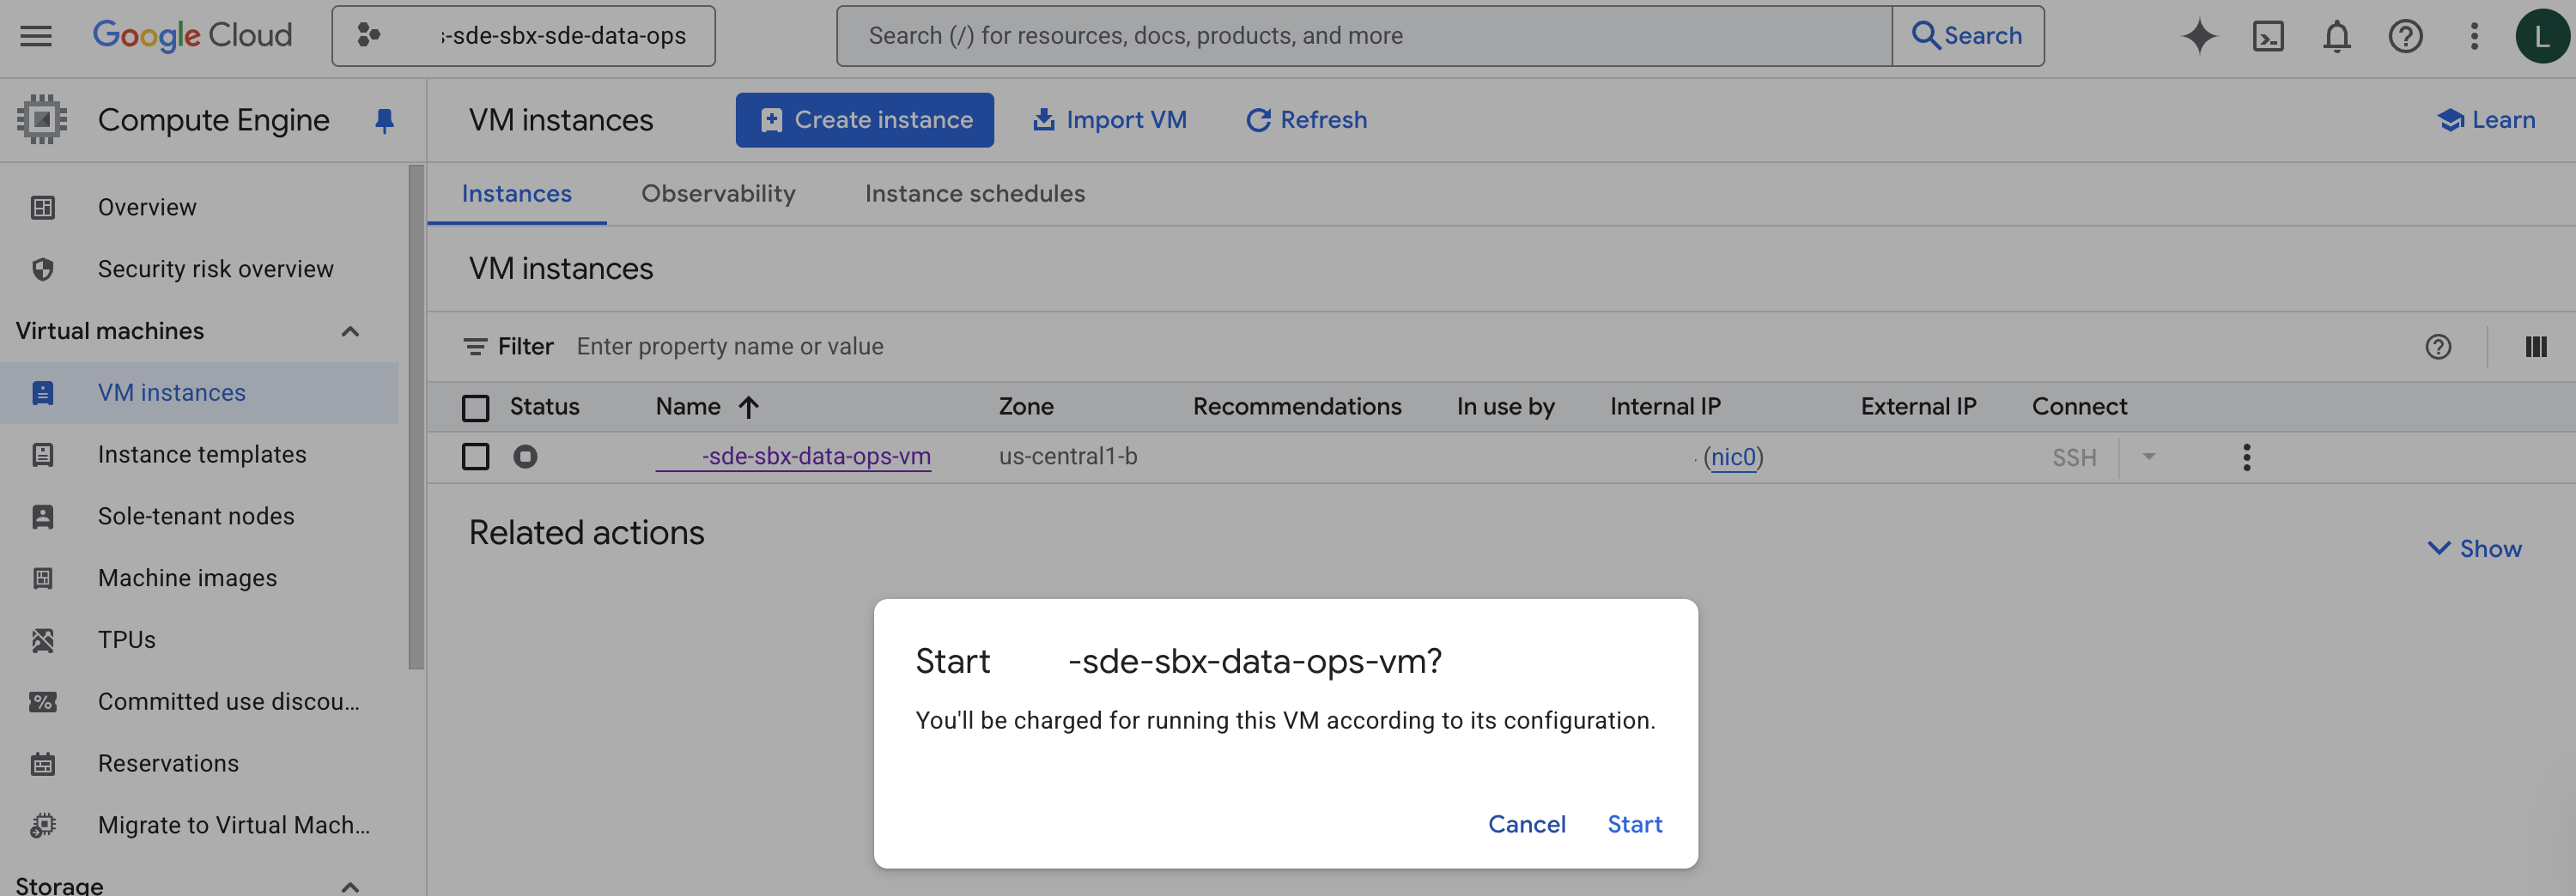
From the “More Actions” menu, select “Start/Resume”. You will be presented with a dialogue box prompting you about the charges. Click “Start”
Wait a minute for the VM to start up.
When the VM is running, the Status symbol will turn Green. You will also receive a notification in the console.

Error: You need additional access
If the Google Console prompts you that you need additional access:
Check to see if you are connected to the Northwestern VPN .
Make sure you are in the correct project; check the project selector at the top of the page.
Always STOP your VM after each session
Your VM is charged by the hour when it is running. You will incur costs even if it not being used.
Make sure to STOP it after you are done with your work. Follow instructions on stopping a VM.
SSH-in-browser Connection to a VM#
The Google Cloud Console offers an option to open a terminal window in your web browser with an SSH command line connection to a VM.
Make sure you’ve started the VM. From the VM Instances Page , with the relevant project selected at the top of page:
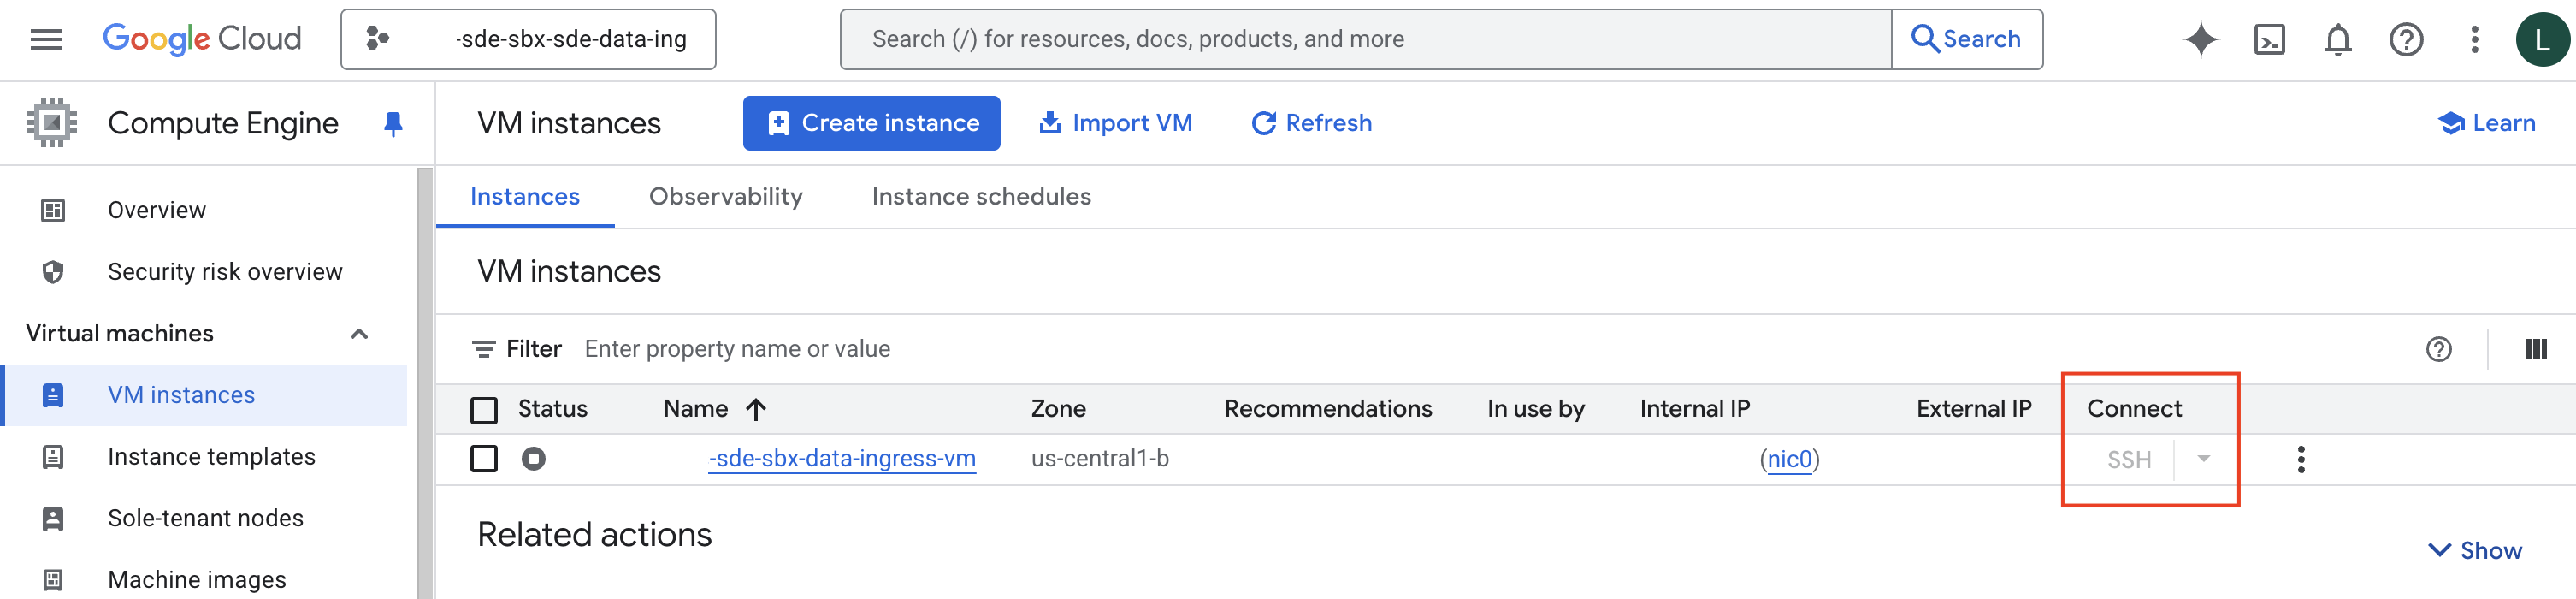
Click the SSH button in the row for the VM (in the “Connect” column). In the image below, the SSH link is grayed out below because the VM isn’t running. The link will be active when the VM is running.
A new browser window or tab will open.
Click Authorize to allow SSH-in browser to connect to VM.
Sign in on the Google Sign-in page using your Northwestern Google Account that has been authorized to use the SDE.
You will then be prompted to grant “Google Cloud Shell” access to your account. Click Continue
You will be redirected back to the SSH window that will show a command line prompt. Commands you enter here run on the VM, not your local computer.
Password#
If this is your first time connecting to this particular VM, you will be asked to “Please enter a remote desktop password”. This password prevents others who might have access to the VM from connecting to your session.
Choose and enter a password you’ll remember.
Remember this password
You will need this password later and for future sign-ins. Record this password somewhere, ideally in a password manager .
When asked “Would you like to enter a view-only password (y/n)?” enter n for no.
You can now work with the VM from the command line, or you can proceed to create a screen sharing session to access the desktop and GUI applications.
Connect to VM Desktop Environment#
To use software with a graphical interface, you can create a screen sharing or remote desktop connection to the VM.
To connect to the VM desktop, you need Google Cloud CLI installed on your computer.
1. Gather Connection Information#
Port#
Open an SSH-in-browser connection to the VM.
Find the remote desktop port number in the SSH-in-browser terminal. There will be a line similar to
Connect to the remote desktop on port 5913in the terminal, where the port number might be a different number. You need this port number to connect.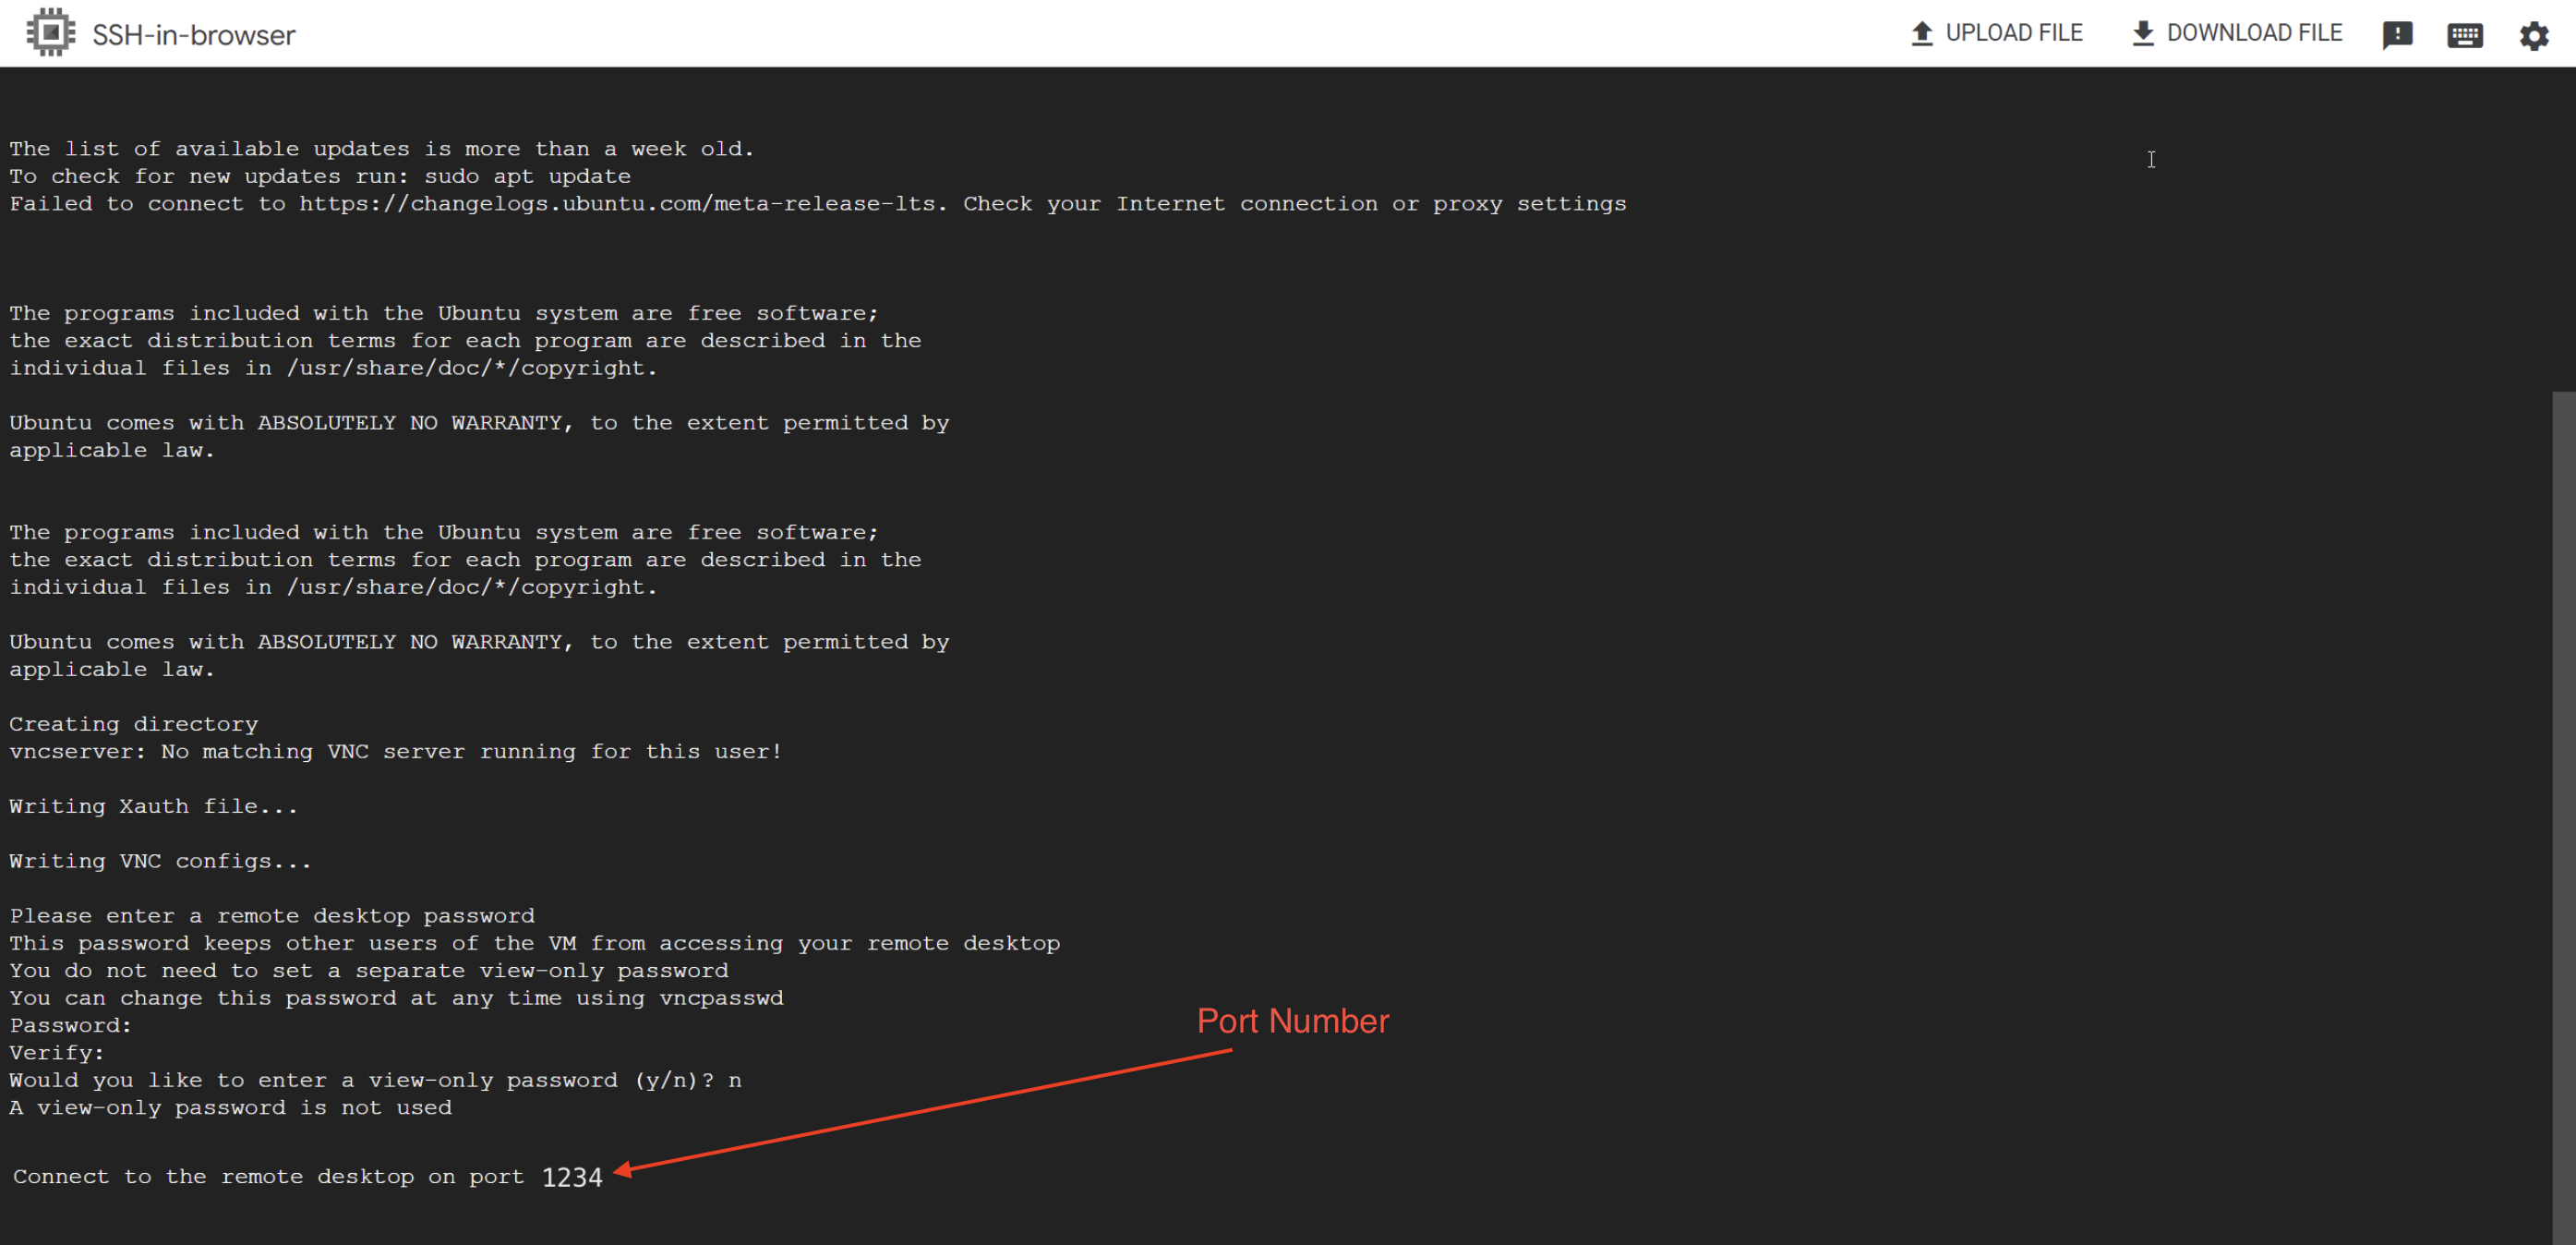
Do not close the browser window
Keep this SSH-in-browser tab open. You need it running while connecting.
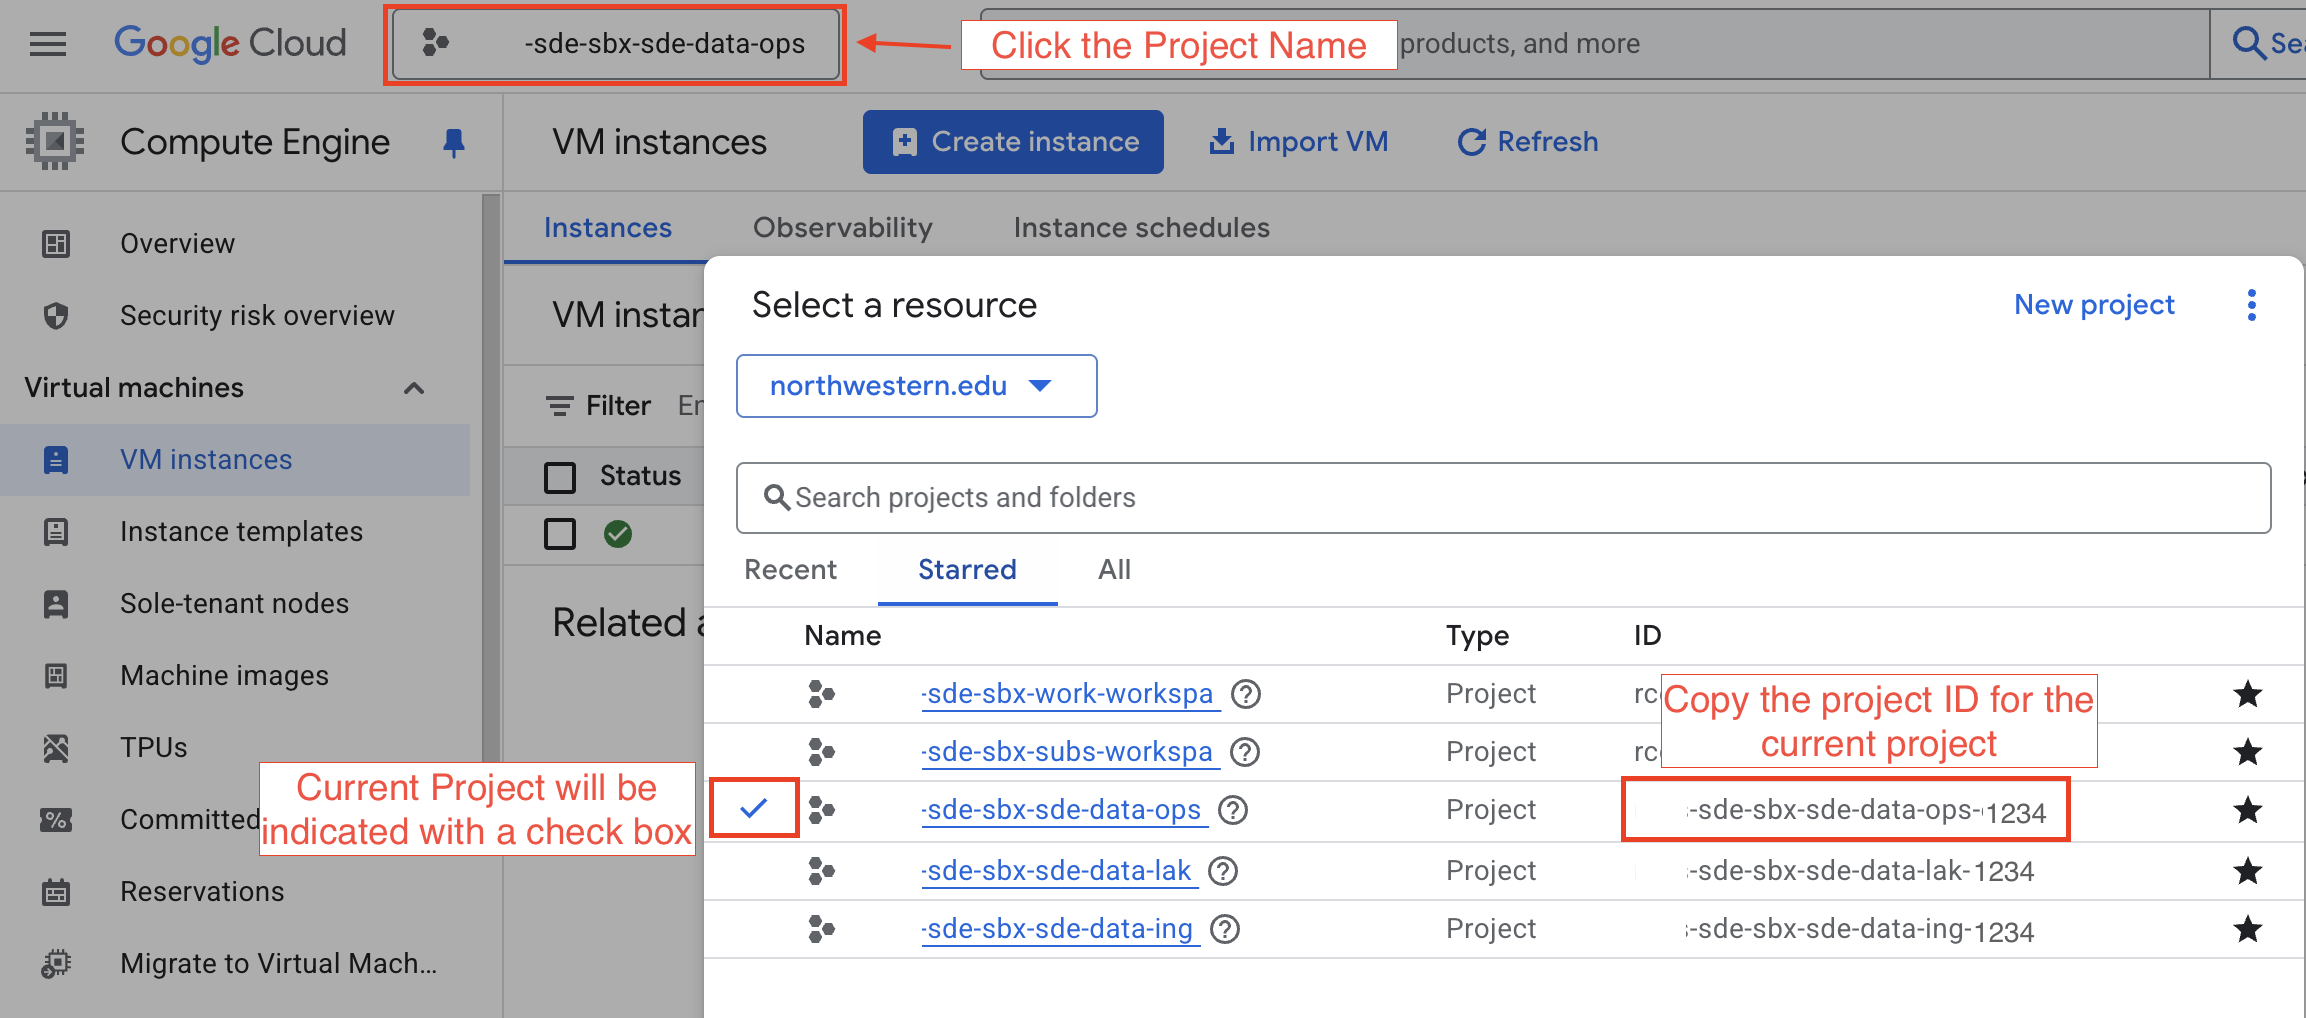
Project ID#
On the Google Cloud Console page open in your web browser, you can get the Project ID from the project menu that you can open from the top bar of the Cloud Console.
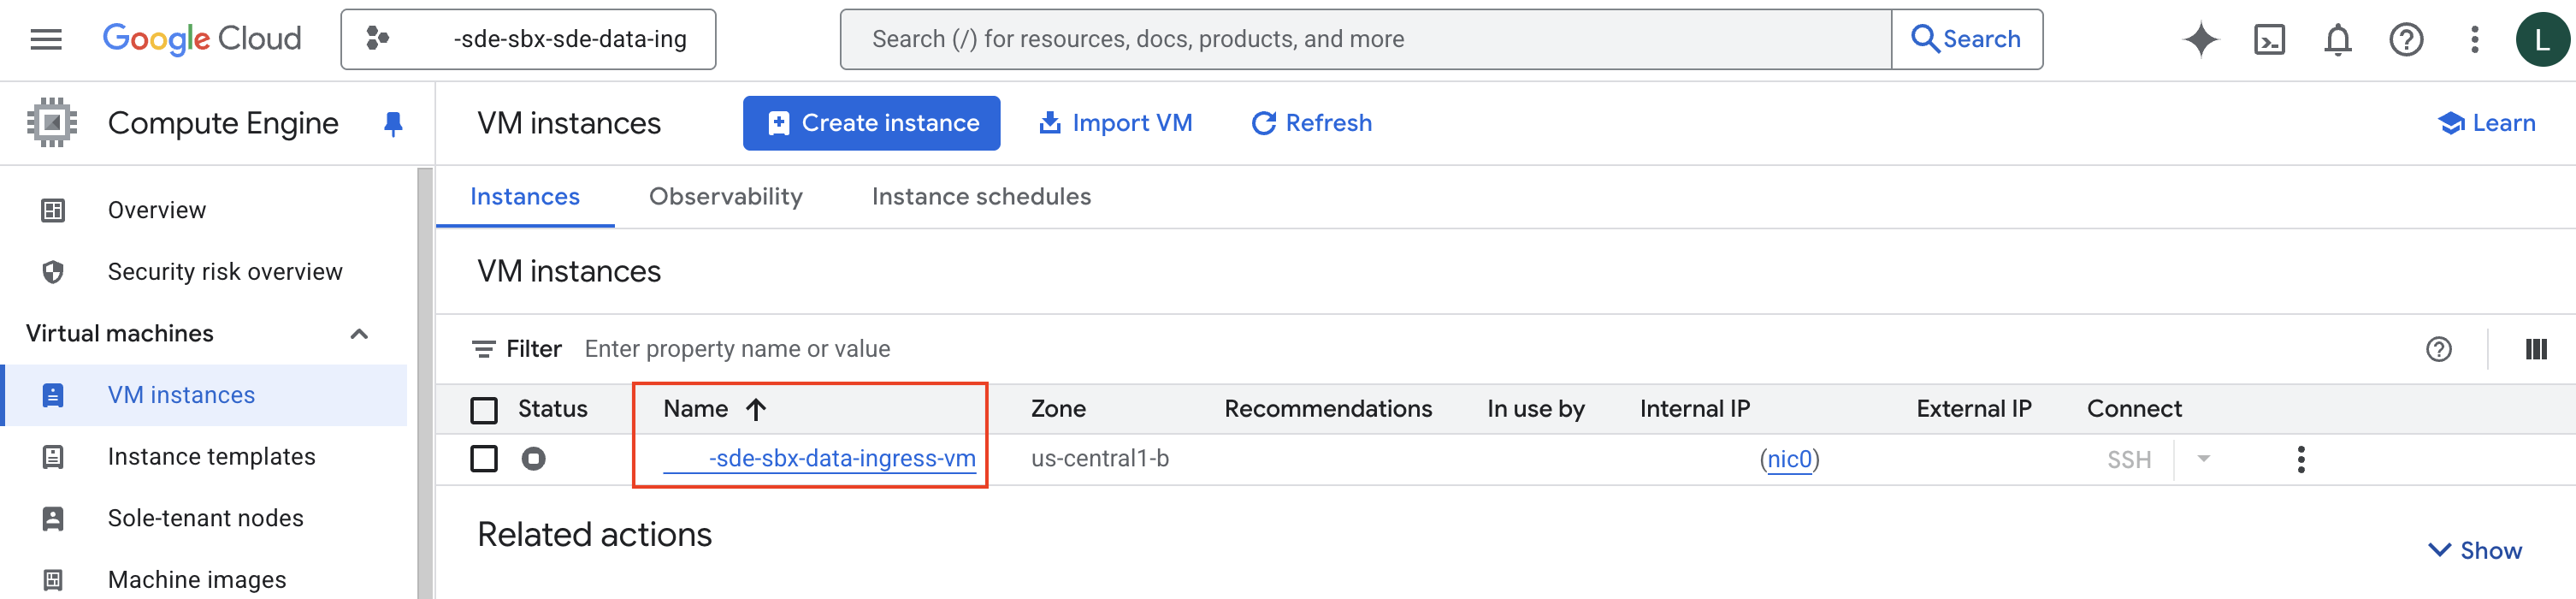
VM Name#
On the Google Cloud Console page open in your web browser, you can get the VM name from the “Name” column in the table on the VM Instances Page .
Record Connection Information#
Enter the Project ID, VM Name, and Port Number to have them automatically inserted into the commands below so that you can copy and paste the commands directly into your Terminal without editing them.
Port number:
Project ID:
VM Name:
2. Establish a secure connection to your VM#
Set up a secure connection between your computer and your virtual machine using the Google Cloud CLI. This step forwards the screen sharing port from the VM to your local machine.
Open your Terminal (Mac) or the Google CLI application (Windows) and authenticate:
gcloud auth login
Set your project:
gcloud config set project projectid
If you entered your project ID in the box above, you can copy and paste the above command directly. If the above command shows projectid, replace that with the project ID you identified above.
The command will return this result: “Updated property core/project.”
Double-check your configuration by running this command:
gcloud config list
You should see the output similar to:
[core]
account = <yourname>@northwestern.edu
disable_usage_reporting = True
project = projectid
Run this command to create a connection between your computer and the VM:
gcloud beta compute start-iap-tunnel vm_id portnumber --local-host-port=localhost:portnumber --zone us-central1-b
If you entered the port number and VM name above, this command has the values substituted in already. Just copy the command and run it. If you see vm_id or portnumber in the command above, replace those with the appropriate values.
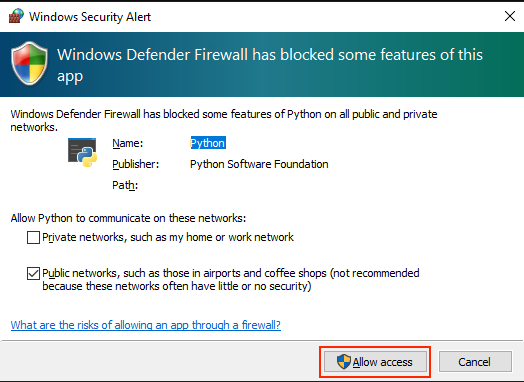
If you are using a computer running Windows, Windows Defender will open up a firewall window. gcloud is a Python application, so the message may reference Python. Click “Allow Access”. You will then be taken back to your terminal window.
If connected successfully, you will see this message in your terminal:
Testing if tunnel connection works.
Listening on port [portnumber].
Do not close your terminal; it needs to stay open to keep the connection to the VM open.
3. Access the VM via a Screen Sharing App#
Safely access the VM through your preferred screen sharing tool on either MacOS or Windows.
Open up the “Screen Sharing” application. It is likely located in Applications > Utilities.
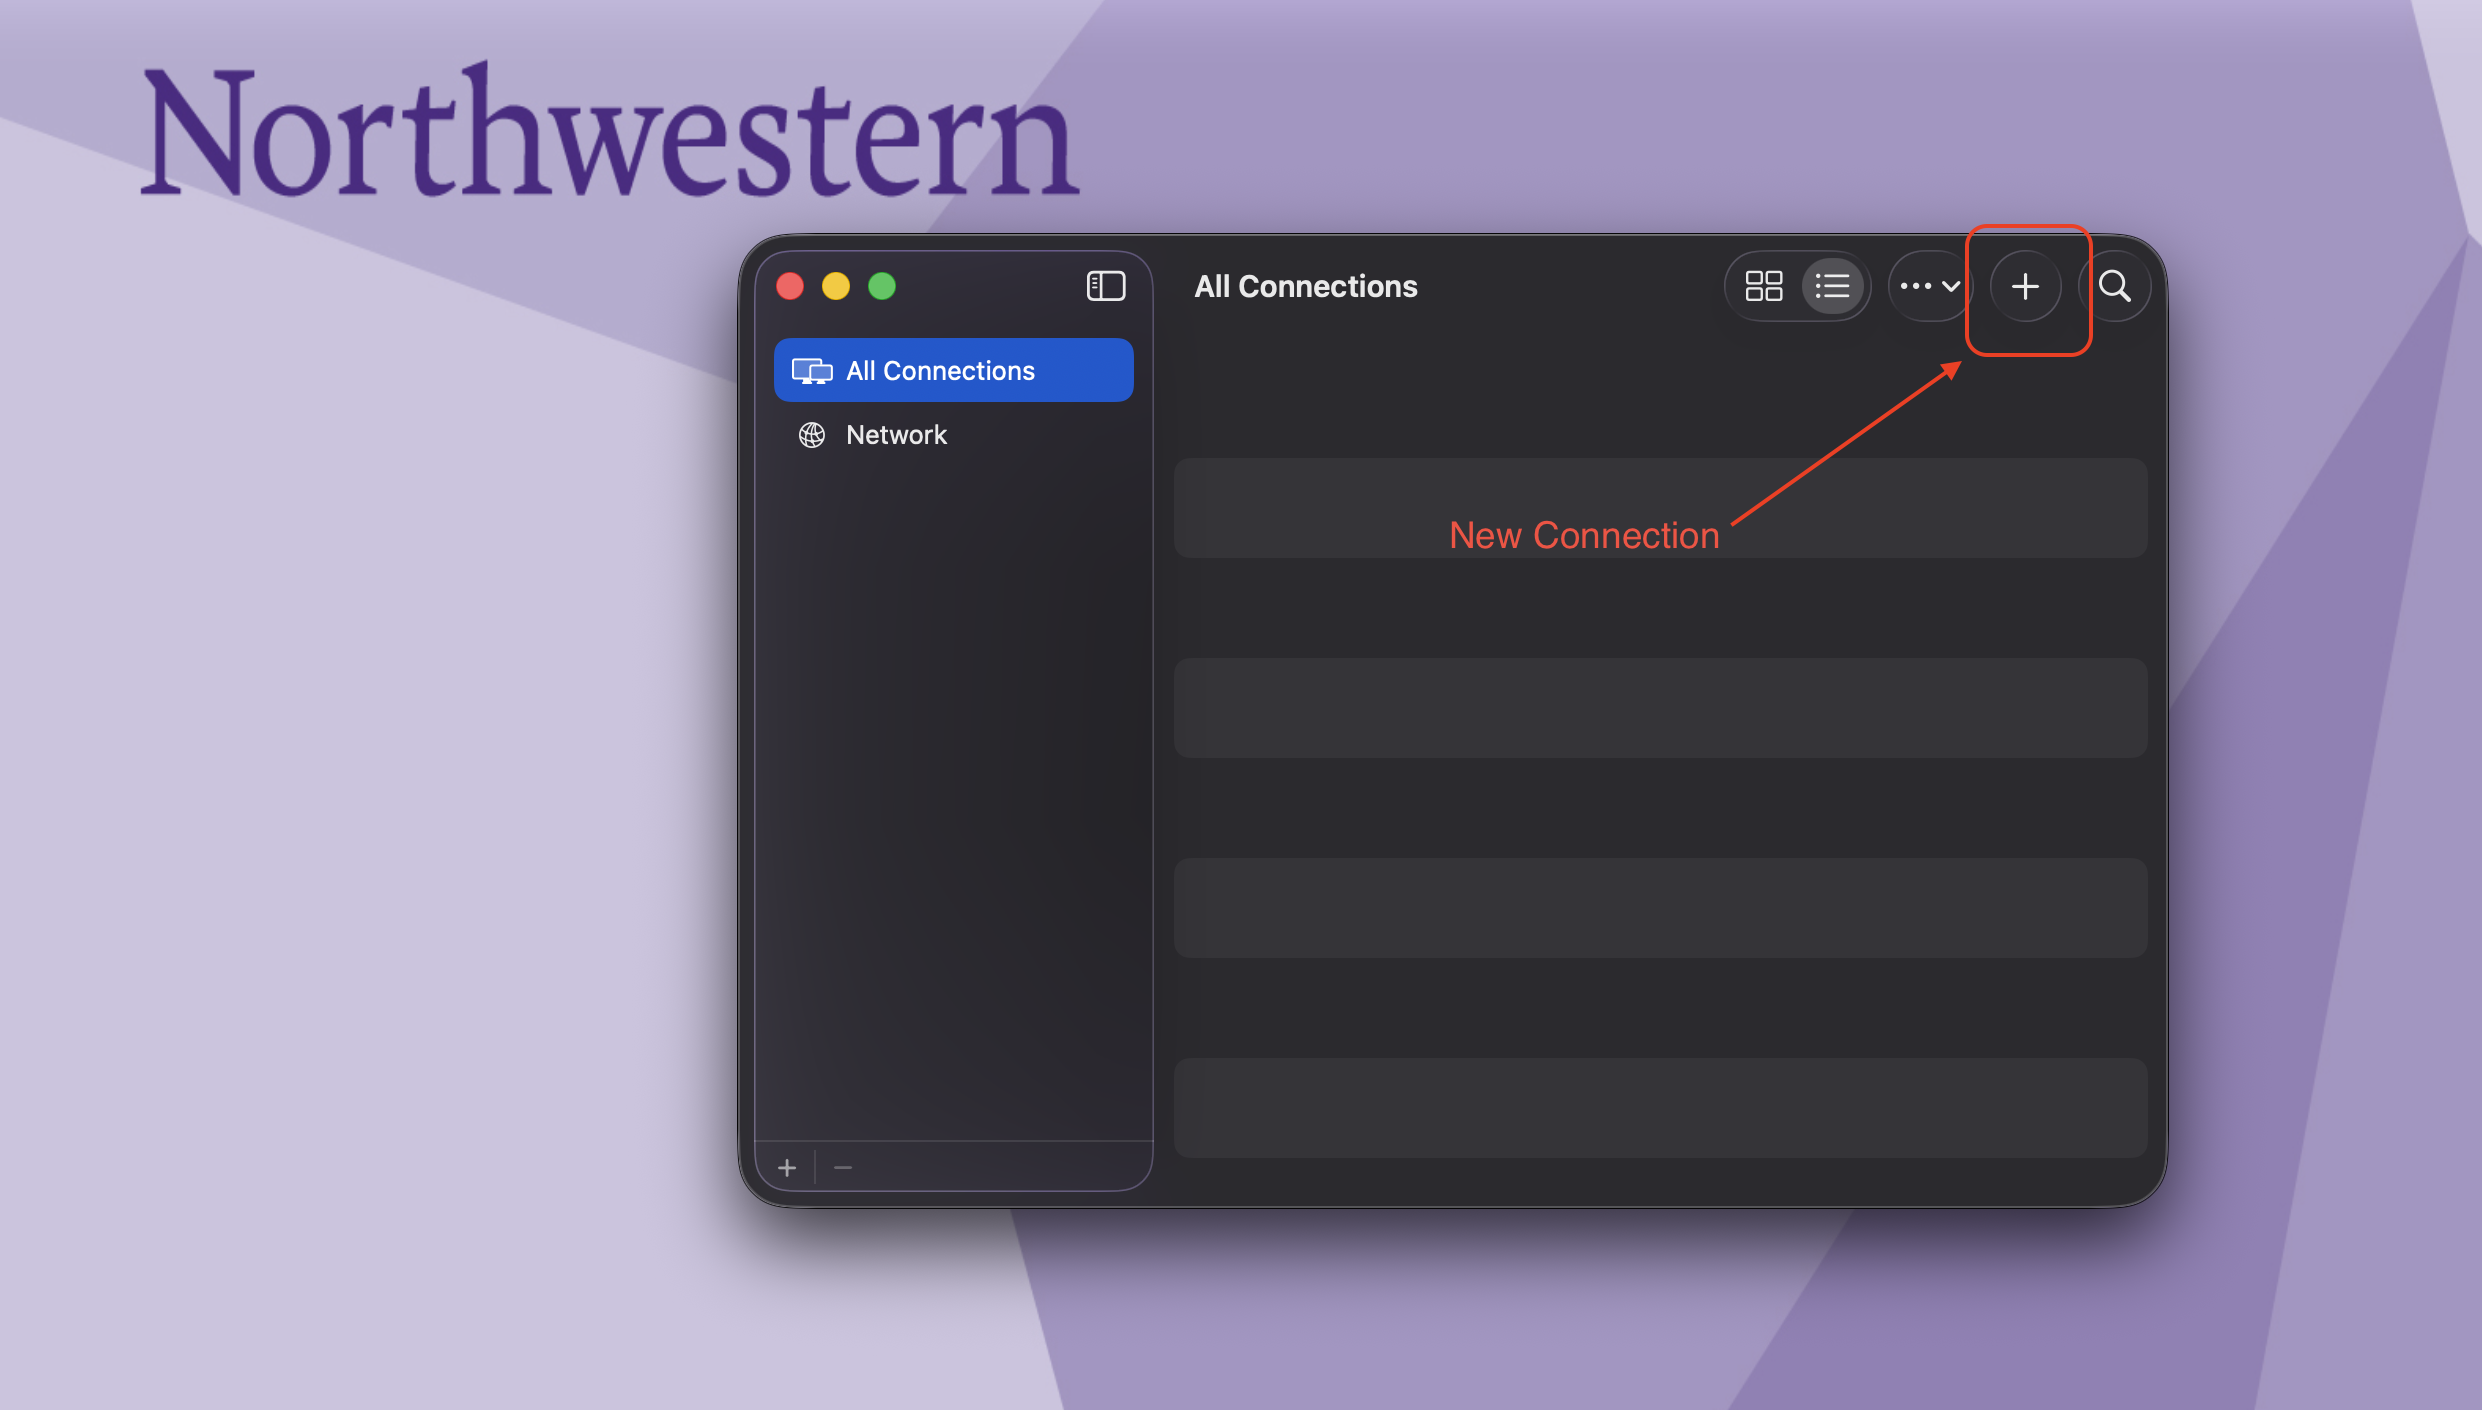
If this is the first time connecting to the VM, Click the “New Connection” option, and you will be presented with a dialog box.
Copy-Paste the text below in the text box and click “Connect”
vnc://localhost:portnumber
If the above command shows portnumber, substitute in your port number.
If you have connected to the VM before, you can select the VM you wish to connect to and click “Connect”.
You will then be prompted to enter a password. This is the password you created when you first created an SSH-in-browser connection to this VM. You can choose to remember password to speed up the log-in process.
Click Sign-in.
A window will open showing the VM desktop. The VM runs the Linux operating system.
Download and install RealVNC Viewer if you do not have it on your computer yet.
Open the “RealVNC Viewer” application.
You will be presented with this window:
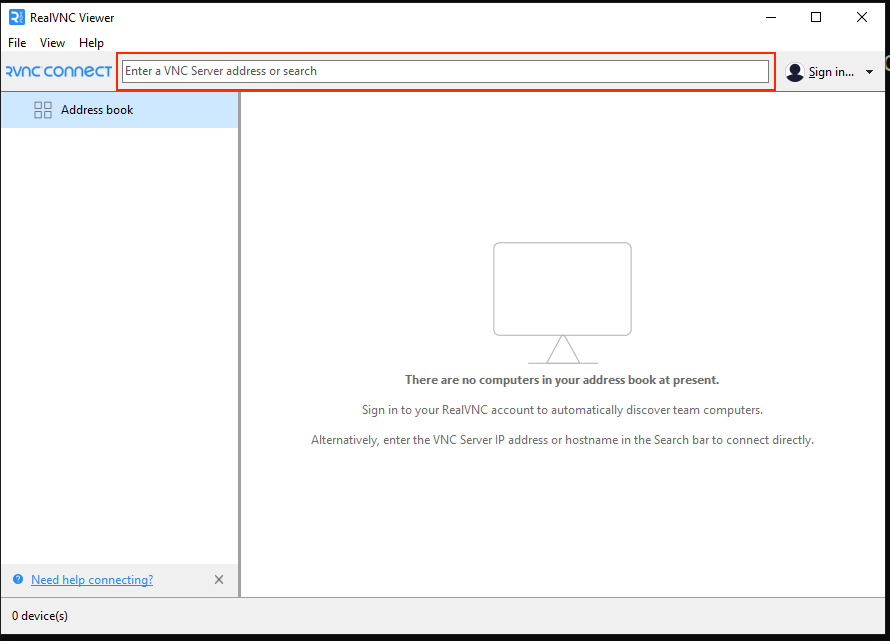
Copy-Paste the text below in the input box and press the “Enter” key.
localhost:portnumber
If the above command shows portnumber, substitute in your port number.
You will be prompted with an “Encryption” dialogue box:
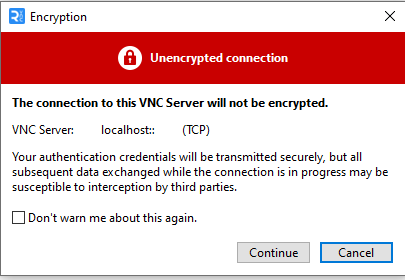
You can choose not to be warned by this message again, and click “Continue”.
A dialogue box will open requesting you to enter a password. This is the password you created when you first created an SSH-in-browser connection to this VM. You can choose to remember password to speed up the log-in process.
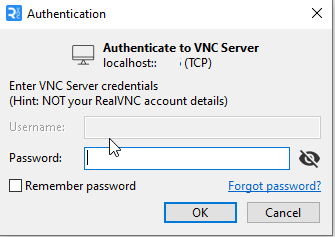
Click OK
A window will open with your VM page. You now have access to your VM.
Stop a VM#
A VM should be stopped after finishing your work session. Stopping the VM shuts it down safely while preserving its data and configuration, so you can start it again later without losing progress.
Before you stop your VM:
Save your work! Copy your data from your VM to a Bucket
Ensure your code/scripts are backed-up too, by saving them in a bucket.
You may currently have four tasks running:
SSH-in-browser tab in your web browser
Screen Sharing or RealVNC Viewer application on your computer
Terminal/Command Prompt window running the SSH tunnel/port forwarding
The VM itself, which you can control through the Google Cloud Console
Here’s the correct order to close them:
1. Close the Screen Sharing window#
Close the Screen Sharing app on your Mac.
This disconnects the VNC session cleanly from the VM desktop.
Do this first so you’re not interacting with the VM while shutting things down.
Close the RealVNC Viewer app on your Mac.
This disconnects the VNC session cleanly from the VM desktop.
Do this first so you’re not interacting with the VM while shutting things down.
2. Stop the SSH tunnel in Terminal#
Go to the open Terminal window where you have your CLI listening on port
Testing if tunnel connection works.
Listening on port [5915].
Press “control + C” to stop the port forwarding.
You should see the prompt return in your terminal and the message “Server shutdown complete.”
This step closes the secure connection from your Mac to the VM.
Go to the open Terminal window where you have your CLI listening on port
Testing if tunnel connection works.
Listening on port [5915].
Press “control + C” to stop the port forwarding.
It may ask if you want to “Terminate Batch Job [y/n]”. Type in “n” and press the “Enter” key.
You should see the prompt return in your terminal and the message “Server shutdown complete.”
Close that window.
This step closes the secure connection from your computer to the VM.
3. Close the SSH-in-browser window#
Go back to the browser tab or window where you had SSH open to the VM. It will say “SSH-in-browser” near the top.
Close the tab/window.
This disconnects the in-browser SSH session safely.
4. Stop the VM from the Cloud Console#
Now that everything is disconnected, it’s safe to shut down the VM:
Navigate to the VM Instances page and find the VM you wish to shut down.
Ensure you are in the right project.
Select the VM.
Click Stop.
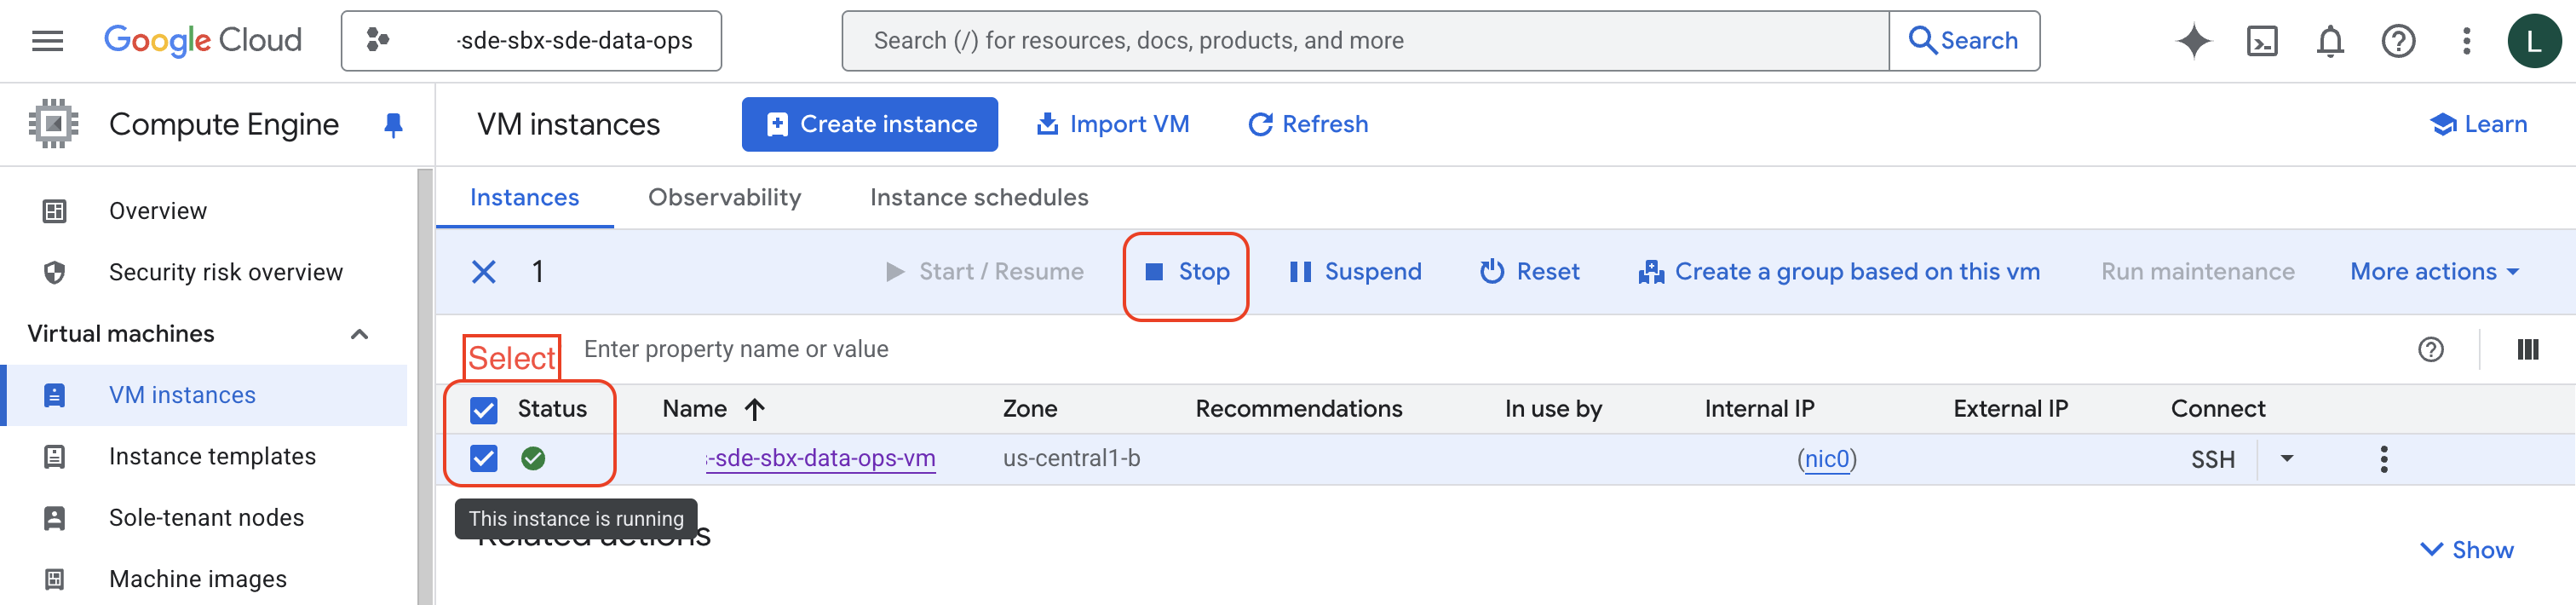
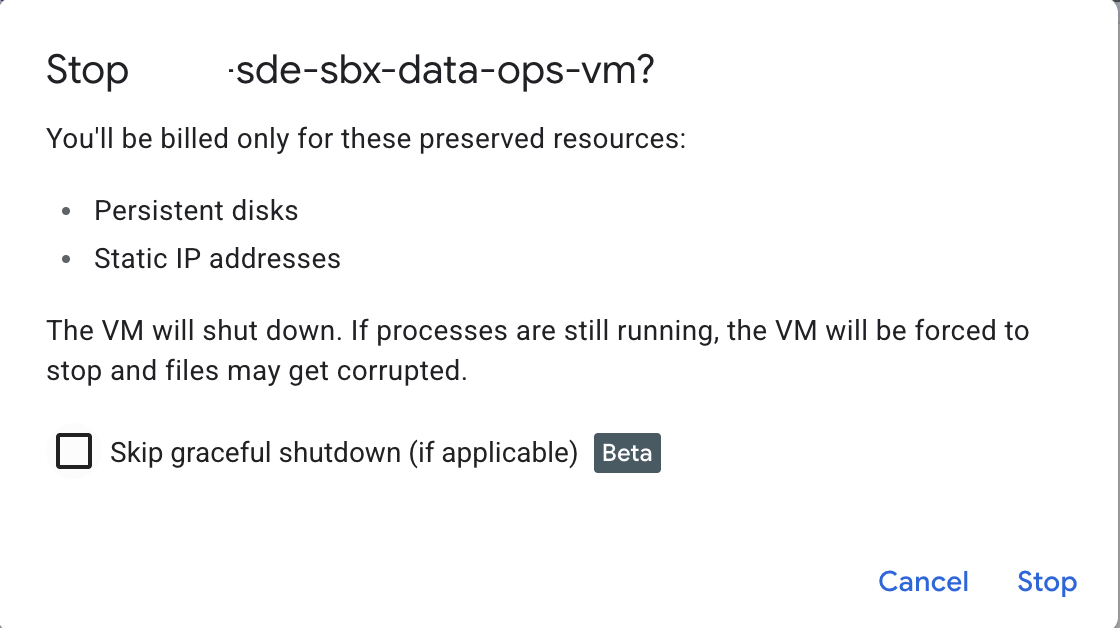
You will be prompted with a dialogue box, Click “Stop”
This process can take a couple of minutes. You can track it within the notification section on your Console Page.

Stopping is not Deleting
This does NOT delete your VM. All your data and configuration stay intact. You’re only stopping it to avoid extra costs.