Logging in to Quest#
Users can connect to Quest through three different entry points:
Quest Login Nodes: the login nodes are the primary connection point for Quest
Quest OnDemand: use Quest OnDemand to submit jobs to Quest through a web browser interface
Quest Analytics Nodes: the Analytics Nodes provide access to specific applications (RStudio, Jupyter, SAS Studio) via a web browser interface
Users can connect to the Quest Login Nodes in several different ways:
SSH from the command line: interact with Quest through a terminal application
FastX desktop client: FastX provides a remote desktop connection to Quest; recommended if you’ll be working with GUI (graphical window) applications
FastX HTTP client through a web browser: a good option if you need to access Quest from a computer other than your primary one
After connecting to the Quest login nodes via any of the methods above, users will connected to one of the seven login nodes; all files and services are available from all login nodes. When you connect to a login node, you will start in your home directory, /home/<netid>, as the working directory. From the Quest login nodes, users can submit jobs to the compute nodes, edit files, and run small processes to test code. Resources available to users on the Quest login nodes are limited to 4 cores and 6 GB of RAM per user.
Video Tutorial#
In this video, you will learn about three log in methods: SSH from the command line, FastX desktop client, FastX HTTP client through a web browser.
Login Node Connection Information#
Regardless of your connection method, the information needed to connect to the Quest login nodes is:
Hostname: login.quest.northwestern.edu
Username: your Northwestern NetID (all lowercase)
Password: your Northwestern NetID password
Port: 22 (may not need to be specified for all connection methods)
NetIDs are case-sensitive
Your NetID, which is also your Quest username, is case-sensitive. For instance, using ABC123 instead of abc123 when connecting to Quest will not work.
Option 1: SSH via a Terminal#
The first way to connect to Quest is with SSH through the terminal on your personal computer.
Note
The first time that you connect to Quest you will be prompted with a message like following
The authenticity of host 'login.quest.northwestern.edu (129.105.9.114)' can't be established.
ED25519 key fingerprint is SHA256:CAExm9BxP35H4UOi3dHEJy1twdjgp8mmcFlkmD1RTtE.
...
Are you sure you want to continue connecting (yes/no/[fingerprint])?
Answer yes to this question.
You may also receive this message the first time you are directed to each of the individual login nodes, or after new login nodes are added to Quest.
MacOS or Linux#
To log in to Quest from a Linux or Mac computer, open a terminal application. On MacOS, the application is called Terminal and is located by default at Applications > Utilities > Terminal.
At the command prompt of the terminal enter:
$ ssh -X <netid>@login.quest.northwestern.edu
Here is a concrete example.
$ ssh -X abc123@login.quest.northwestern.edu
You will be prompted to enter your NetID password.
Windows#
To log in to Quest from a Windows computer, open PowerShell. To do this, open the Start Menu, type “PowerShell” in the search bar, and select “Windows PowerShell” from the results.
At the command prompt of the terminal enter:
$ ssh <netid>@login.quest.northwestern.edu
Here is a concrete example.
$ ssh abc123@login.quest.northwestern.edu
Option 2: FastX Desktop Client#
The FastX Desktop Client is an application for Microsoft Windows, Linux, and Mac personal computers that connects you to the Quest with full graphics support via the Linux X Windows system, also called X11. FastX is available to members of the Northwestern community under a campus site license. FastX is recommended if you will be using GUI-based applications.
Note
FastX is not required for connecting to Quest. You are welcome to use other SSH clients you may already be familiar with. FastX is provided as an option with convenient features such as using terminal and display in one application, remote desktops, and the ability to pause and resume sessions.
Install and Configure FastX#
You only need to do the steps in this section once on each computer you want to use to connect to Quest.
Step 1: Download and Install FastX#
Download the appropriate Fastx4 Client for your operating system and install it.
Step 2: Run FastX for the First Time#
Windows :
Use the Start Menu (Click Start Menu > All Programs > FastX4) or use the Start Screen to find the FastX4 application and run it.
When prompted, allow FastX4 to communicate through the firewall.
MacOS :
In the Finder, open the Applications folder and locate FastX4.
Press the Control-key and click the FastX4 icon.
Choose Open from the pop-up menu.
Click Open.
Note
After installing and launching FastX4 for the first time using these steps, FastX4 will be stored as an exception to your Mac security settings and you will subsequently be able to launch it by double-clicking the FastX4 icon. If you upgrade the FastX4 desktop client, you will have repeat the steps list here.
Linux :
Open the FastX4 folder and locate FastX4 executable file.
Double-click FastX4 executable file.
Step 3: Configure a Connection#
FastX uses SSH to connect to a Quest login node.
Note: The screenshots below are of FastX3, not FastX4. Use similar steps to set up FastX4.
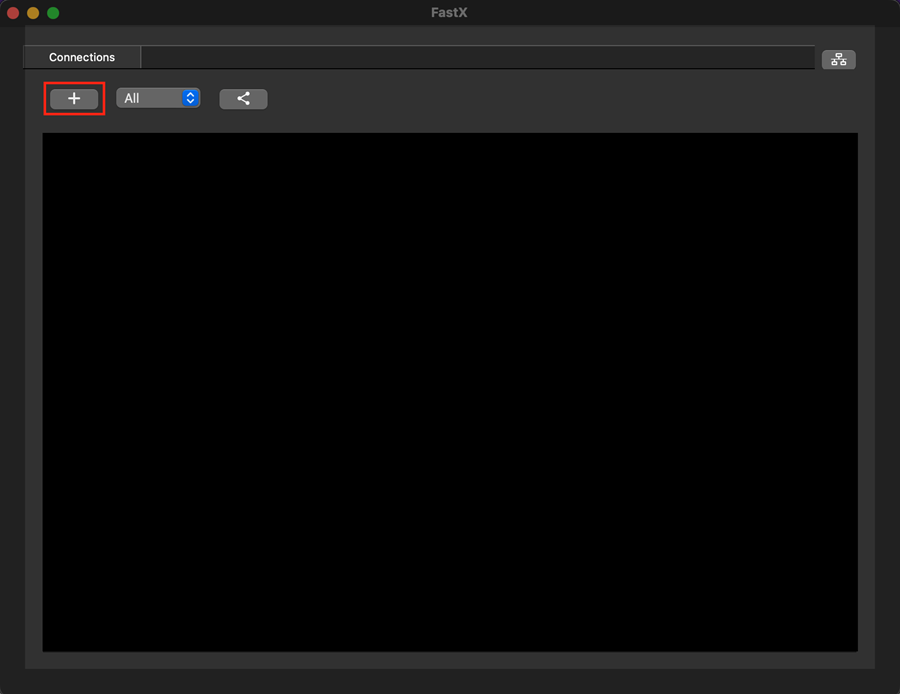
Click the + icon in the upper left corner of the window.
An Edit Connection window will open. You must already have an account on Quest to log in. Fill in the following fields:
Host: login.quest.northwestern.edu
User: your NetID, all lowercase
Port: 22
Name: My Quest Connection (you can use a different connection name if you want)
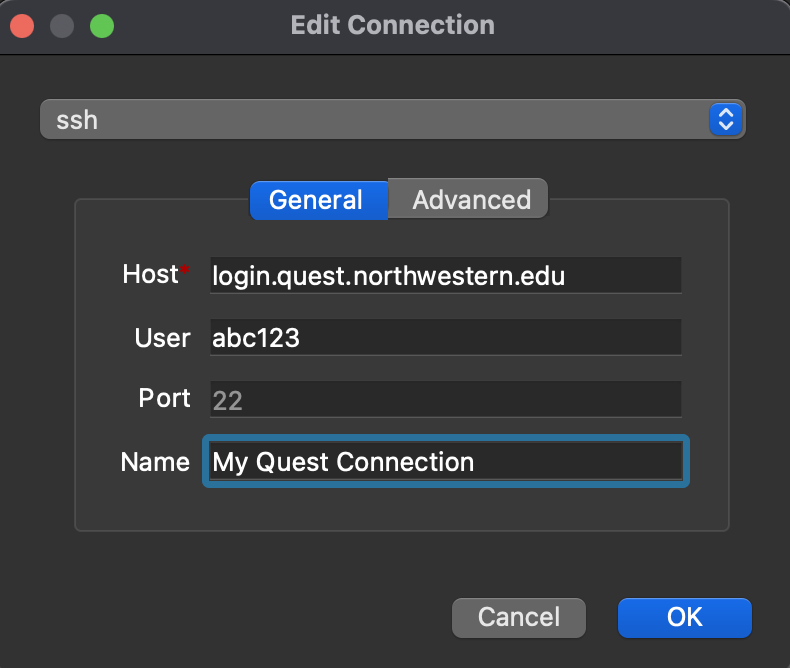
Click OK.
Connect to Quest#
After you’ve installed and configured FastX, follow these steps to connect to Quest.
Note: The screenshots below are of FastX3, not FastX4. Use similar steps to set up FastX4.
Step 1: Open a Connection to a Quest Login Node#
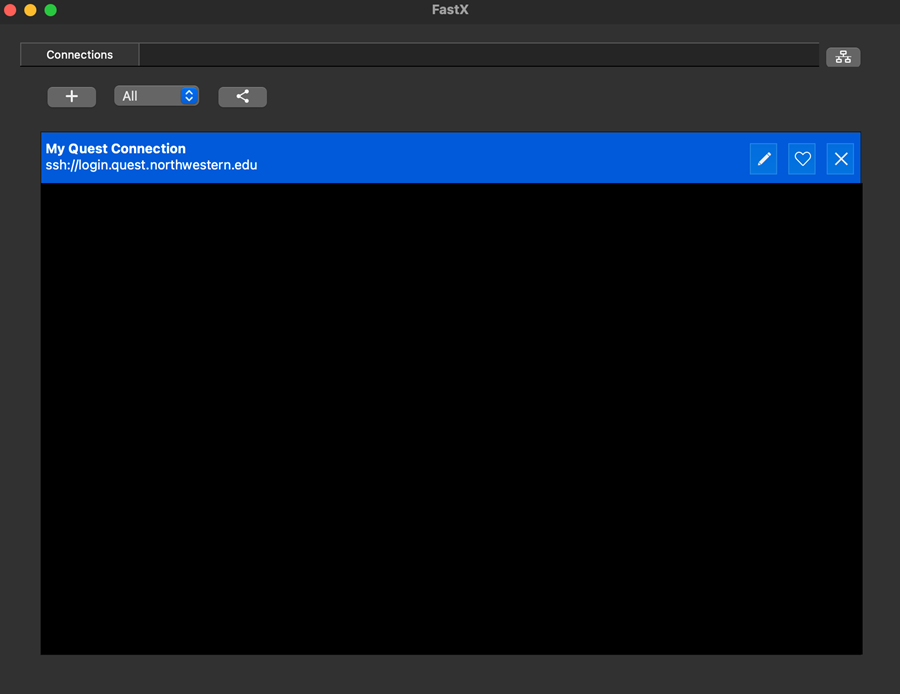
With FastX open, double-click “My Quest Connection” in the Connections window.
If this is the first time you have logged into Quest, a question like the one below will show up and will ask if you are sure that you want to continue; enter
yes. Then click Continue. This screen may come up again in the future if you connect to a new login node, but most of the time you will not see it.

You will be prompted to enter your password. Enter your NetID password.
FastX will open an SSH connection to Quest and open a Session Management window for Quest. You will have no sessions to begin with, so the window will appear to be empty.
Step 2: Start a Session#
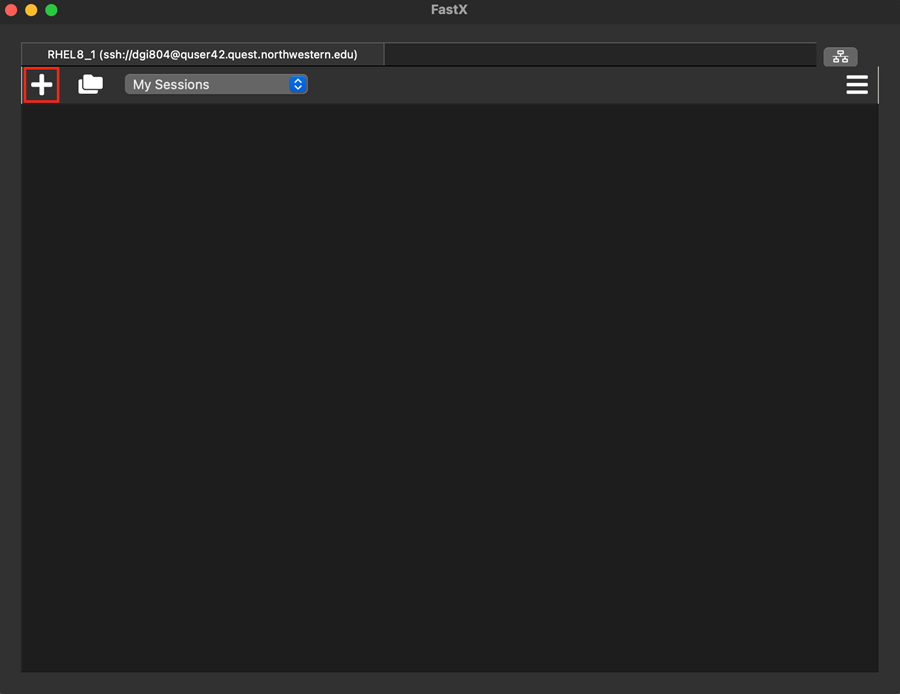
Click the + icon in the upper left corner of the Session Management window to create a new Session.
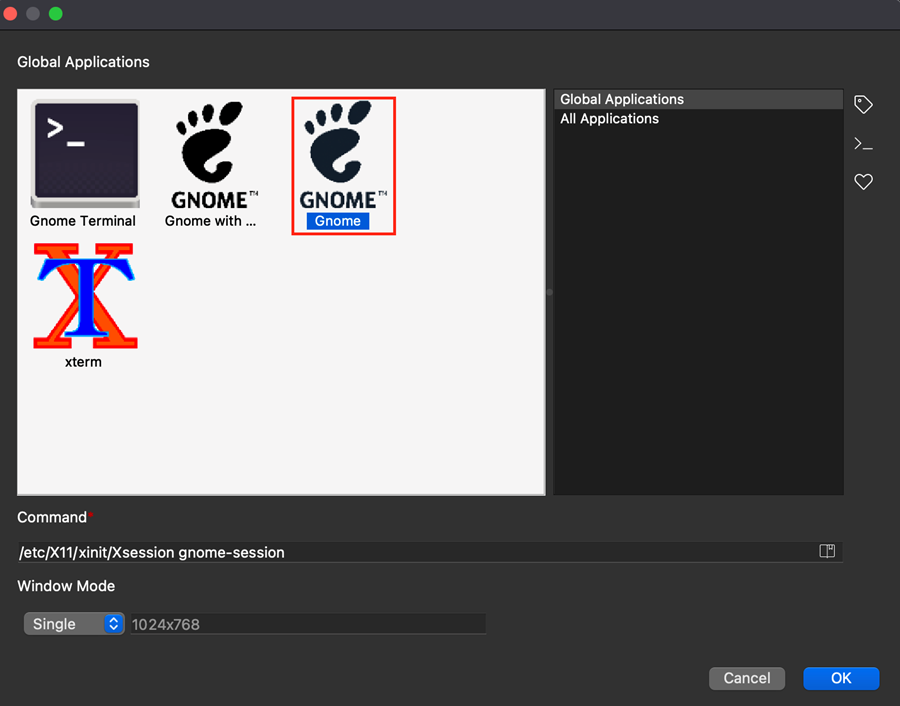
A new window will appear with icons. We recommend selecting the GNOME icon from this menu. When you select the icon, the Command box will change to start a single application named gnome-session. Click the OK button in the bottom right.
Your GNOME Virtual Desktop window will open, and your Session Management window will change to show that you have a single session named GNOME.
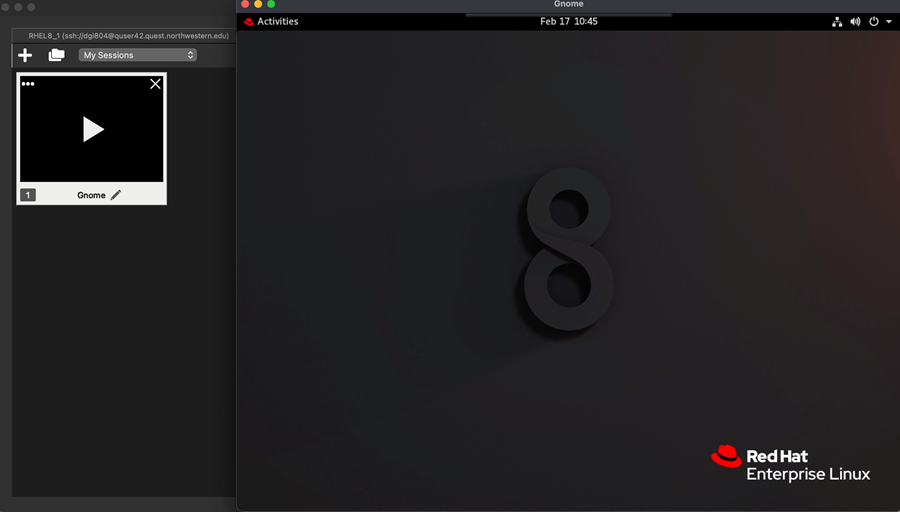
Launch a terminal inside of your GNOME virtual desktop to interact with Quest. Click
Activities > Terminal. This will give you a traditional GNOME Terminal session running a Bash shell; it provides full graphics support via X11.
Option 3: FastX HTTP Client#
Instead of downloading the FastX client to your computer, you can connect to Quest using FastX through a web browser.
Note
While convenient, the FastX HTTP client typically has a slower connection than the FastX Desktop client. It is a good option for incidental use or when accessing Quest from a computer other than your primary one.
Connect to the GlobalProtect VPN if you are not on the Northwestern campus network (eduroam)
Go to https://login.quest.northwestern.edu:3300 in any web browser.
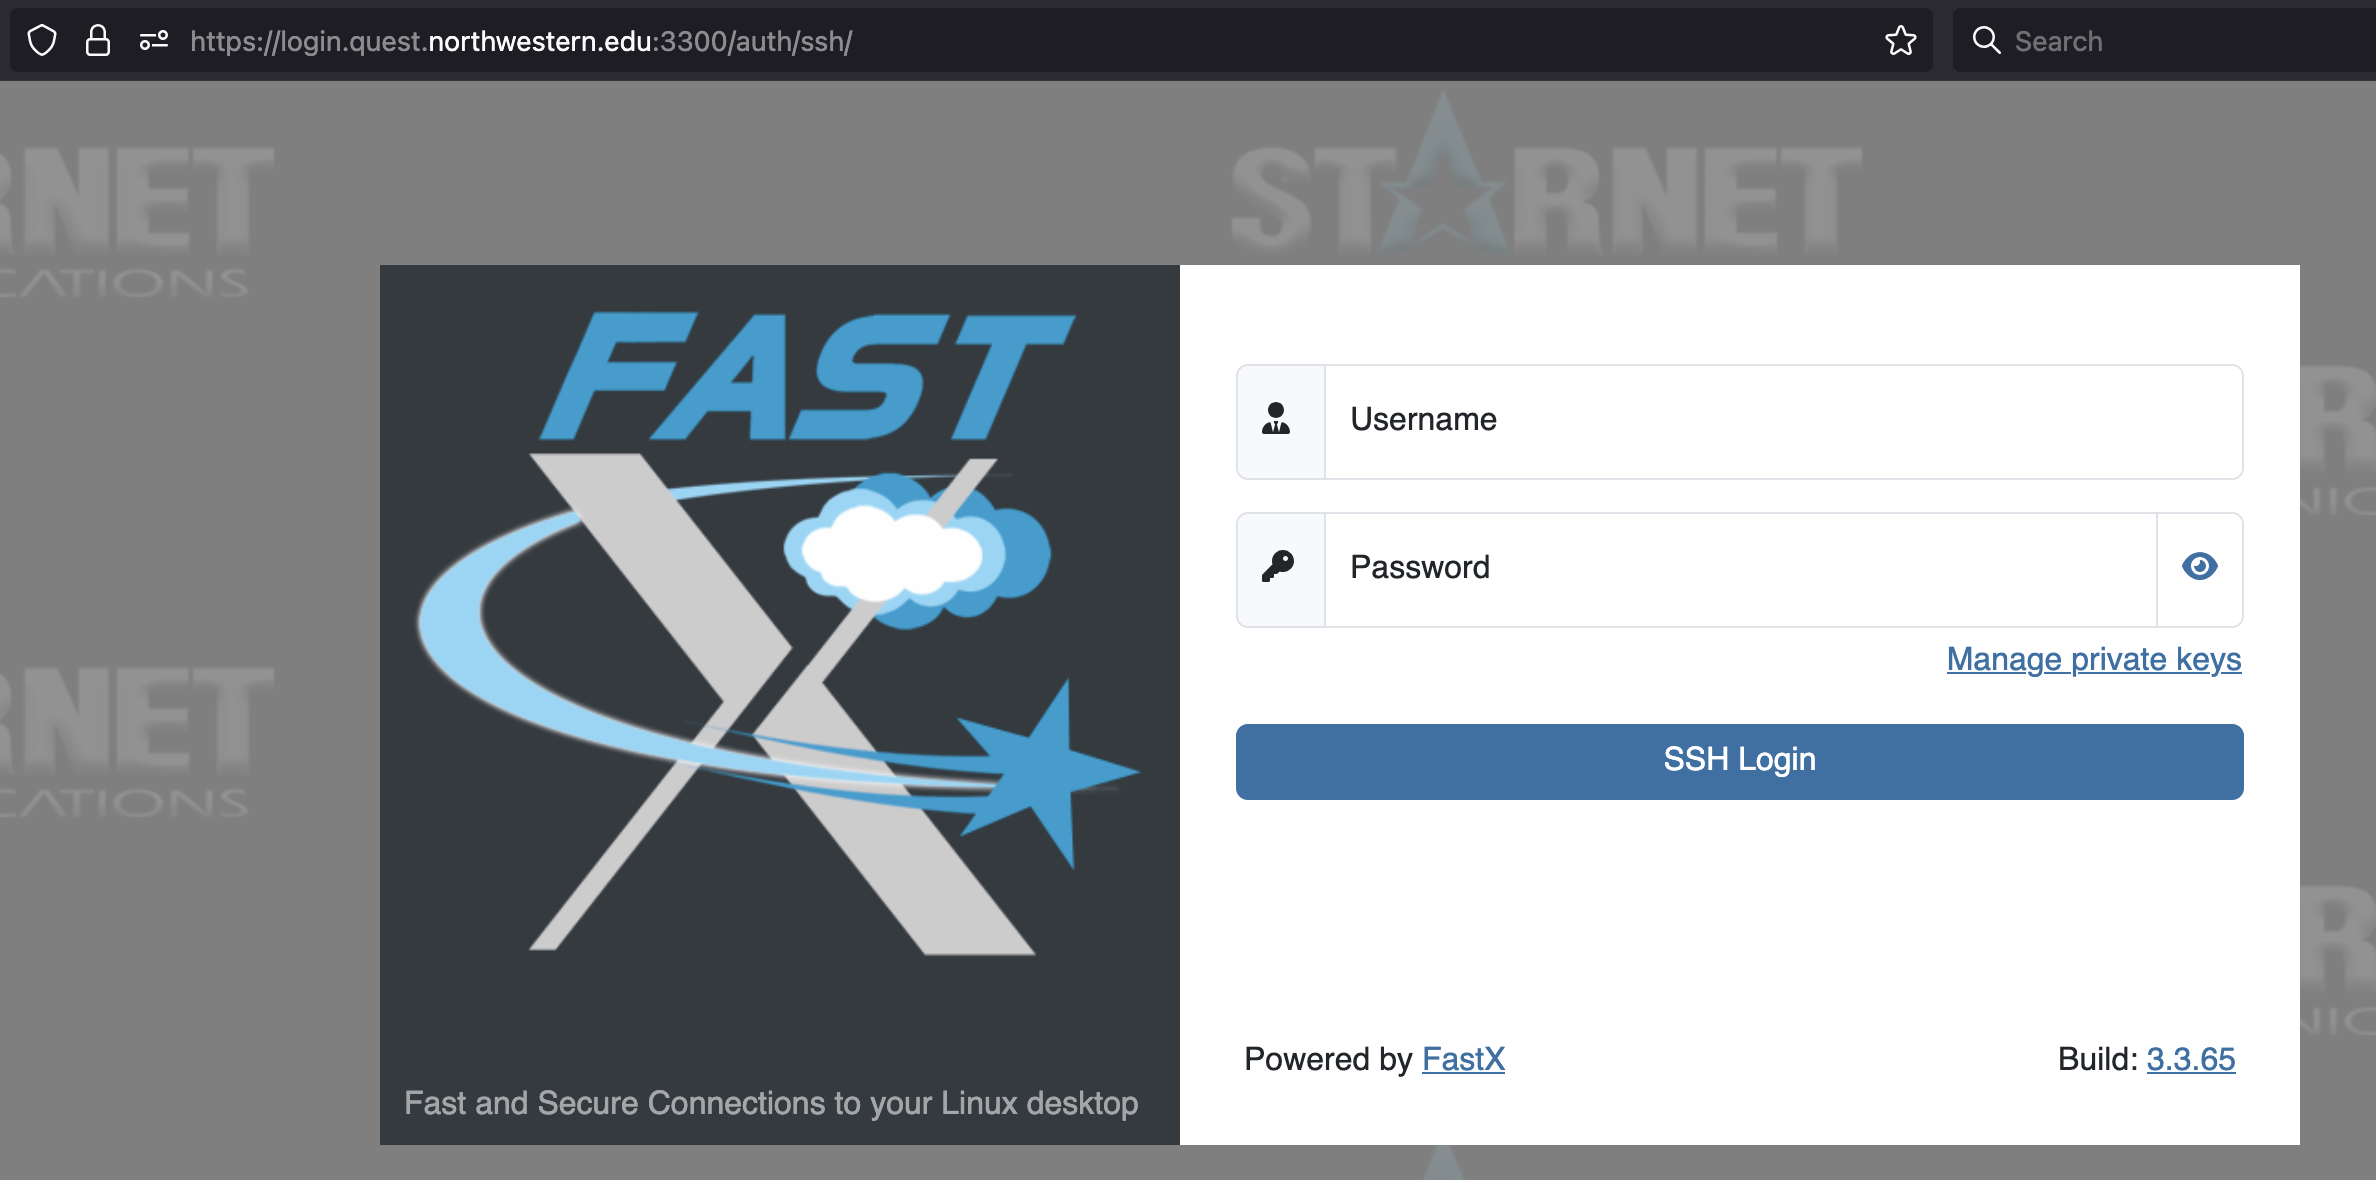
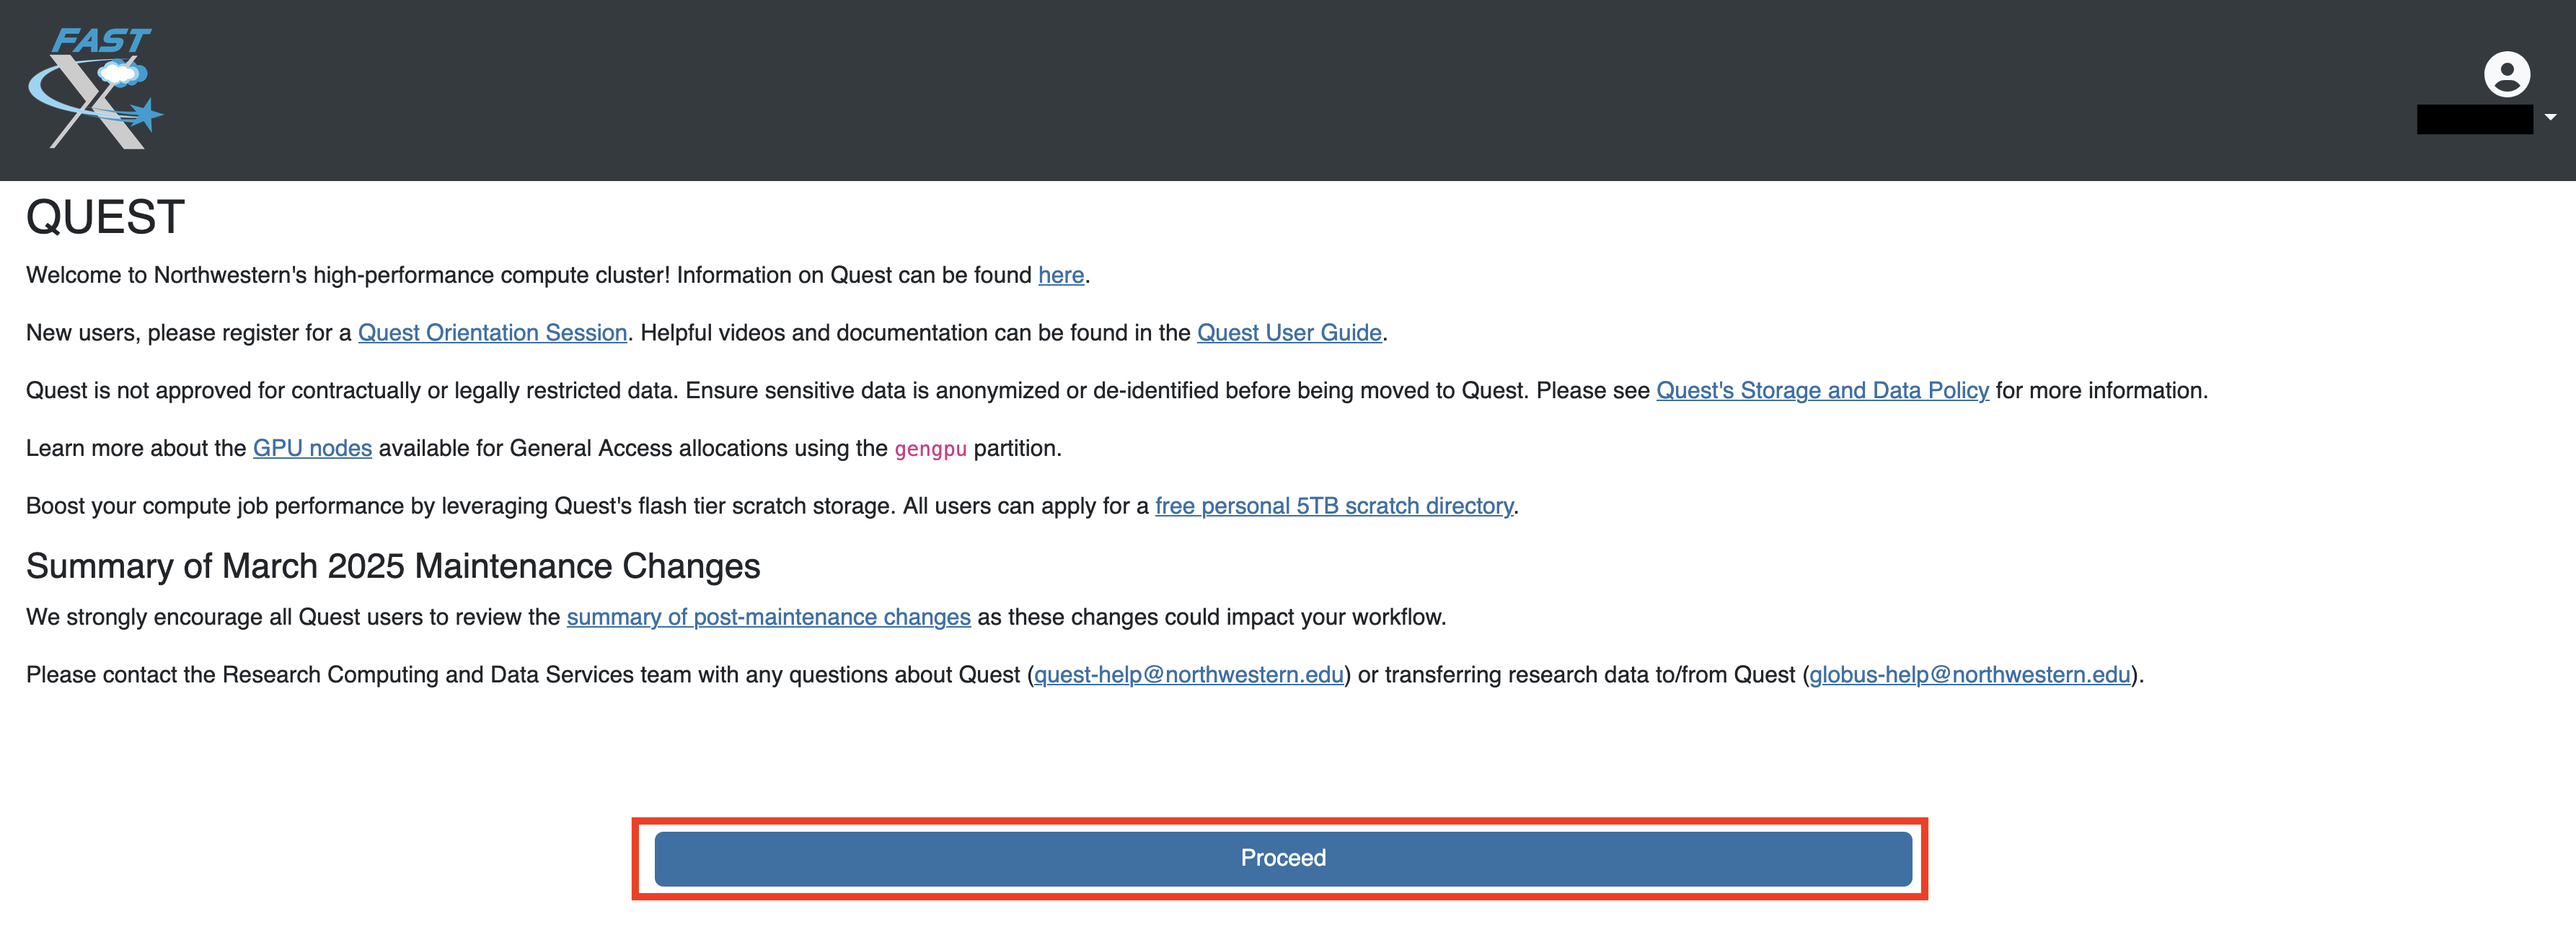
Enter your NetID and password.
After reading the Message of the Day, click Proceed.
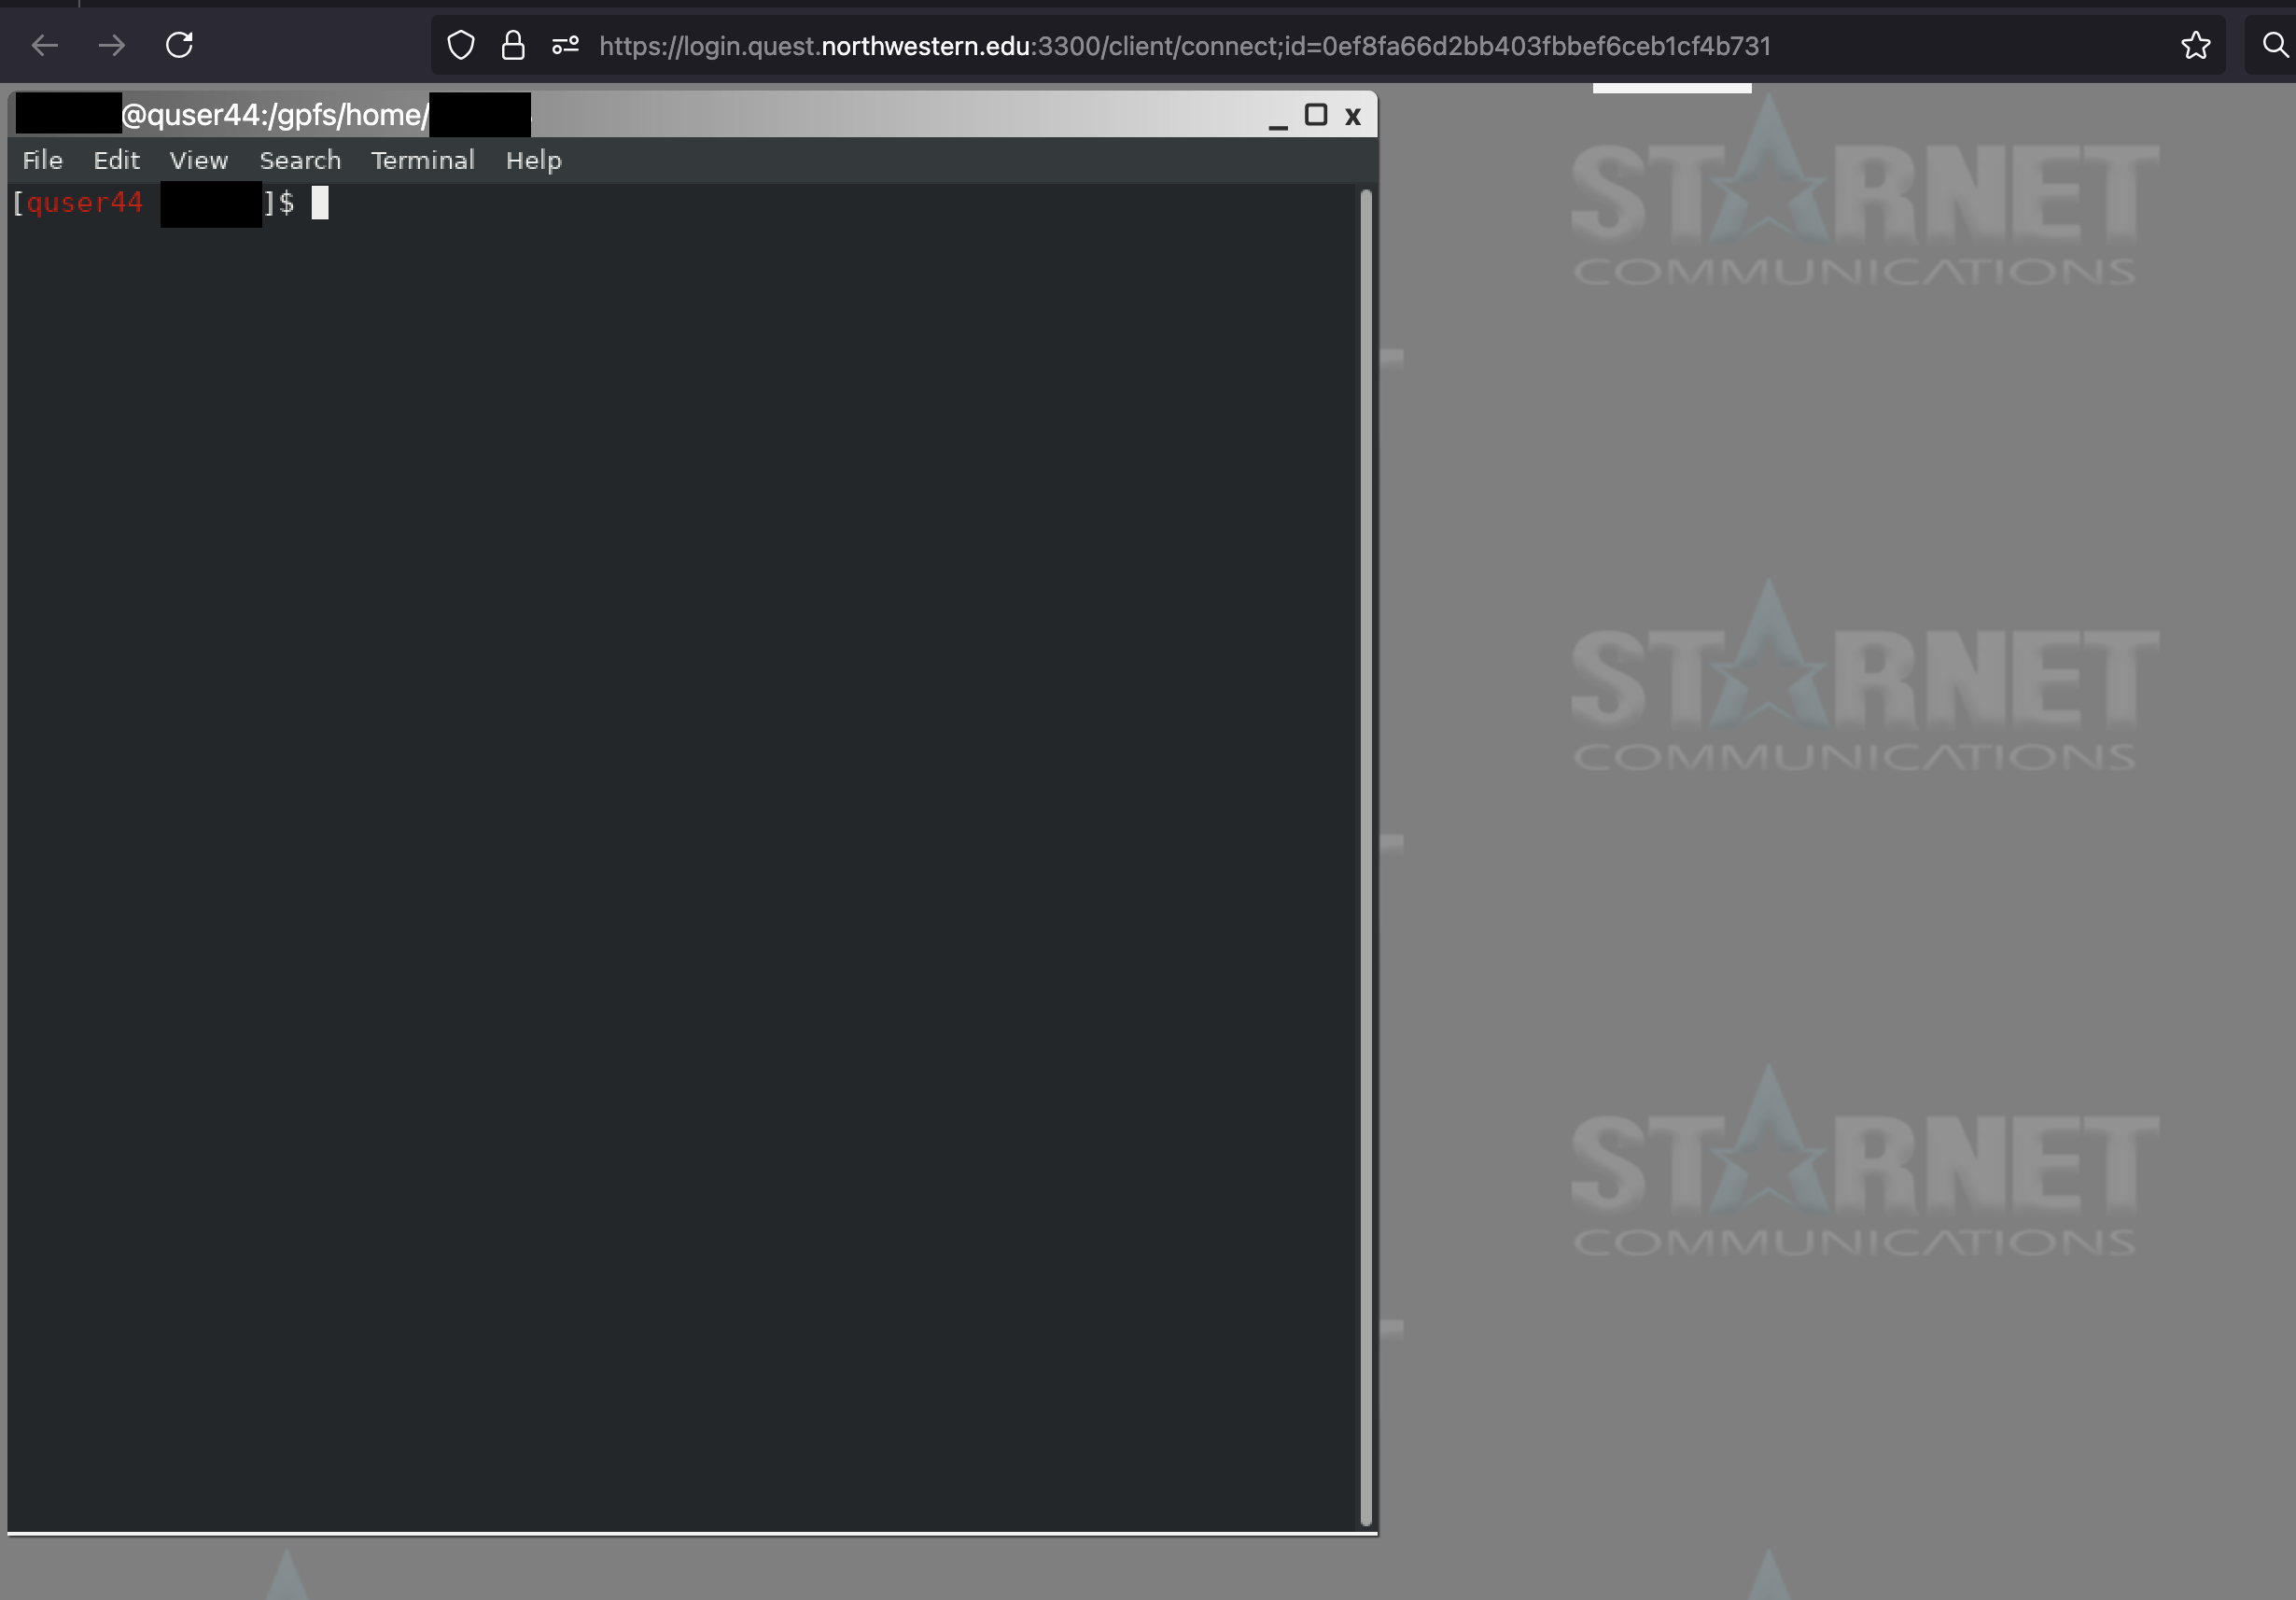
On the left hand side, you will be presented with the list of applications you can launch. For example, you can select GNOME Terminal. You will have to click it twice to launch.

GNOME Terminal will then launch in a new tab.