Creating an Amazon S3 Storage Bucket#
Using AWS at Northwestern
Before you use AWS for your research, make sure you’re using a Northwestern-affiliated AWS account. If you don’t already have a cloud account, see our Amazon Web Services page for information on requesting a Northwestern AWS account or affiliating an existing account with Northwestern.
Amazon S3 is a cloud-based object storage service that allows you to
Securely store your files
Access them from anywhere
Pay only for what you use
Choose a storage classes based on your use case and budget
Scale your storage to handle any amount of data
When to Use Amazon S3#
Researchers often use Amazon S3 in the following cases:
Backups: Maintain a secondary copy of your data
Archiving: Amazon S3 offers inexpensive storage classes (eg: Amazon S3 Glacier Deep Archive) for long term archiving of data that will not be frequently accessed. See Archiving Data in Amazon S3 Glacier Deep Archive.
Data analysis using other AWS resources: If you use other AWS services, such as Amazon EC2, storing data in S3 avoids having to transfer data into the AWS environment and provides efficient data access.
Cost#
S3 costs vary by storage class . See Amazon S3 storage pricing for current rates. Users pay per GB for the storage they use, as well as fees for data transfer and other operations. Some of these fees are based on file sizes, while others are based on the number of files.
Creating an S3 Bucket#
Once you have an AWS account, to create an S3 bucket,
Log in to the AWS console using your Northwestern account.
Navigate to the S3 console . You will then see a navigation pane on the left and a list of buckets you have access to, if any.
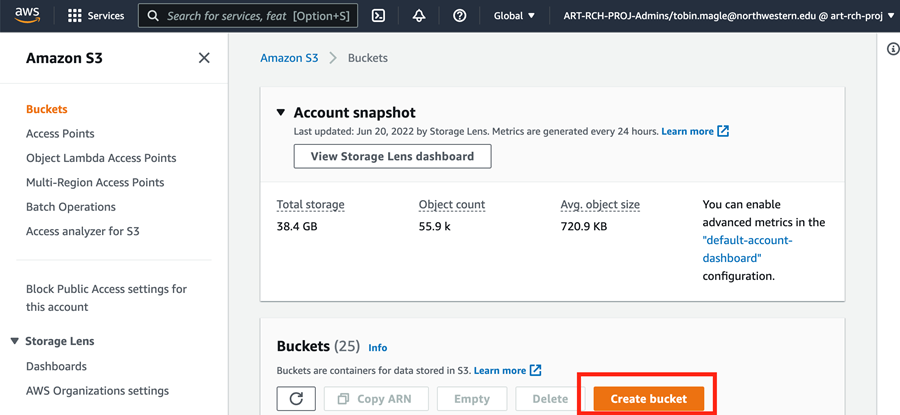
Click the Create bucket button to begin configuring a new S3 bucket.
On the Create Bucket screen, provide a Bucket name. The name must be globally unique and contain only alphanumeric characters and dashes
(Optional) Configure advance options: Most users should keep the rest of the options on this screen as defaults. By default, S3 buckets have the following properties:
Bucket Type: “General purpose” gives the most flexibility, allowing a mix of storage classes and store objects across availability zones for redundancy. Choose “Directory” if you require low latency.
Object Ownership: ACLs disabled is recommended because it ensures that access to all files in the bucket are controlled by account that created the bucket. If you would like to allow other accounts to specify access, choose ACLs enabled.
Public access: Public access to buckets and objects are blocked. Access is granted on a case by case basis to those who need it. This setting is recommended for content that you don’t want freely available on the web.
Bucket versioning: This feature is disabled to save space. Select Enable if you have a need to keep previous versions of files that are being changed in this bucket. Keep in mind you will pay storage costs for each version.
Encryption: Encrypting objects stored in the bucket is enabled.
Object lock: This feature is disabled. Enabling this feature will prevent objects from being deleted or overwritten.
When you have entered the required information, click the Create Bucket button at the bottom right of the screen.
You should see a banner at the top of the screen that says Successfully created bucket “bucket-name”. The webpage will return to the main Amazon S3 page.
Next, grant access permissions to this bucket using the instructions below.
AWS Region
AWS has data centers in different regions of the country to ensure resilience of their infrastructure. If you use other AWS resources, pick the same region as you use for other work. Otherwise, pick the region that is the most geographically near to where you do your work. For those at Northwestern, “United States (Ohio) us-east-2” should be your default region.
You can change the region you’re working in from the top bar by clicking the current region. A menu with all other available regions will appear.
Managing Access#
By default, only people who have access to the AWS account your bucket was created in have access to read or write files in the bucket. If you want to share the bucket or its contents with other colleagues, you will have to grant them access.
Access to files: We recommend using a Globus Guest Collection to share files in the bucket. This simplifies data transfer and makes it easier to manage user permissions. See the Northwestern Amazon S3 Globus collection for more information.
Access to the bucket: Granting access to the bucket itself to manage permissions or bucket-level settings requires creating an access policy that specifies who can have access to what resources. See Granting Access to an Amazon S3 Bucket Using Access Keys for more information about how to do this using access keys.
Finding an S3 Bucket’s Unique Identifier#
Every resource in AWS has a unique identifier called an Amazon Resource Name (ARN). These identifiers are useful when creating policies to grant access to a bucket.
To find your bucket’s ARN:
Navigate to the S3 console .
Click on the bucket name.
Click the Properties tab.
Copy the text under Amazon Resource Name (ARN).
The ARN should be in the following format, where YOUR_BUCKET_NAME is the name of your S3 bucket.
arn:aws:s3:::YOUR_BUCKET_NAME