Working with Storage Buckets#
Google Cloud Storage Buckets should be used to store files long term and share files between users of the same SDE environment.
Researcher/Data Analysts can access data in buckets and transfer files to and from VMs to which they have access.
Data Engineers can create and delete buckets, manage bucket permissions, and transfer files.
See the Projects page for details on which resources each role has access to.
Accessing and Transferring Files#
There are multiple ways to move data between your buckets and Virtual Machines (VMs):
To copy or move files with the Google Cloud Command Line Interface, you will need the bucket name. You can find the bucket name from the Buckets page once you’re logged in to the Google Cloud Console.
Both Data Engineers and Researcher/Data Analysts can move or copy files between buckets and VMs to which they have access. The buckets and/or VMs can be in different projects.
Do not transfer files to laptops/workstations
Downloading files from any SDE storage buckets other than approved Egress buckets to your laptop or workstation is a violation of the Acceptable Use Policy.
Uploading files from your laptop or workstation to SDE storage buckets is a violation of the Acceptable Use Policy; all data imports must follow the Data Ingress procedures.
Move or Copy Data Between Buckets#
You can move or copy files between two buckets using the:
Google Cloud Console via a web browser on your laptop or workstation.
Google Command Line Interface on your laptop/workstation, a SSH-in-browser connection to a VM, or the Terminal application from a VM desktop. See Google Cloud Command Line Tools for instructions for installing the command line tools on your computer if needed.
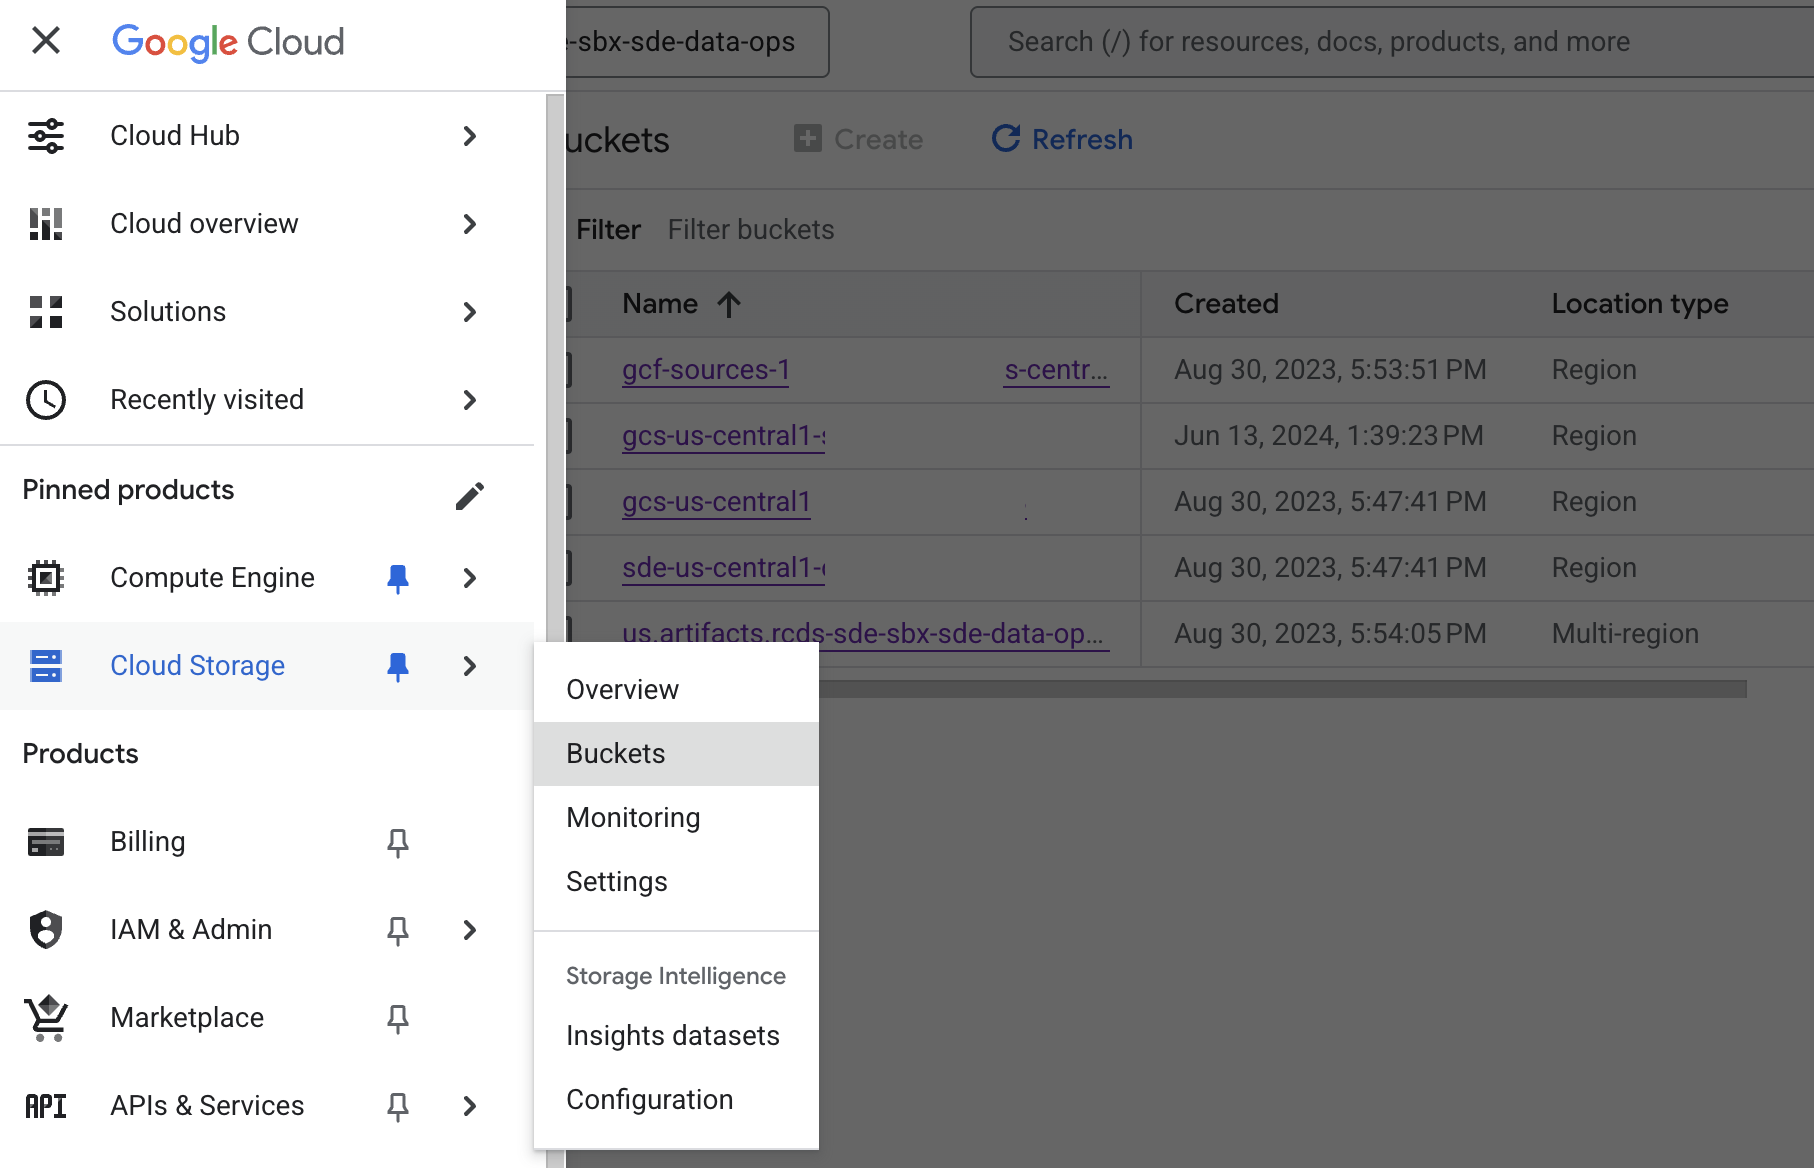
Go to the Google Cloud Storage Page . Make sure you are connected to the Northwestern VPN, and then sign in to the Google Cloud platform.
Navigate to the Cloud Storage Buckets Page.
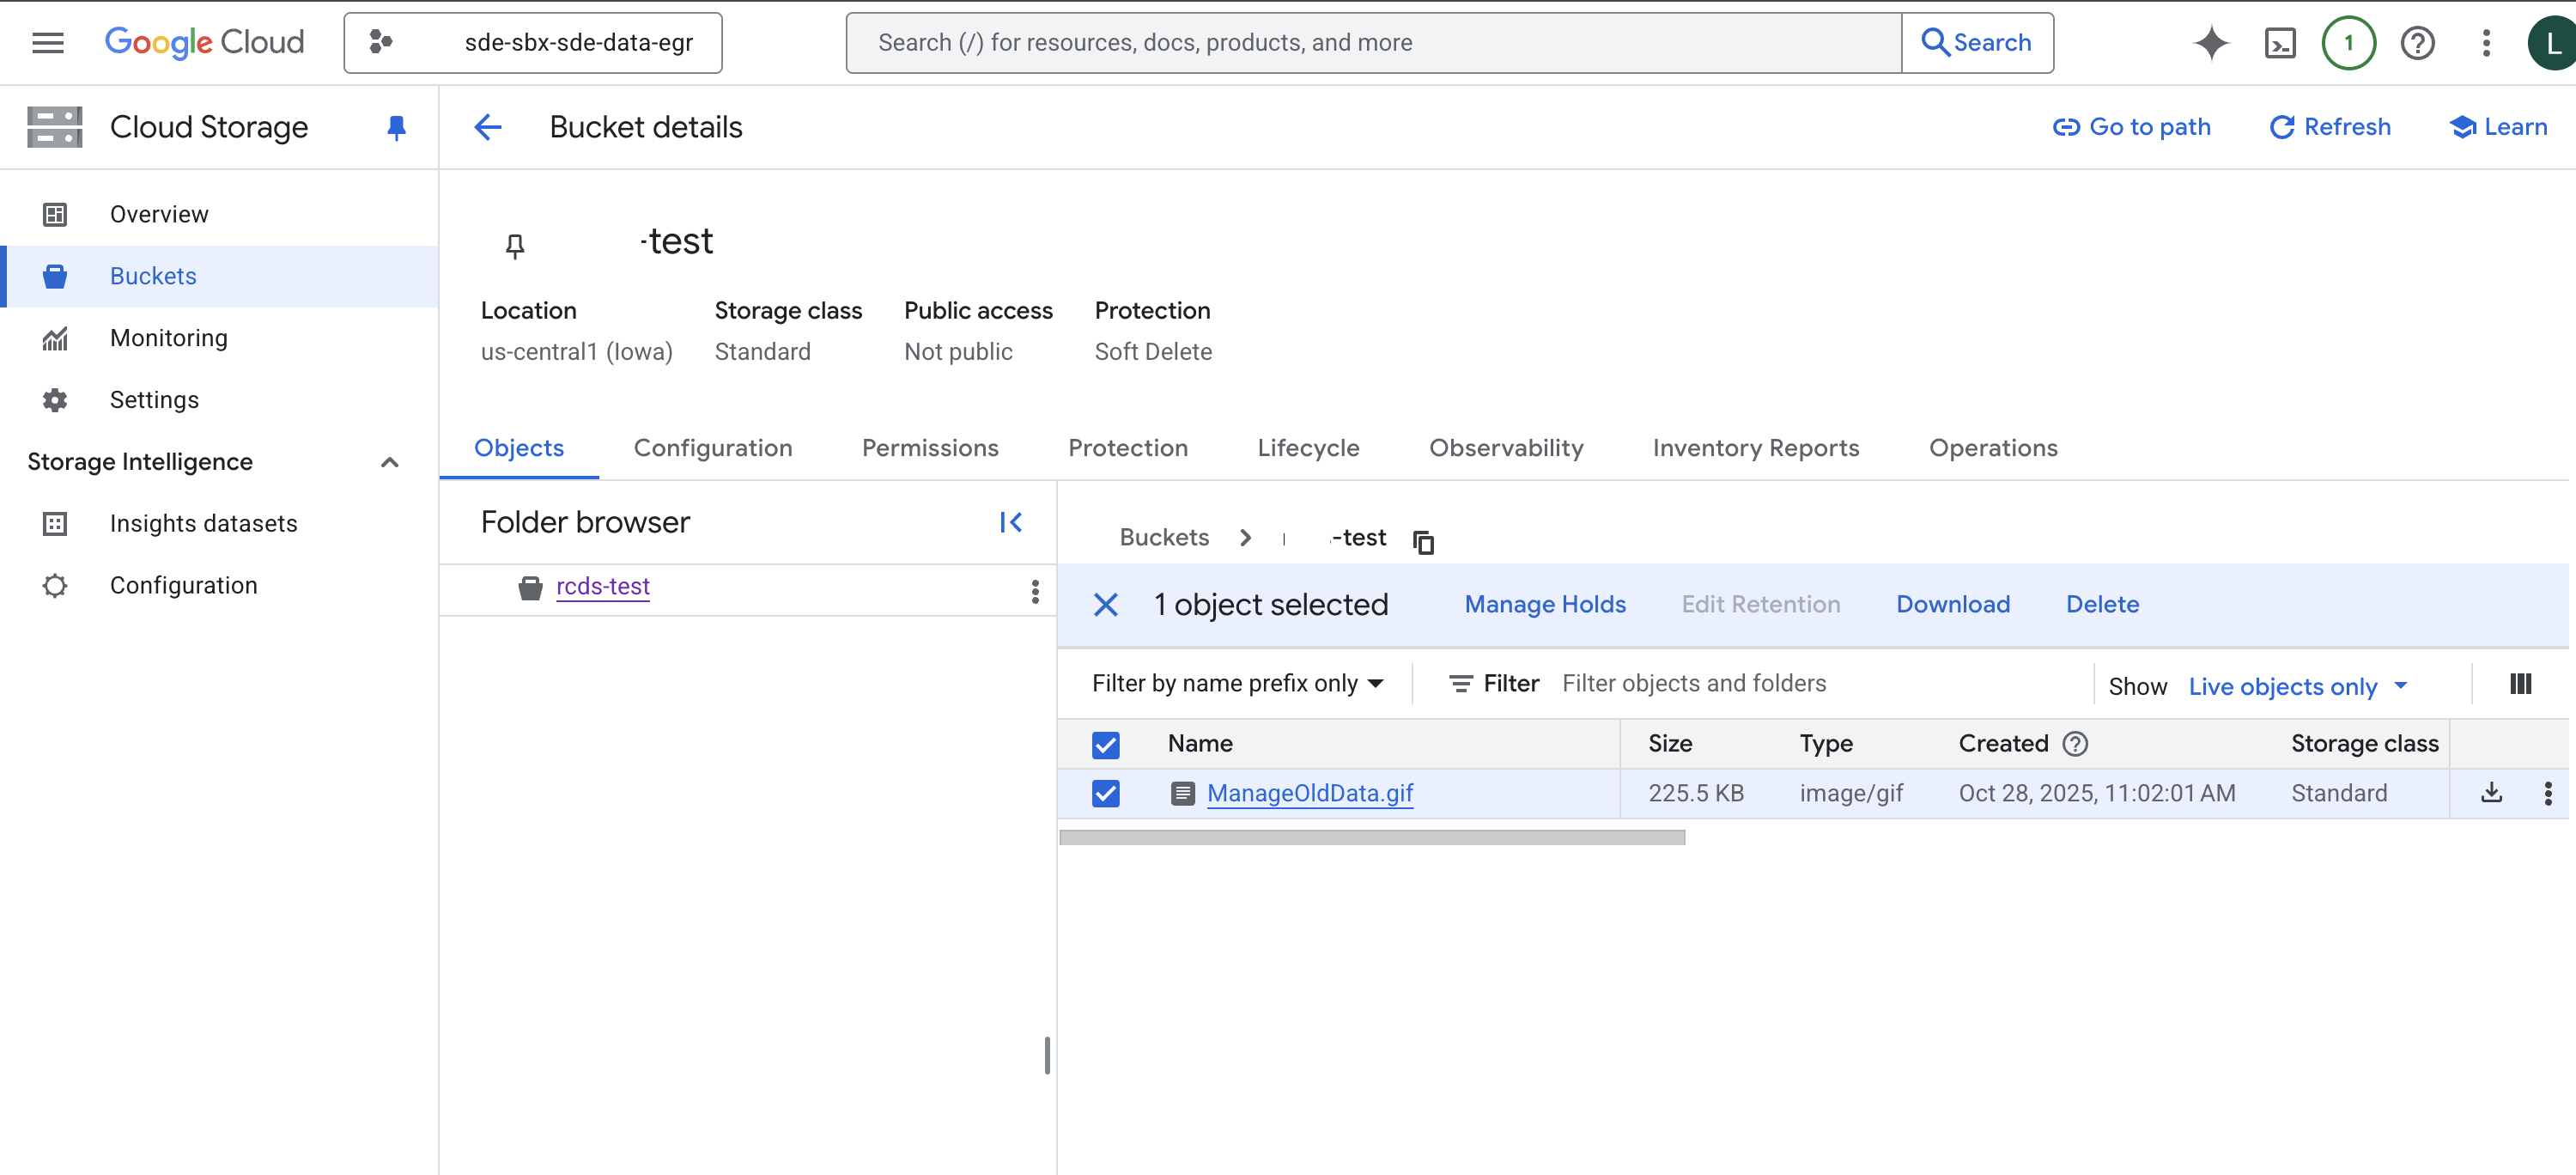
Open the source bucket (the one containing the files you want to transfer).
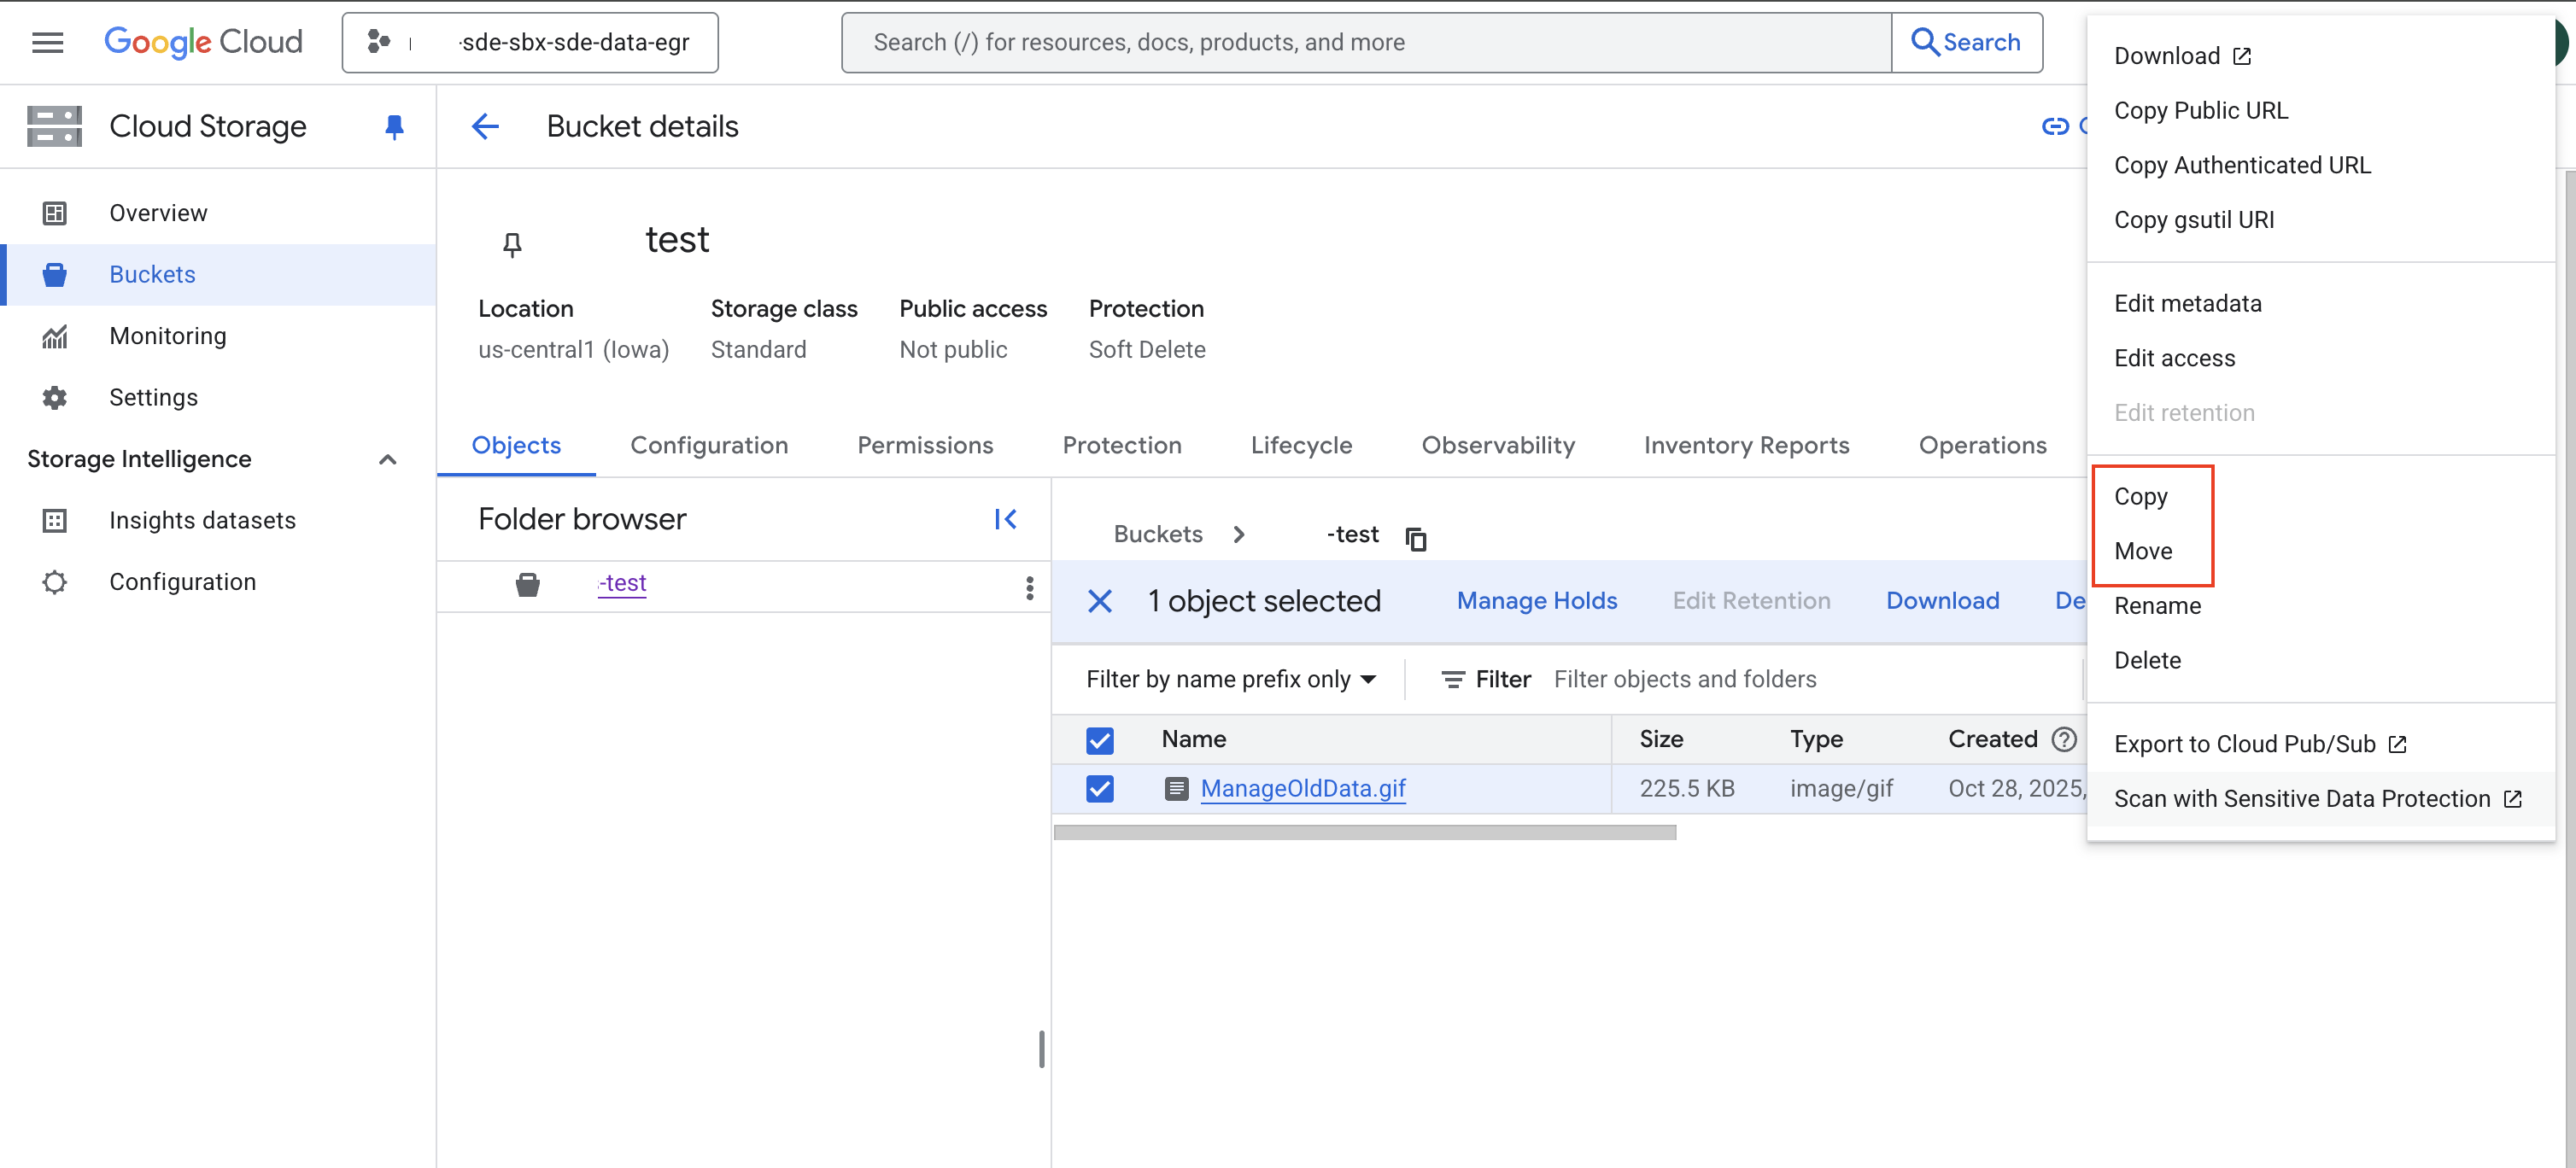
Select the file(s) or folder(s) you want to move or copy.
Click Copy or Move. Copy keeps the original file in the source bucket. Move deletes the file from the source bucket once it is copied to the destination.
Choose the destination bucket.
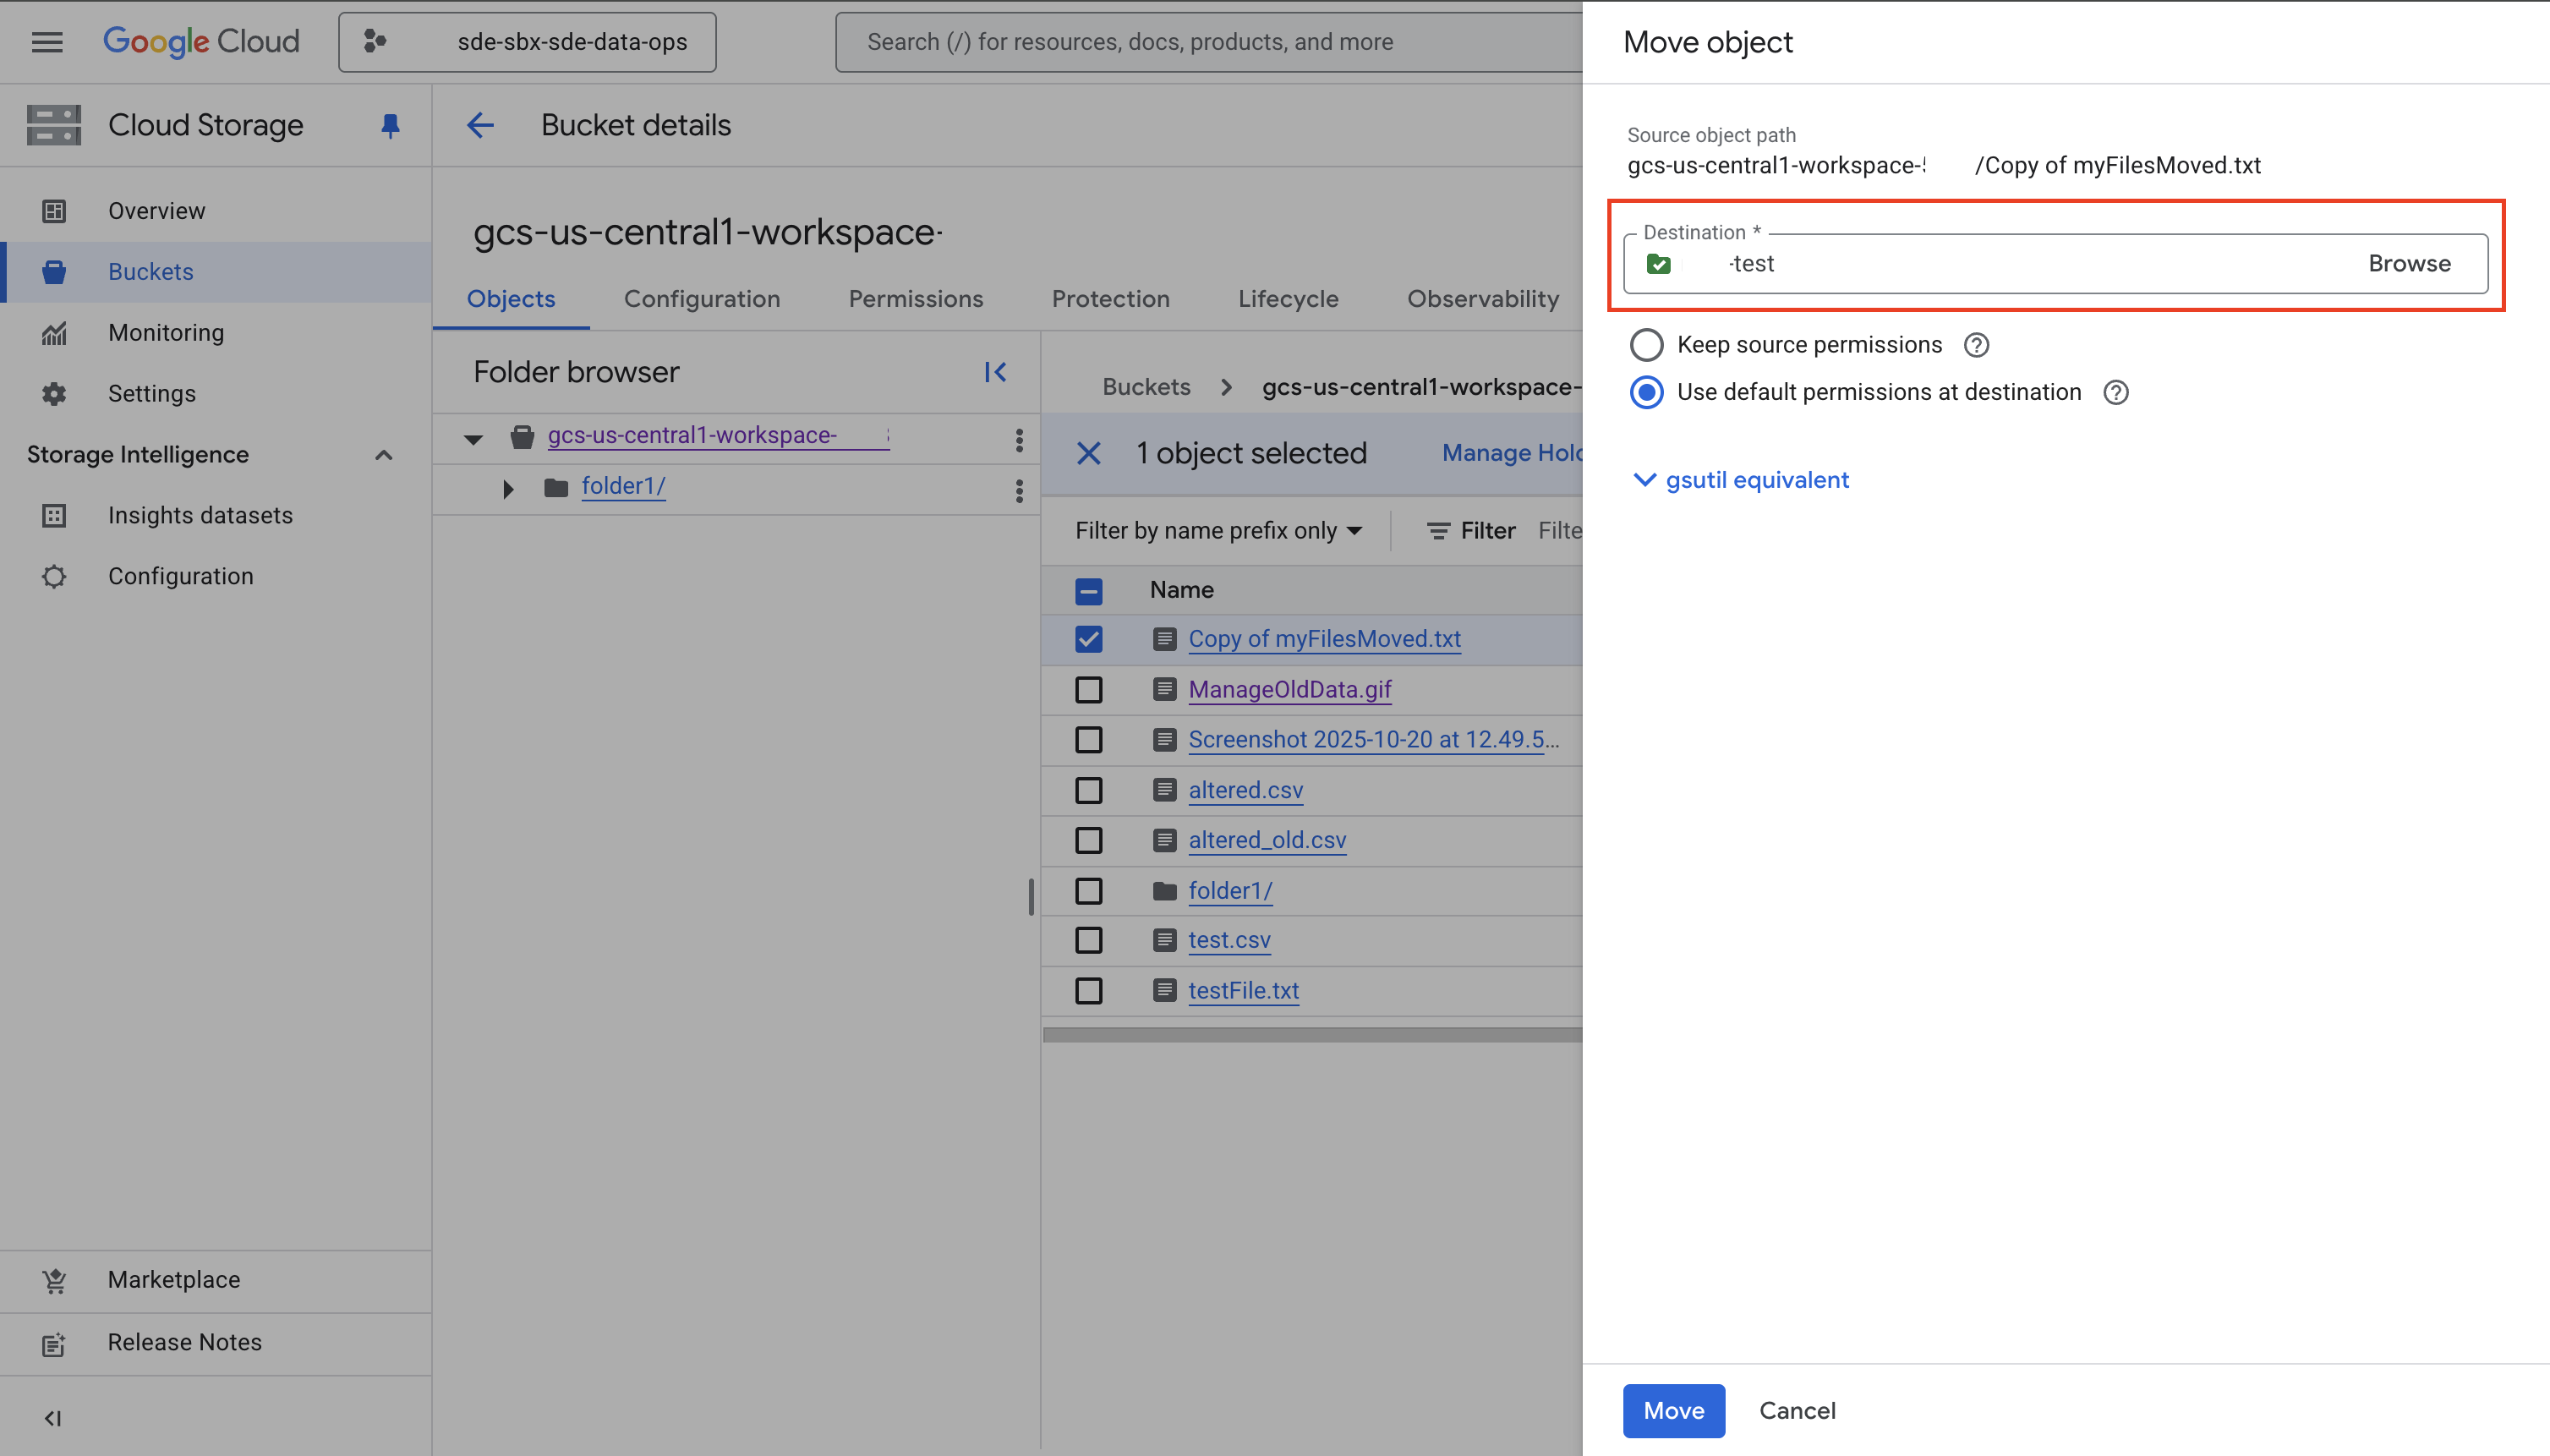
Confirm the operation.
Verify that your files appear in the destination bucket.
Remember to authenticate first to Google Cloud if you’re working from your computer.
To copy a file:
gsutil cp gs://source-bucket-name/file.txt gs://destination-bucket-name/
To copy an entire folder:
gsutil -m cp -r gs://source-bucket-name/folder gs://destination-bucket-name/
Replace cp with mv in the commands above to move files instead of copying them.
Confirm the upload by listing the contents of your bucket:
gsutil ls gs://destination-bucket-name
Or check the contents of the bucket by opening the bucket to view the contents in the Google Cloud Console.
Move or Copy Data from a Bucket to a VM#
Do not run these commands on your local computer
To move data to or from a VM, you must use the Terminal application accessible from the VM desktop or the SSH-in-browser terminal connected to the VM.
Running these commands in the Terminal/Command Prompt or Google Cloud CLI application on your laptop or workstation could move data out of the SDE environment, violating the Acceptable Use Policy and Data Egress procedures.
To copy a single file:
gsutil cp gs://source-bucket-name/file.txt /path/to/destination/folder/
/path/to/destination/folder/ is the path to the destination on the VM.
To copy a folder:
gsutil -m cp -r gs://source-bucket-name/folder /path/to/destination/folder/
Replace cp with mv in the above commands to move the files instead of copying them.
Confirm the upload by listing the files in the destination folder on the VM.
ls /path/to/destination/folder/
Move or Copy Data from a VM to a Bucket#
To move data to or from a VM, you must use the Terminal application accessible from the VM desktop or the SSH-in-browser terminal connected to the VM.
To copy a single file:
gsutil cp /path/to/vm/file gs://destination-bucket-name/
To copy a folder:
gsutil -m cp -r /path/to/vm/folder gs://destination-bucket-name/
Replace cp with mv in the above commands to move the files instead of copying them.
Confirm the upload by listing the contents of your bucket:
gsutil ls gs://destination-bucket-name
Or check the contents of the bucket by opening the bucket to view the contents in the Google Cloud Console.
Managing Access for a Bucket#
Bucket permissions control who can access and modify data stored in Google Cloud Storage. In the SDE, permissions are assigned based on user roles to maintain both data integrity and compliance.
Data Engineers manage buckets and permissions.
Access Types#
Permission |
What They Can Do |
Recommended Use |
|---|---|---|
Storage Object Viewer |
Read and download existing files, list objects, view metadata. Cannot modify or delete objects. |
For users who only need read access to existing files. |
Storage Object User |
Upload new objects, read and download files, modify and delete objects. Cannot manage bucket permissions. |
For users who need to modify files or create new files. |
Storage Object Admin |
Full control over objects: create, read, update, delete, and manage access at the object level. Cannot manage bucket-level permissions. |
For users managing buckets. |
Storage Object Creator |
Upload new objects only. Cannot read, modify, or delete existing objects. |
For users who only need to add files without accessing existing files. |
Adding Users to a Bucket#
Manage bucket user permissions from the Google Cloud Console.
Make sure that the correct project is selected in the console, and go to the Buckets page.
Select the bucket you want to manage.
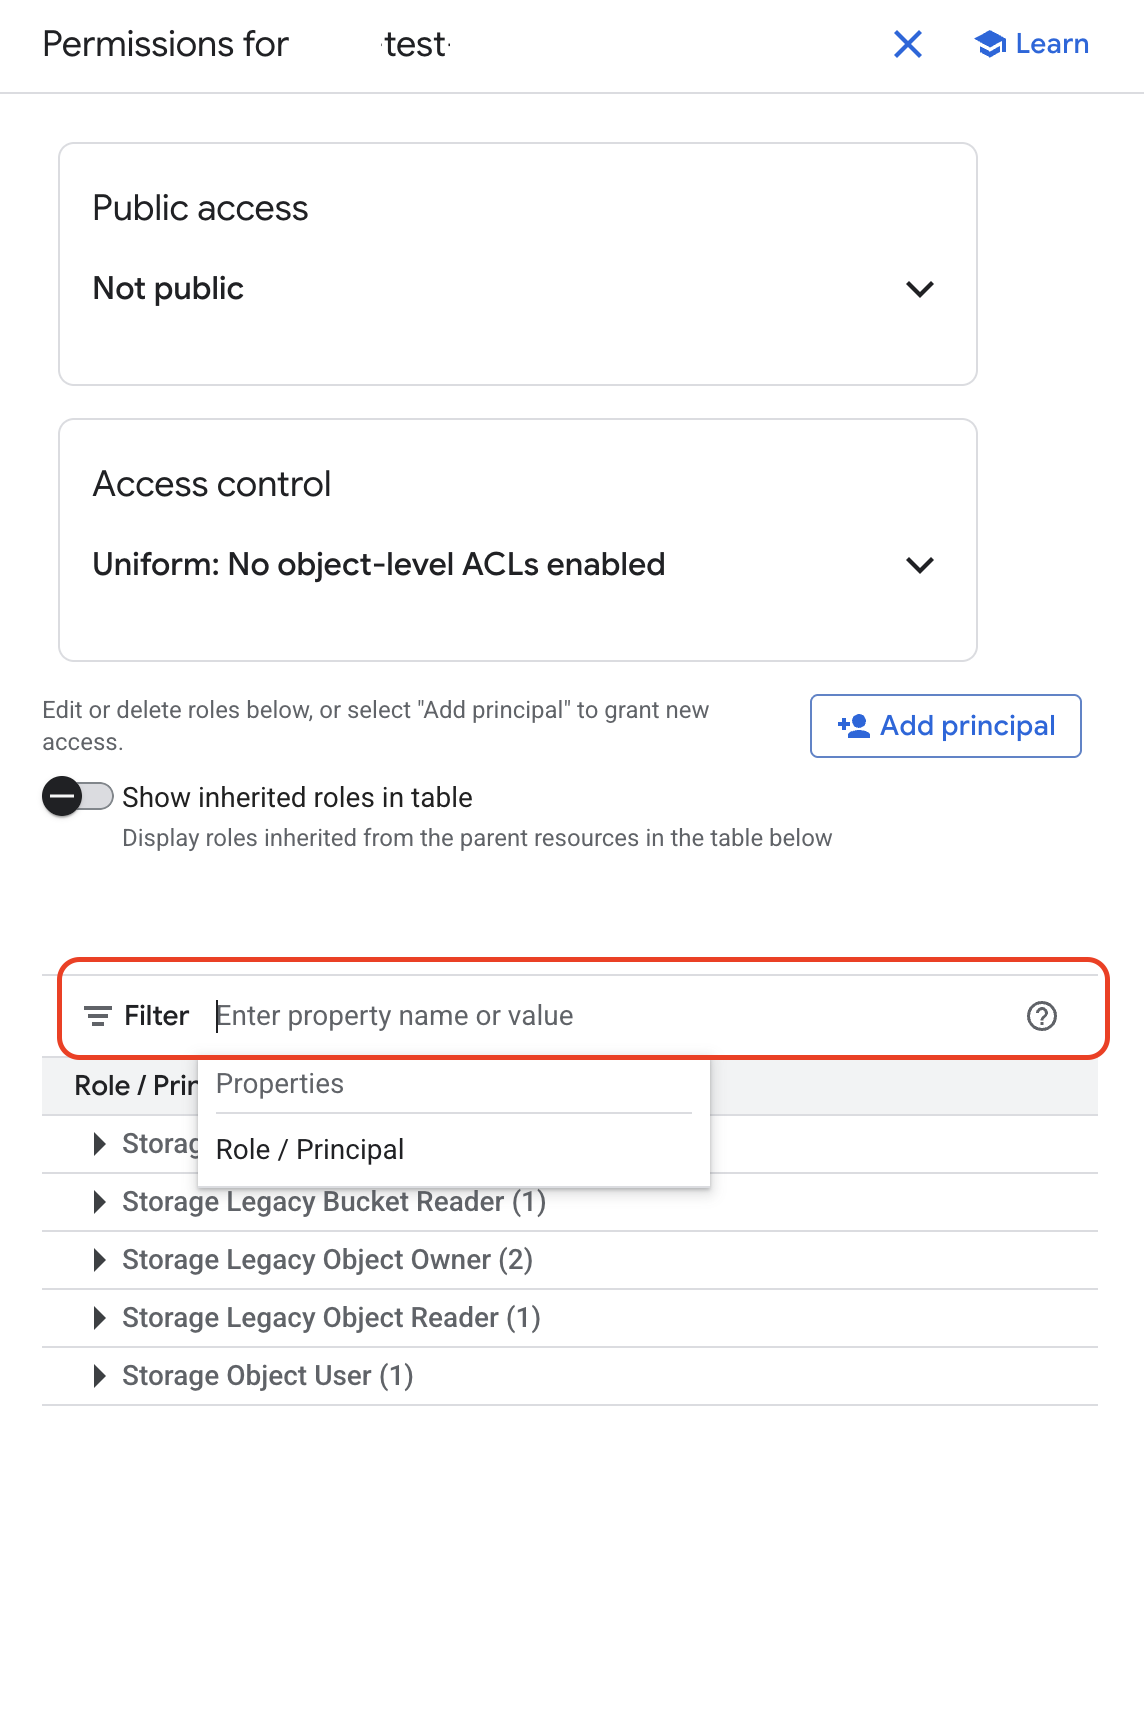
Click the Permissions tab.
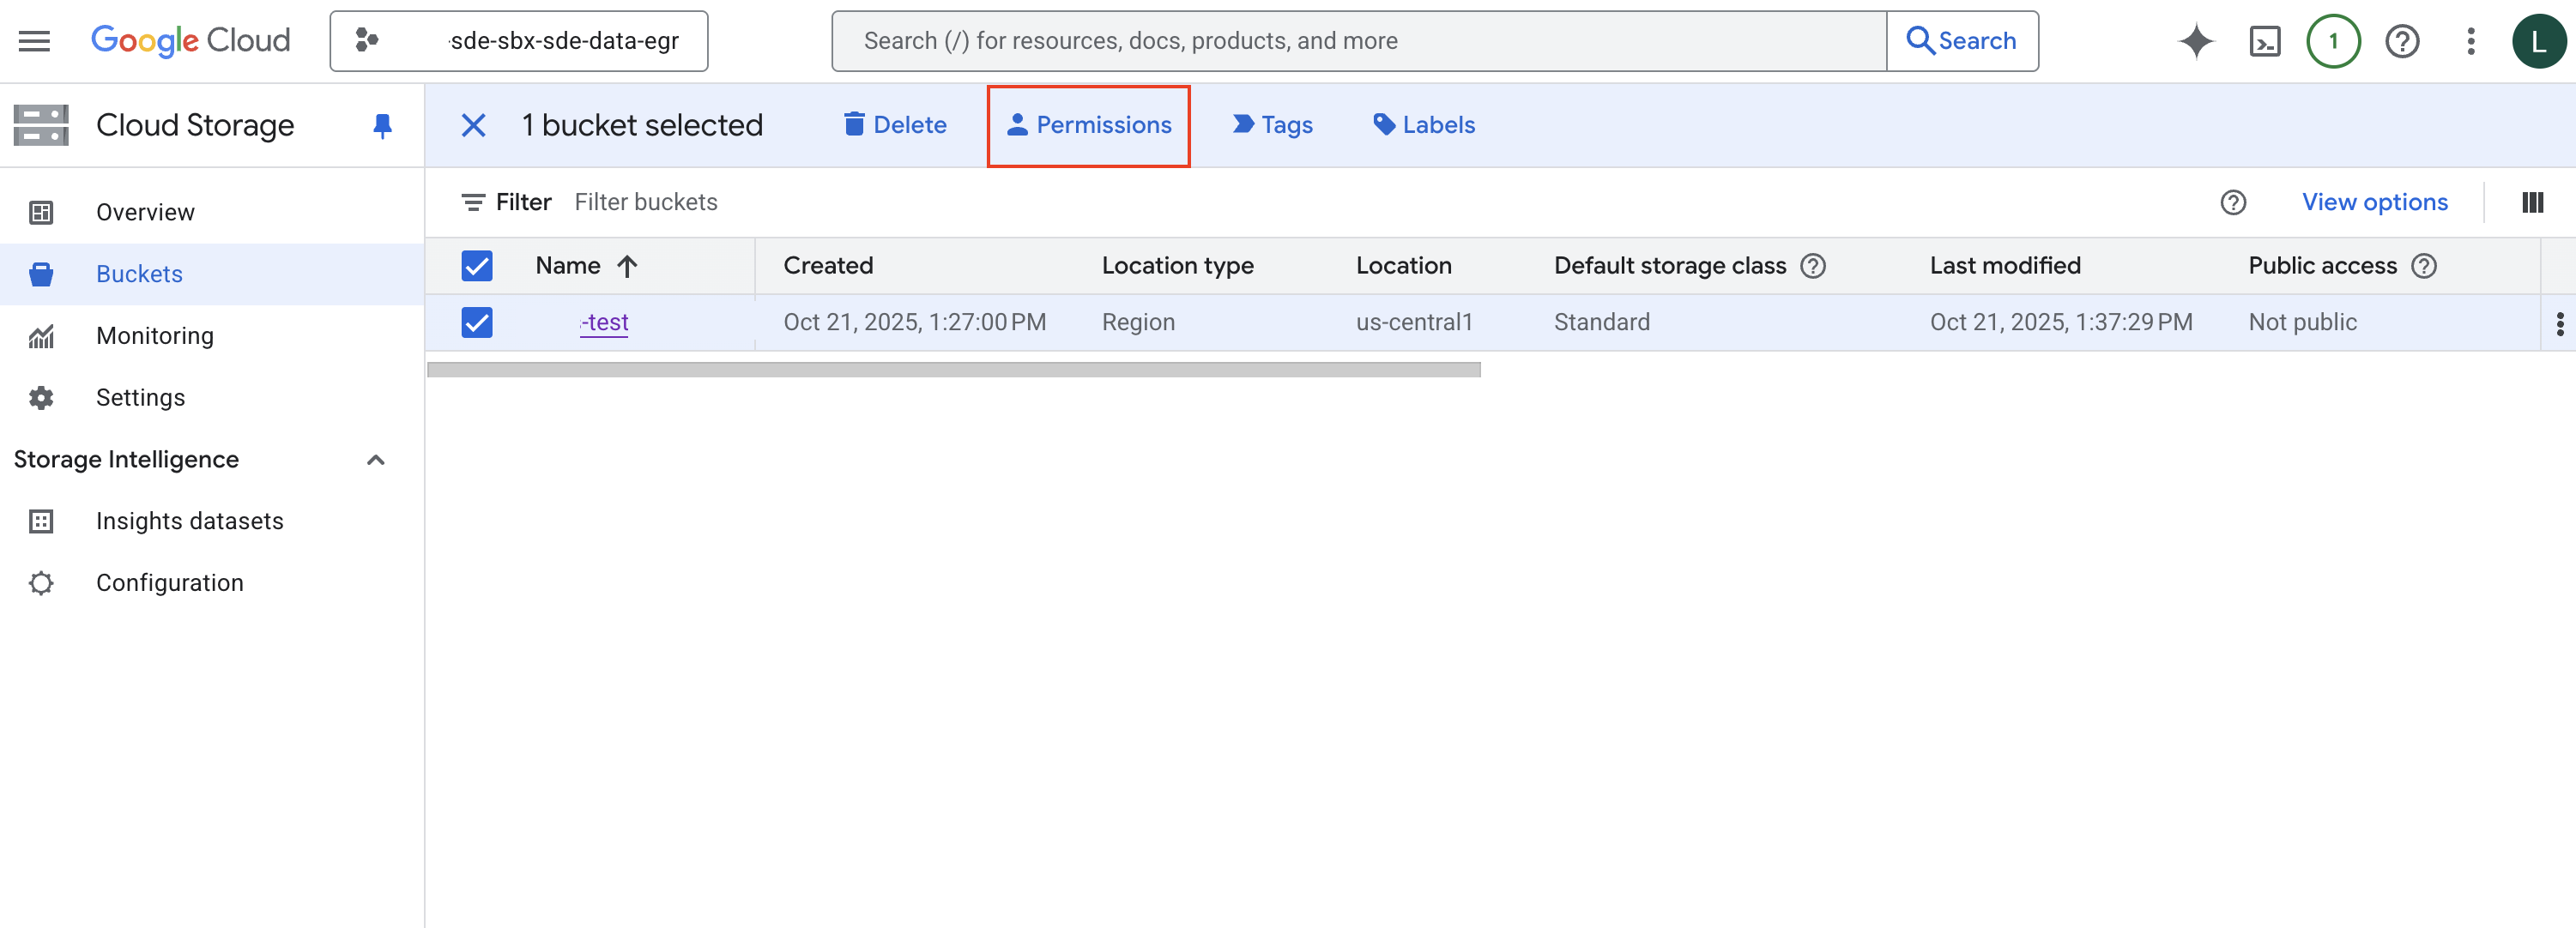
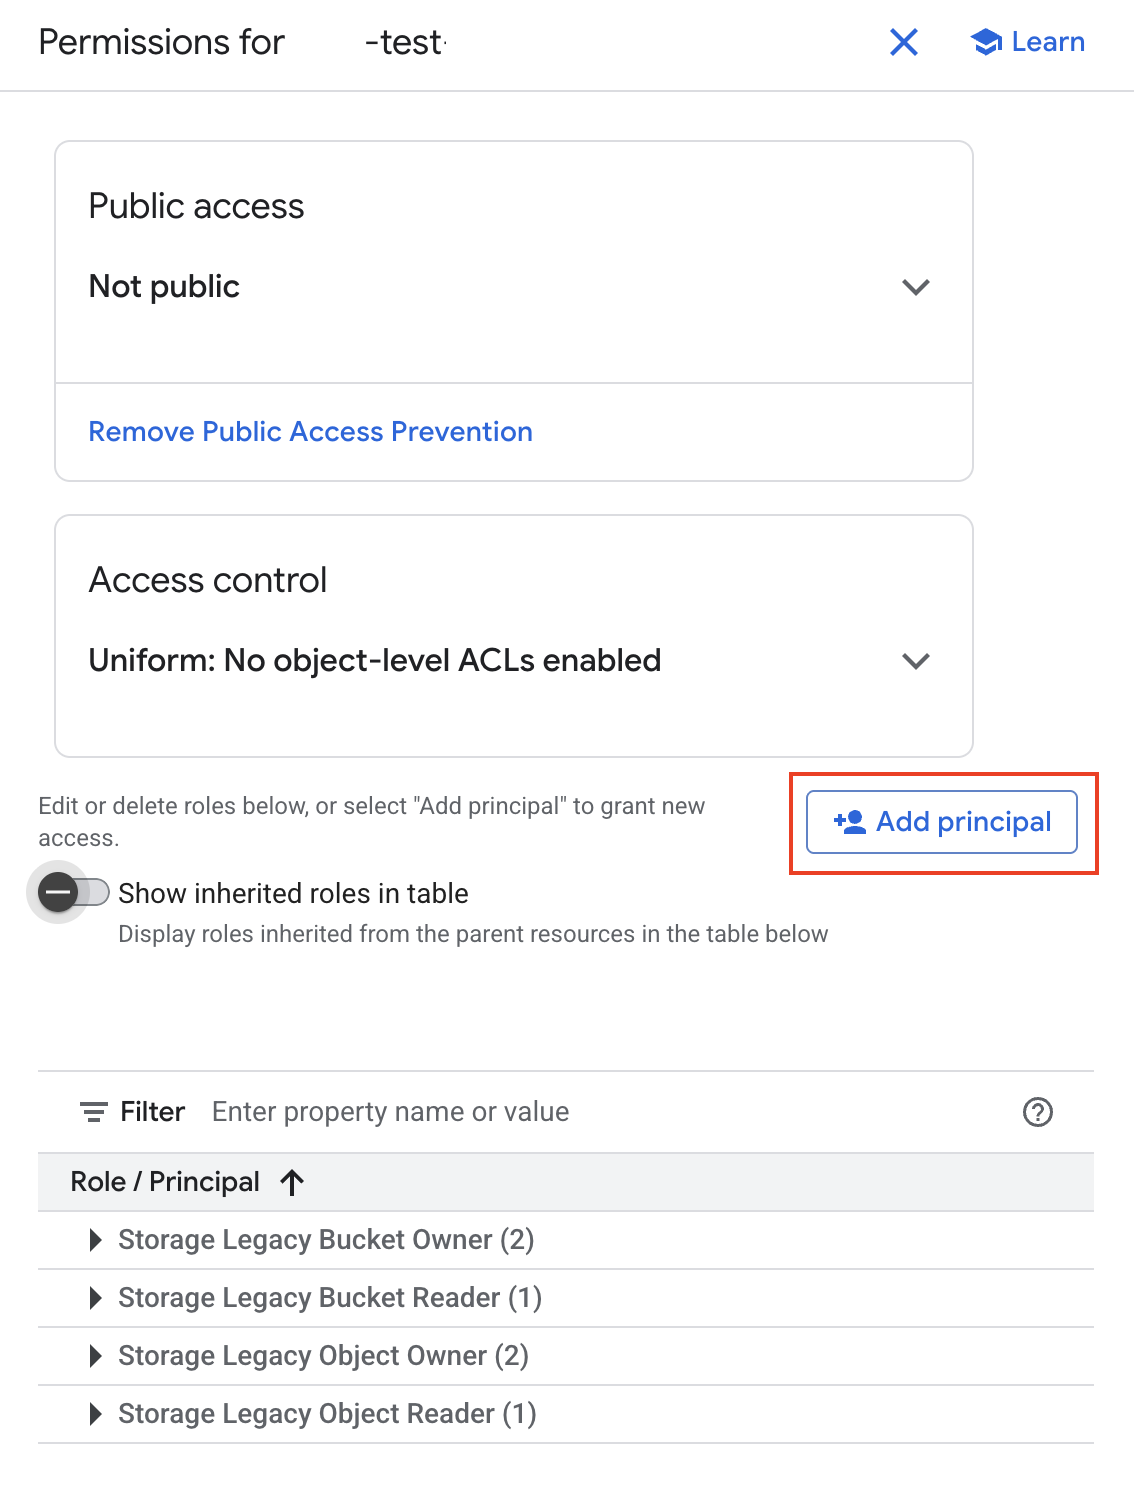
Turn off the Show inherited roles in table
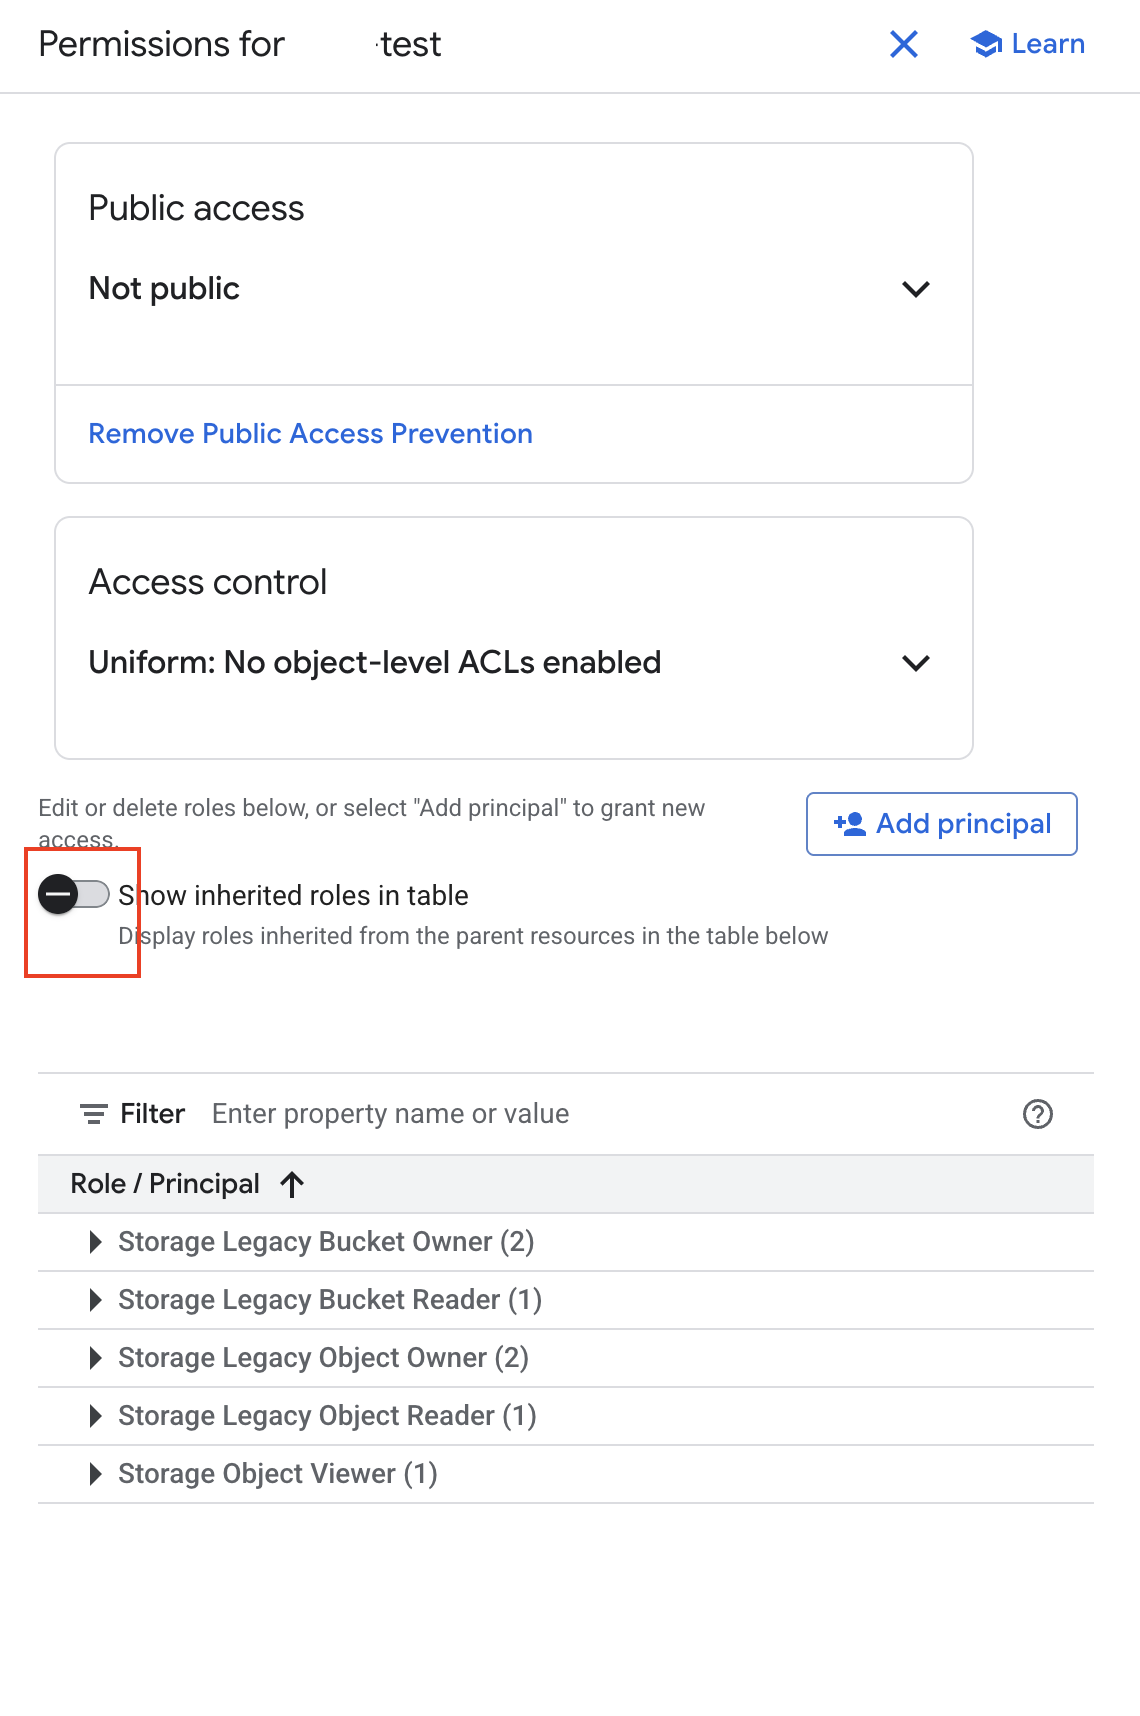
Click Add Principal. You will be taken to new page.
Add Principals: Enter the Northwestern email address for the individual that you want to assign permissions in the Input Box. You can only assign permissions for users that have previously been onboarded to the SDE environment.
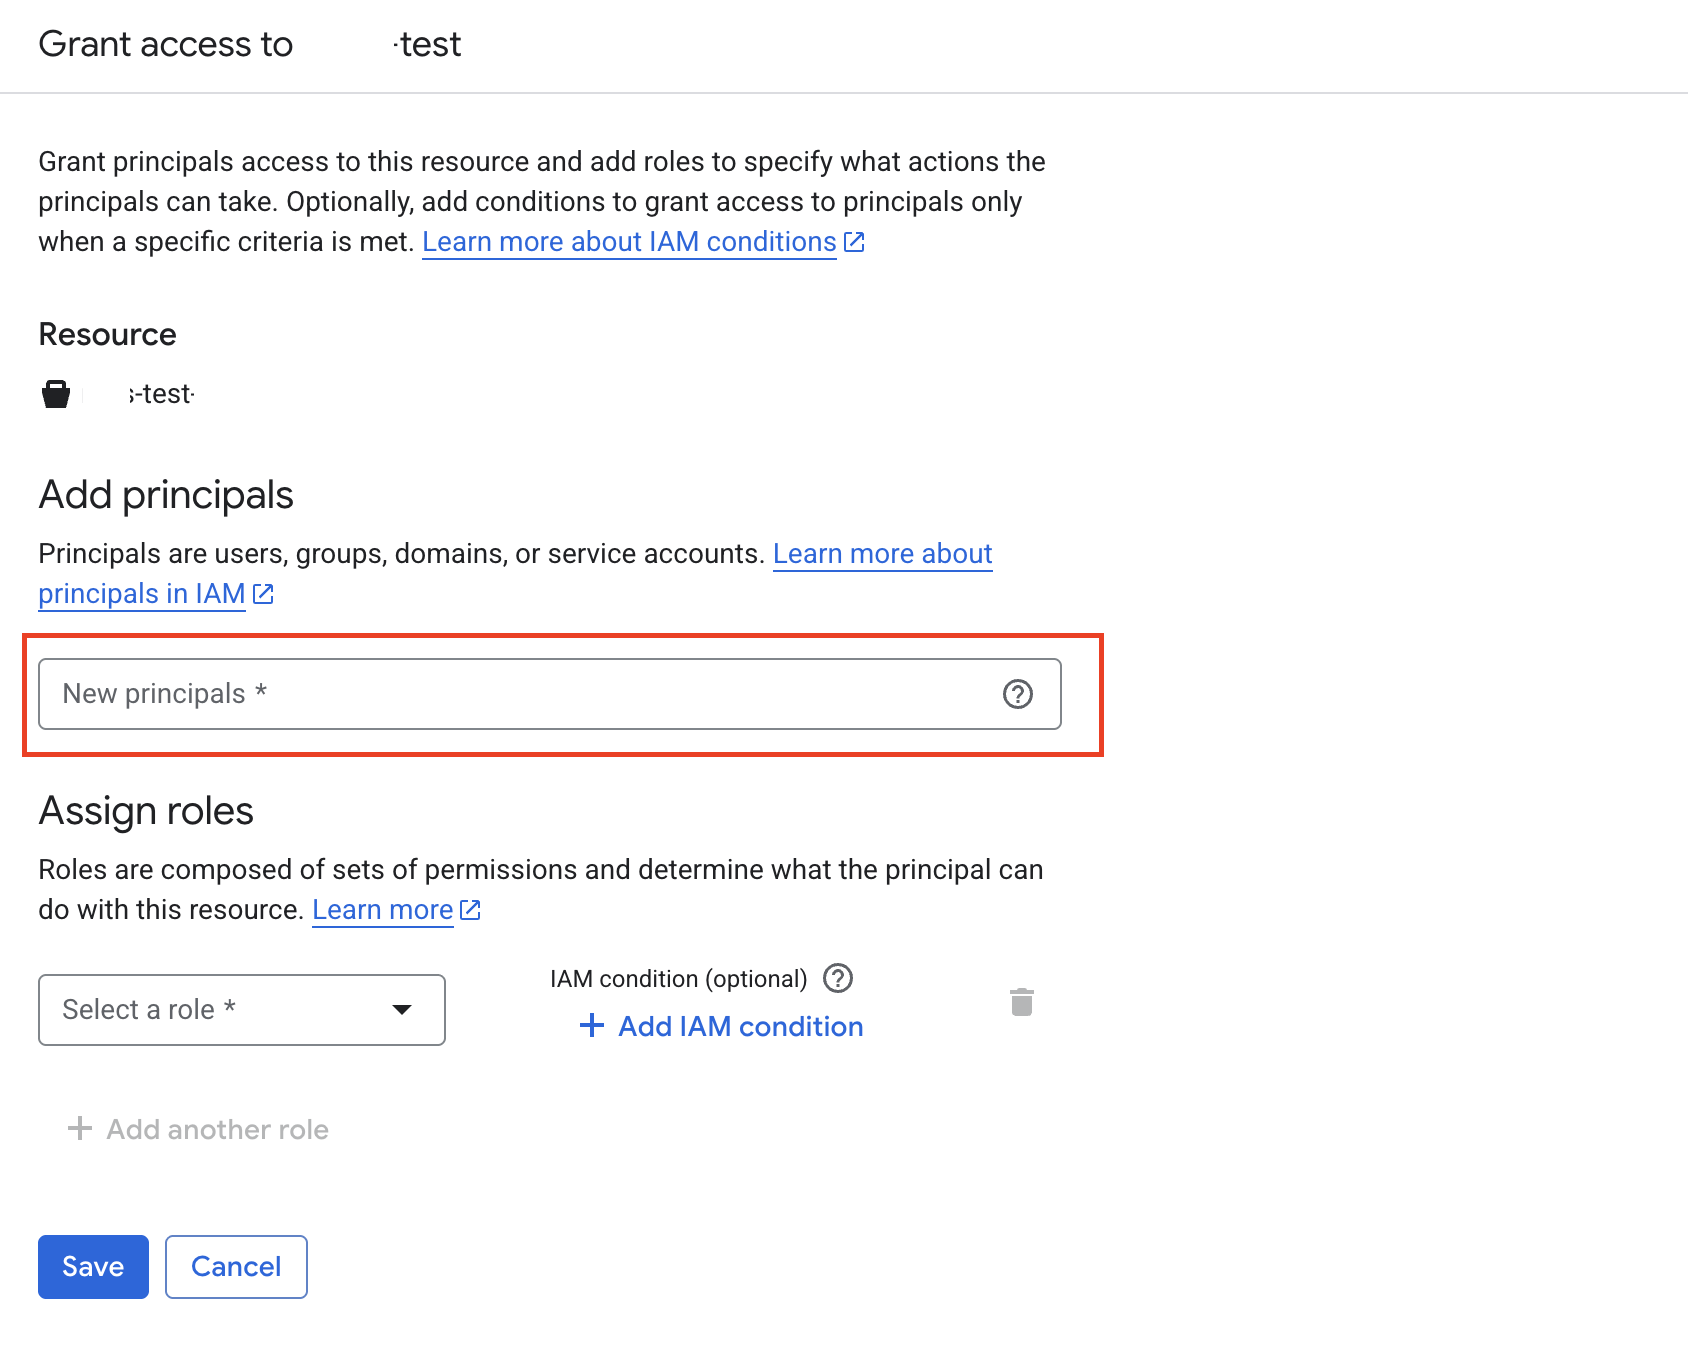
Assign roles
Identify the appropriate access type for the user.
In the dropdown navigation menu:
Select Cloud Storage
Select the permission you wish to apply
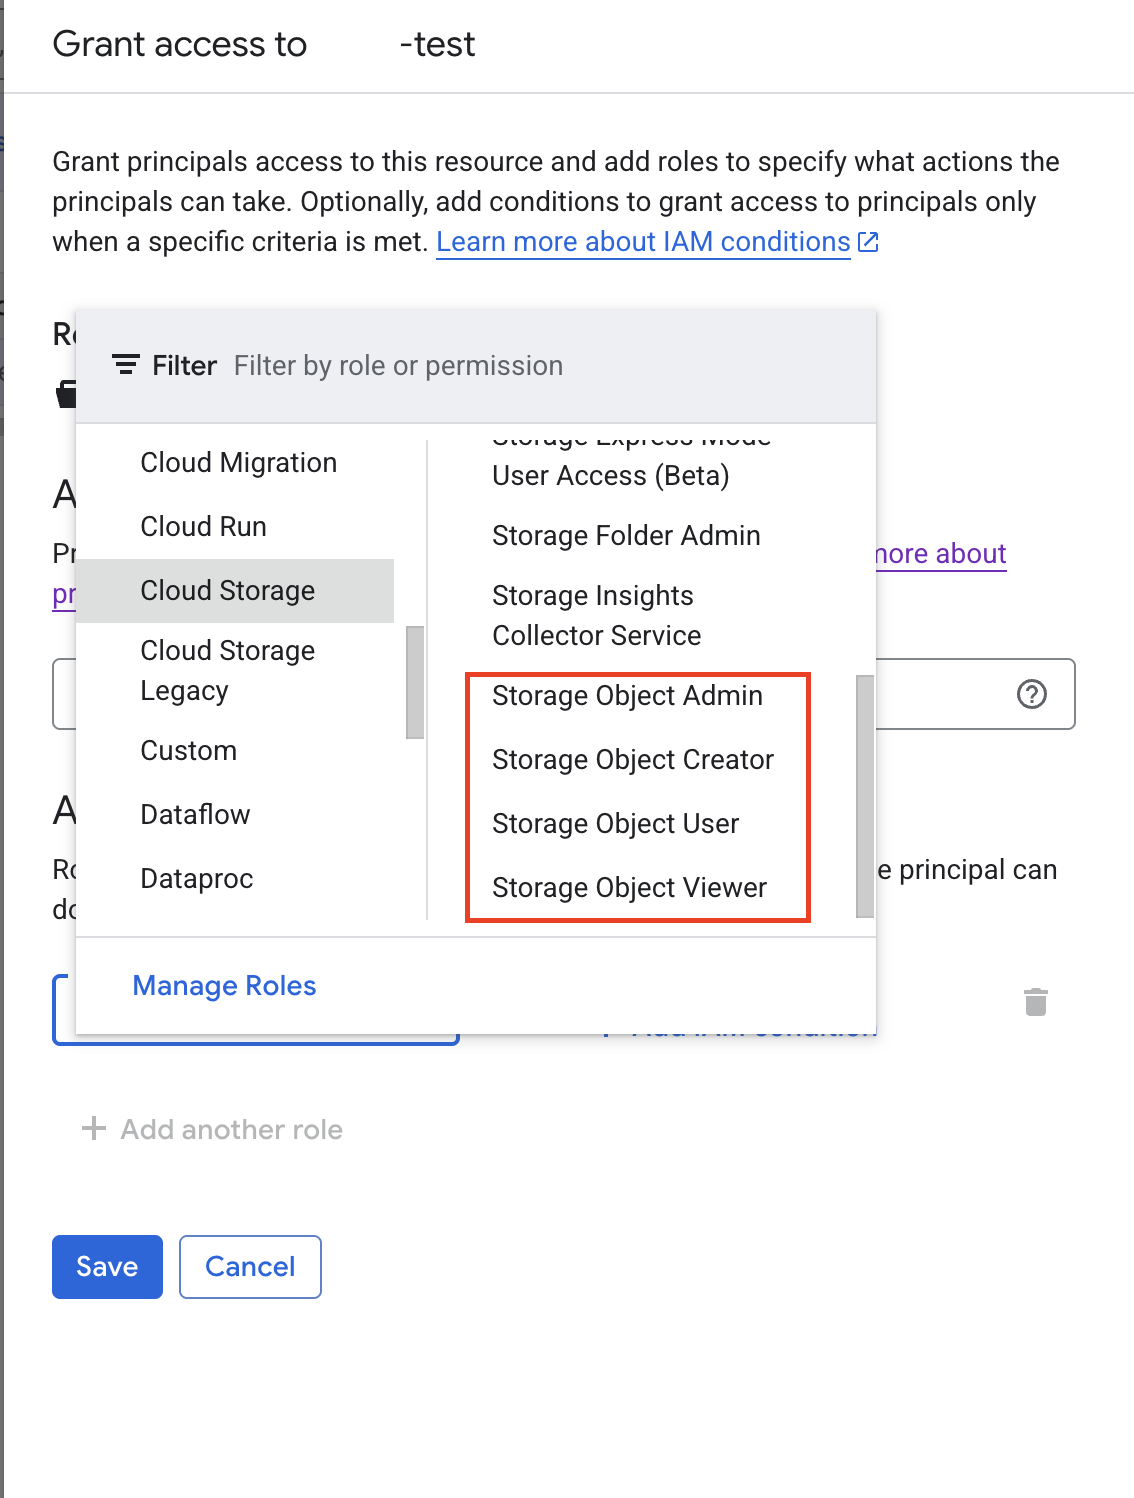
Click “Save”
Verify Access: The user should now appear in the permissions list. Permissions take effect immediately, the user can access the bucket from their VM as permitted.
Removing Users from a Bucket#
To revoke access from a user who no longer needs it:
Manage bucket user permissions from the Google Cloud Console.
Make sure that the correct project is selected in the console, and go to the Buckets page.
Select the bucket you want to manage.
Click the Permissions tab.
Find the user or group you want to remove.
Click the trash can icon next to their name.
If presented with a dialogue box: “Remove role from Principal?”
Select the second option:
Remove
user@northwestern.edufrom all roles on this resource. They may still have access via inherited roles.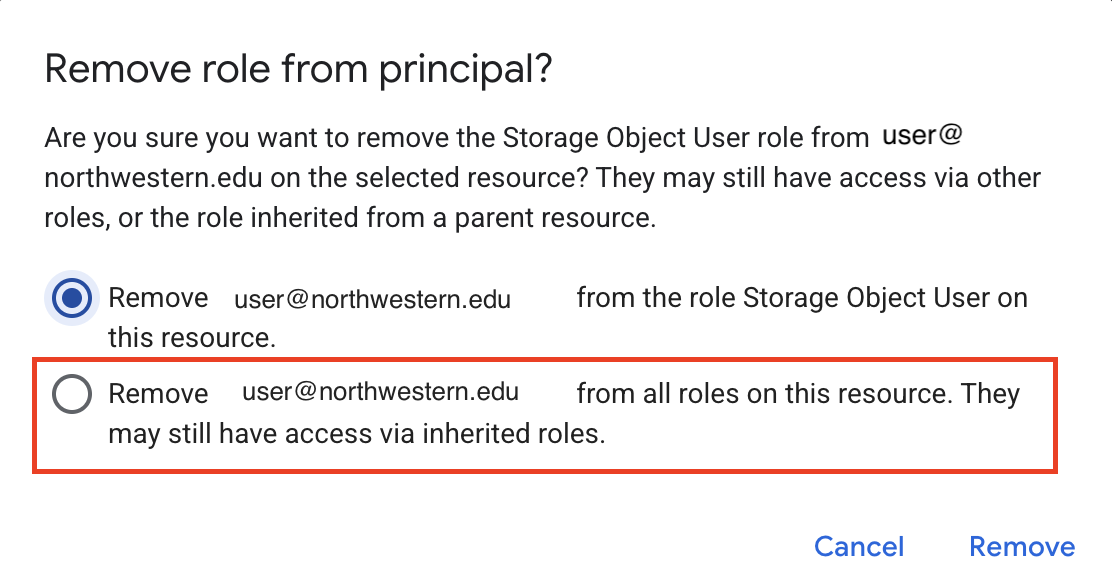
Confirm by clicking Remove.
The user will immediately lose access to the bucket and its contents.
Create a Bucket#
Only Data Engineers can create buckets. Buckets should only be created to support compliant workflows. See the Projects page for more information on preconfigured buckets.
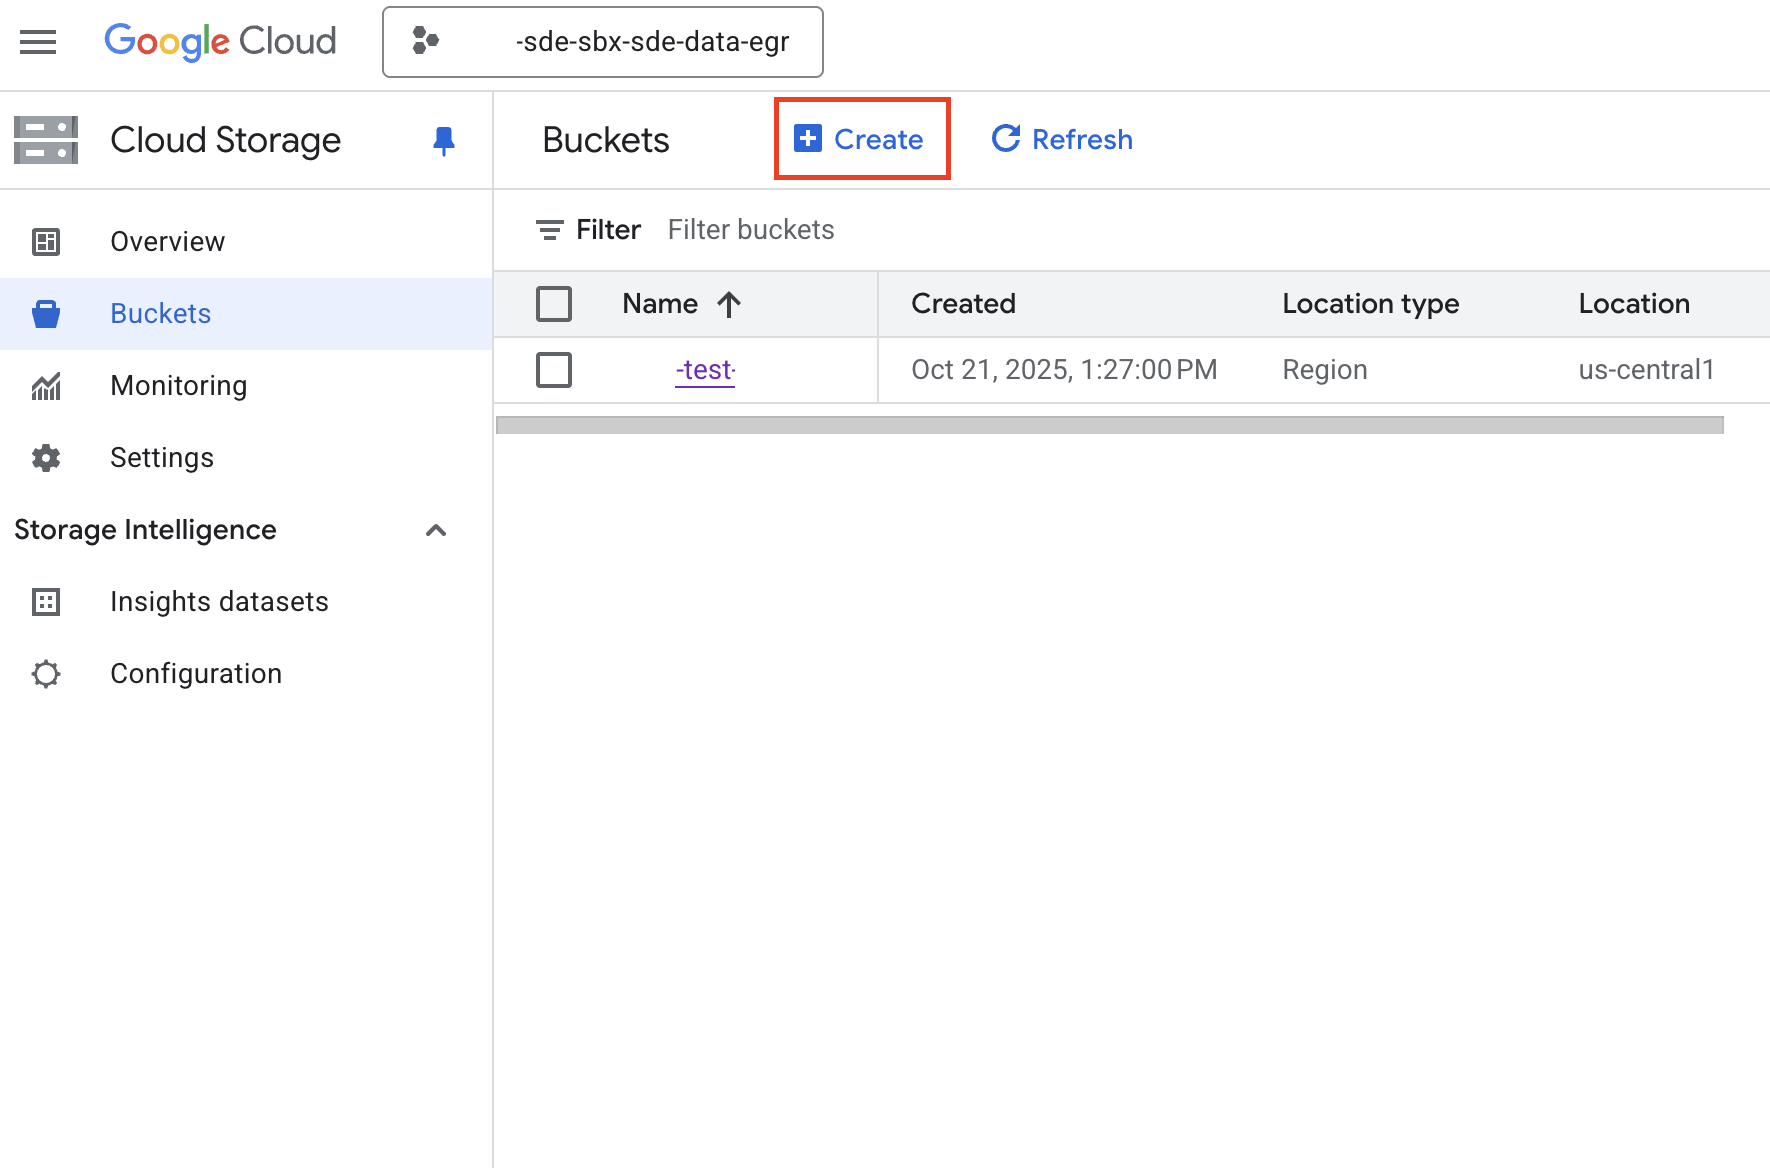
Manage bucket user permissions from the Google Cloud Console. Make sure that the correct project is selected in the console, and go to the Buckets page.
Click the + Create button at the top of the page to start a new bucket configuration.
Name your bucket
Enter a unique name that meets Google Cloud bucket naming requirements :
Contain only lowercase letters, numbers, dashes, and underscores
Start and end with a letter or number
Be globally unique across all of Google Cloud
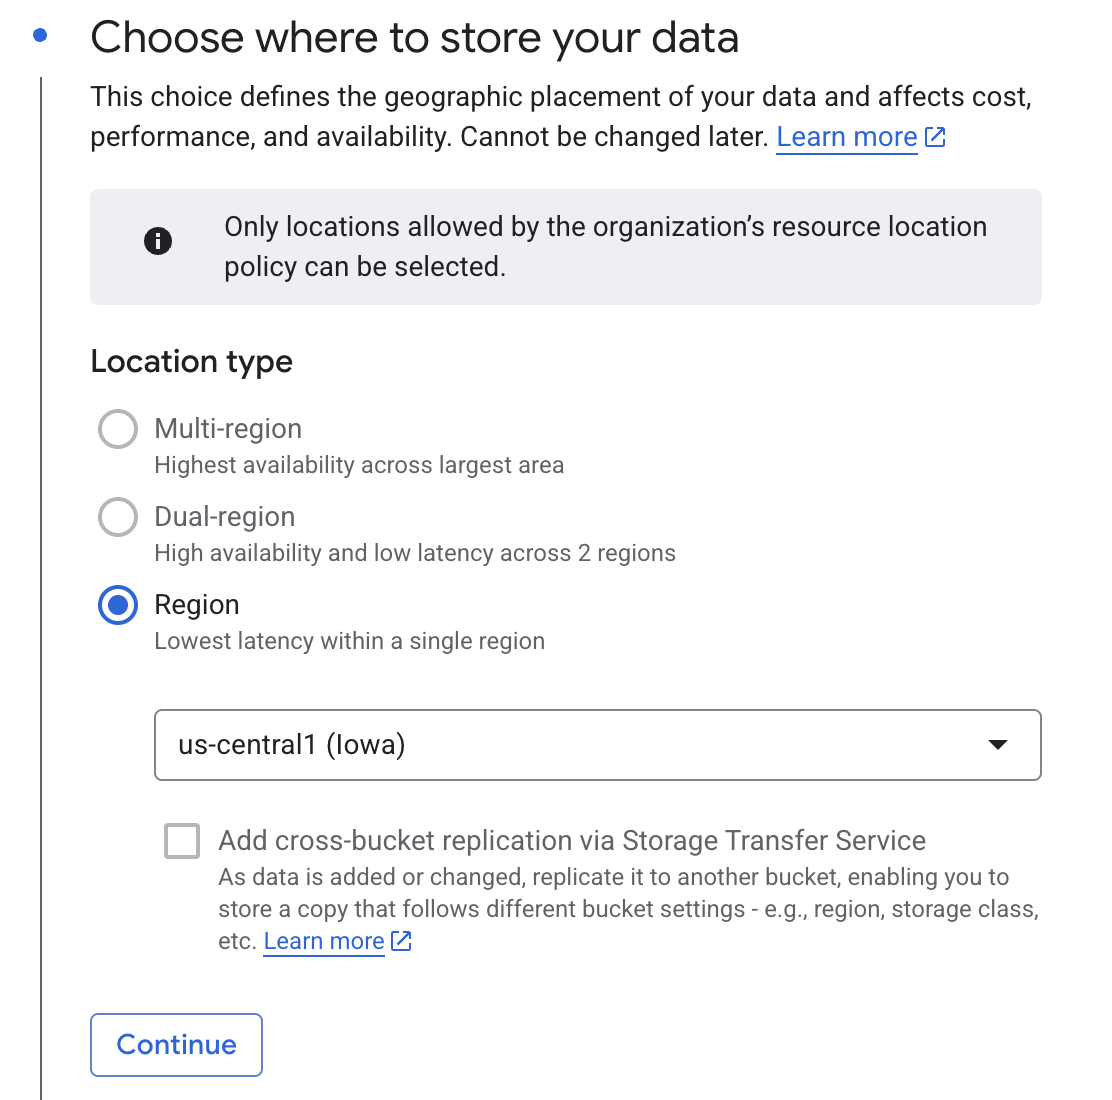
Chose where to store your data. Keep the default selection of us-central1 (Iowa).
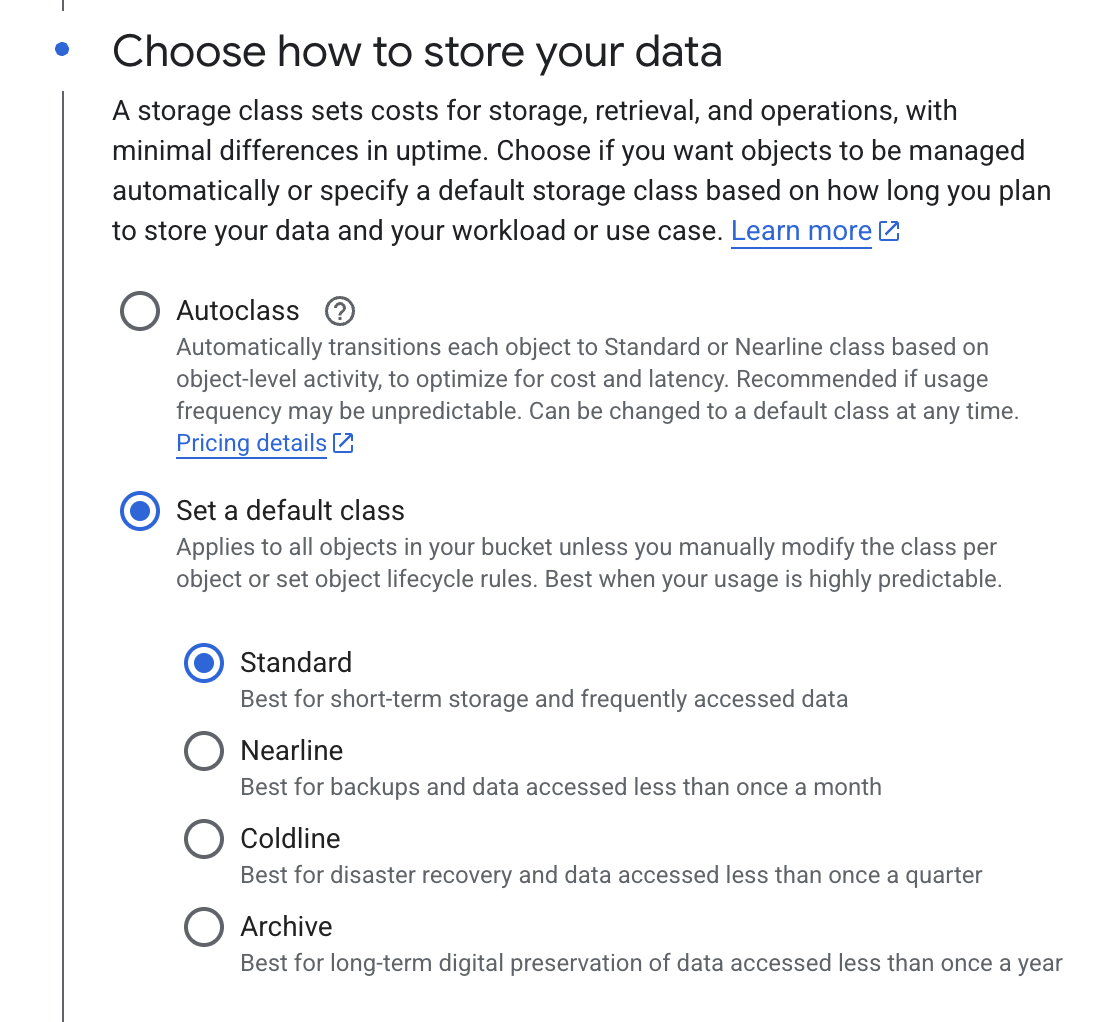
Choose how to store your data. Keep the default “Standard” storage class
Choose how to control access to objects. The SDE is set up to allow “Uniform” access control only.

Chose how to protect object data. Keep the default selections of:
Soft delete policy
Use default retention duration
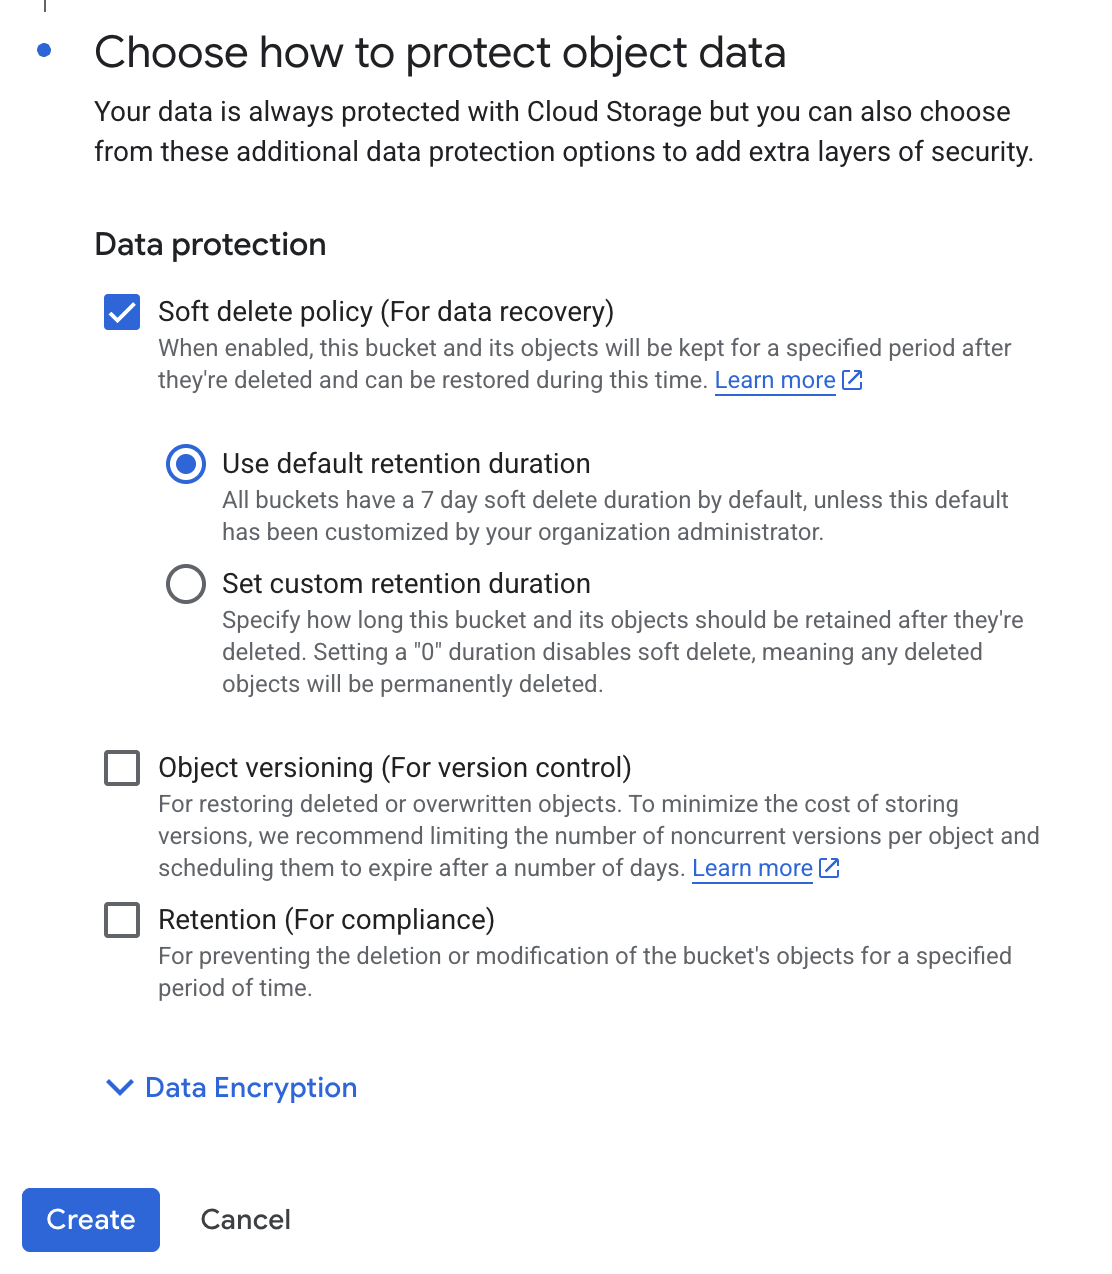
Click Create
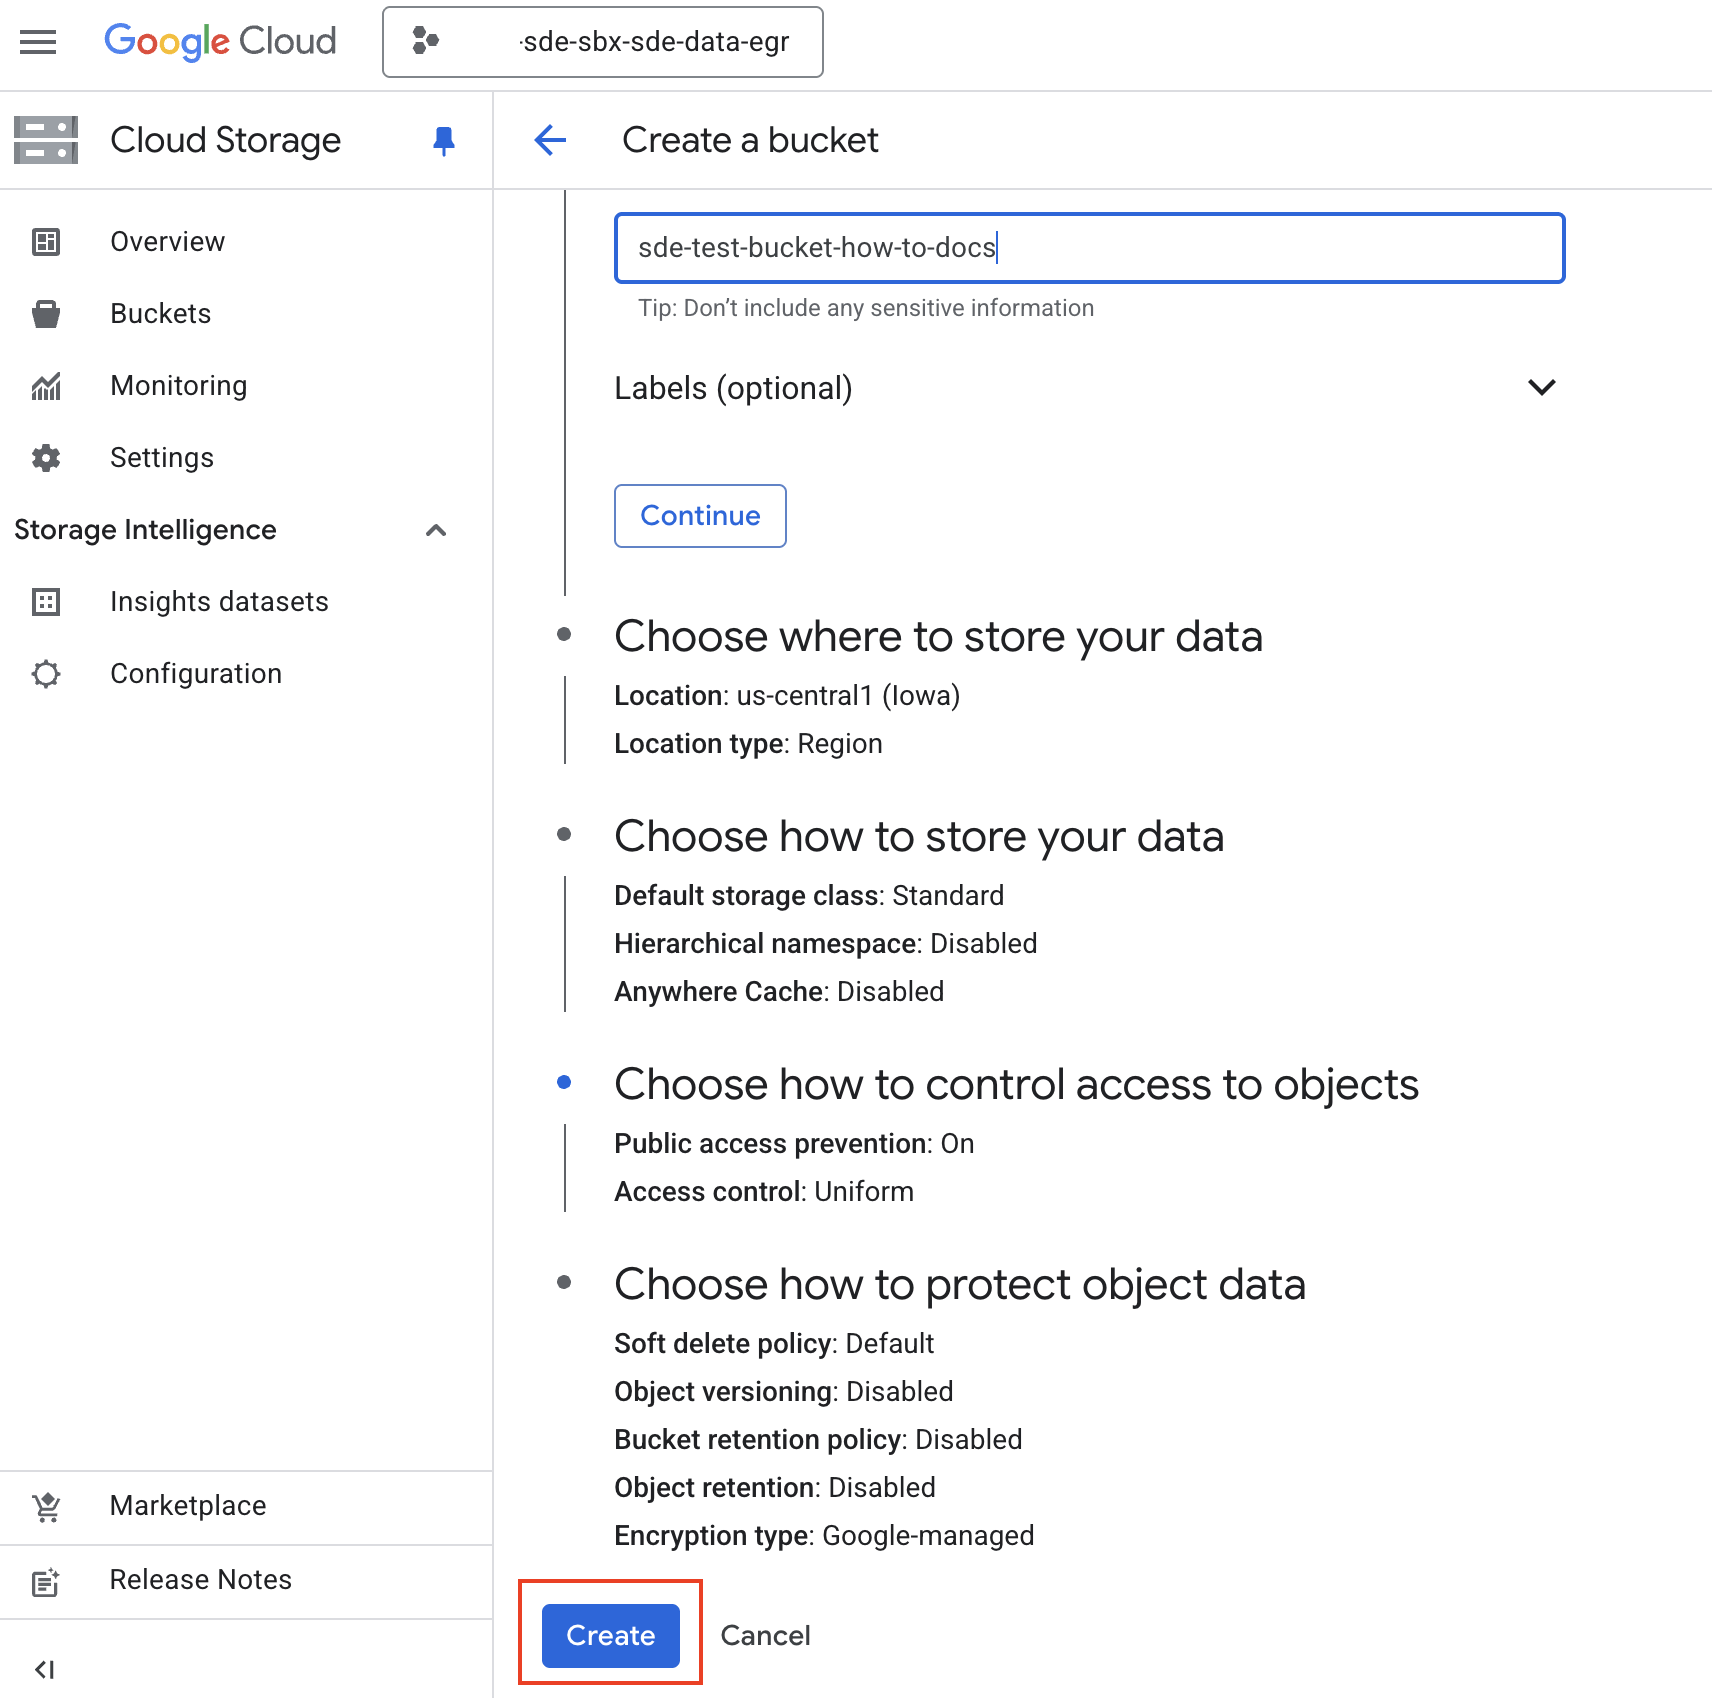
Your new bucket will be created, and you will be taken to the Bucket details page that overviews the bucket properties.
Delete a Bucket#
Remove buckets that are no longer needed to help manage storage costs and keep your project organized. This process also deletes all data inside the bucket. Make sure to back up anything important before deleting.
Check before you Delete
Deleting a bucket permanently removes all files and folders it contains. Make sure to back up or transfer any data you wish to keep before continuing.
Only users with the Storage Admin or other appropriate permissions can delete buckets.
Manage bucket user permissions from the Google Cloud Console. Make sure that the correct project is selected in the console, and go to the Buckets page.
Locate the Bucket: In the list of buckets, find the one you want to delete.
Check Contents (optional but recommended). Click the bucket name to review its contents and make sure nothing important remains.
Delete the Bucket
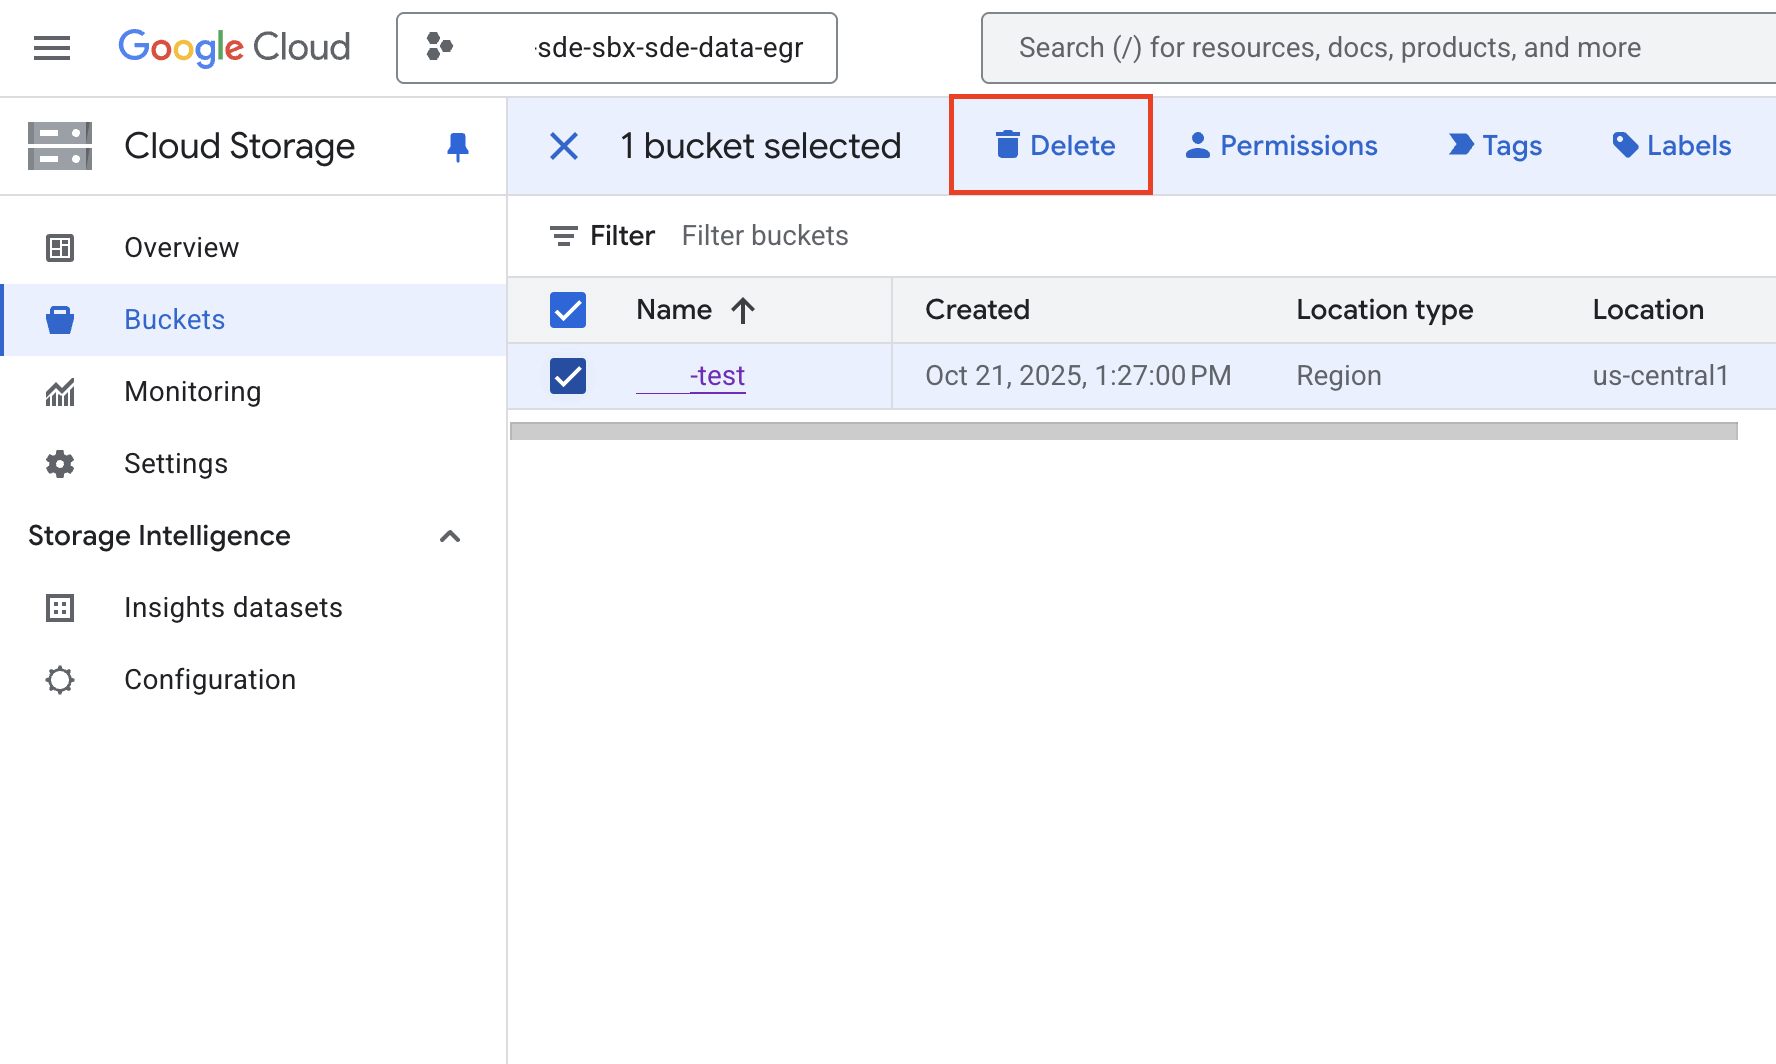
Return to the Buckets list.
Select the bucket you wish to delete.
Select the Delete option.
Confirm Deletion
An overlay window notification will appear.
Type in DELETE all caps, in the prompt box.
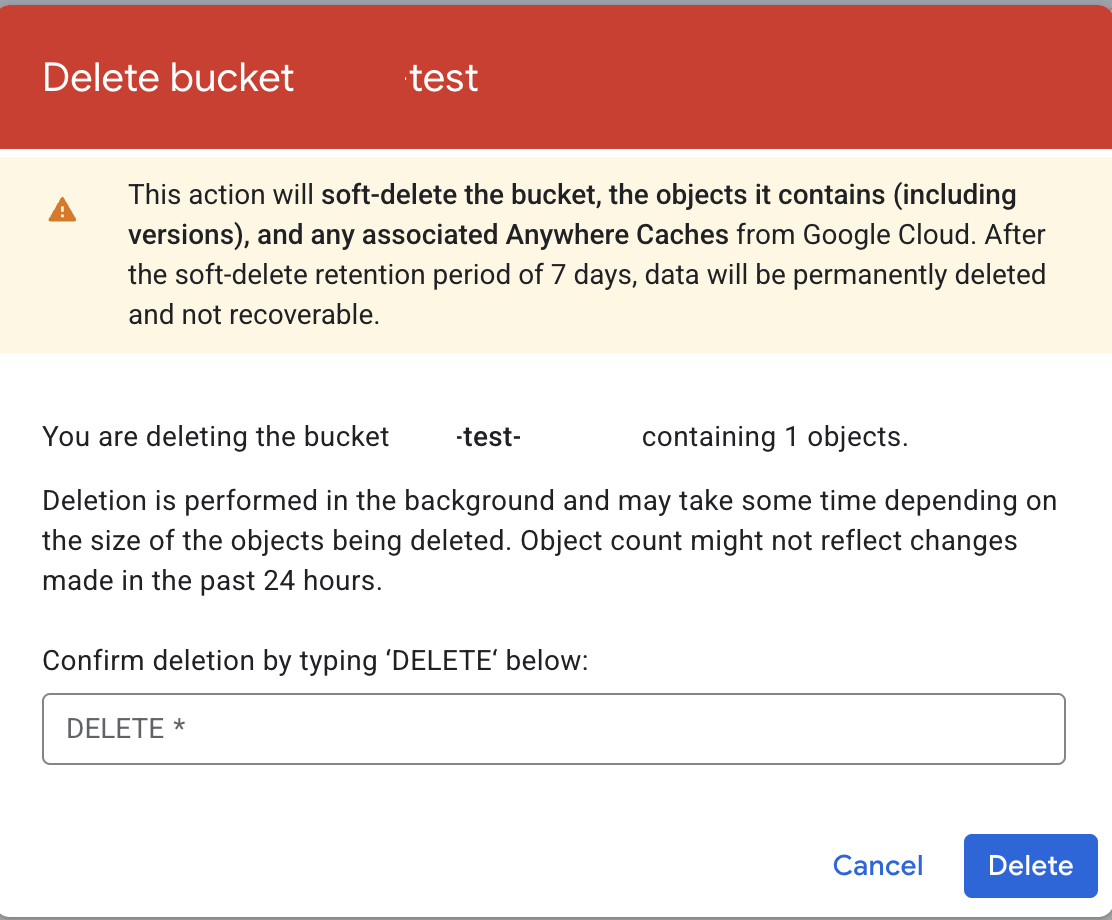
Click the DELETE option
Your bucket will be deleted, and you will be taken to the Buckets page of Google Cloud Storage that lists all your buckets.