Transferring files using Globus#
Before starting a Globus transfer, determine where the files you want to transfer are located (the source) and where you want to transfer them to (the destination). Both of these locations must be accessible to Globus through collections.
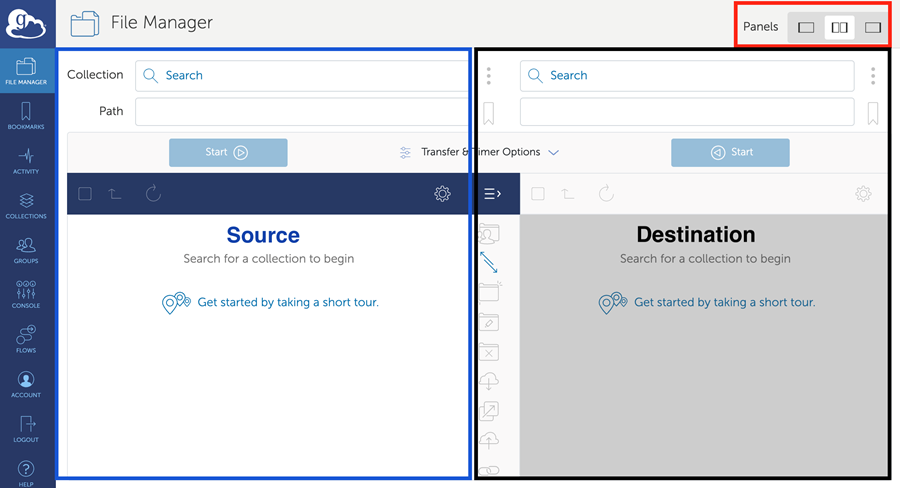
After logging in to Globus , you should see a screen with two search boxes to select source and destination collections. If not, select the two panel view in the upper right corner.
Once you determine the source and destination for your transfer, follow these steps to move data between collections.
One-time File Transfer#
To transfer a file using Globus:
Search for the collection that contains file you want to transfer (the source) using the instructions from the Find a collection section.
Click on the name of the collection. You should see a list of files and folders inside the collection you selected. Choose the files you want to transfer by checking the boxes next to the files or folders. A check mark should appear to the left of the file/folder. All of the files/folders you transfer at once need to be in the same directory.
Next, find the destination collection as you did for the source collection, but in the right hand search box. Then select the folder you want the file(s) to be transferred to.
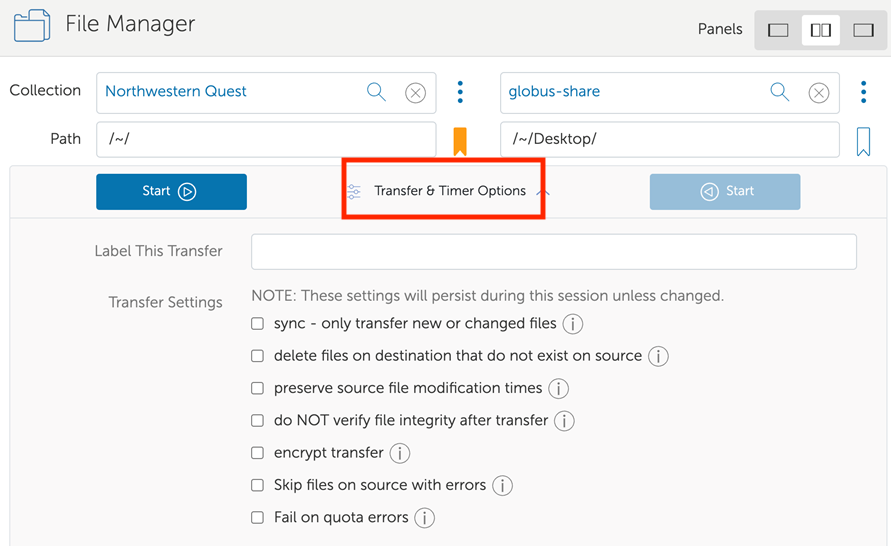
Optional: Globus provides pre-defined transfer settings that you can choose from. To apply these to your transfer, click Transfer and timer options between the source and destination search boxes in the File Manager screen. To apply a setting, click the box to the left of the setting. For more information about what these settings do, click the info button to the right of the setting.
Finally, click the blue Start button on the left under the source collection to start the transfer. A green notification will appear on the Activity shortcut in the Globus navigation menu to confirm that the transfer request has been submitted.
You can review details of completed or current transfers by clicking the Activity icon to under the File Manager icon on the left-hand sidebar. Once the transfer is completed, you will receive an email from Globus. You can view details on completed transfers going back 90 days.
Scheduled Transfers#
When dealing with especially large data transfers, you may want to schedule them for a time when the network is expected to have the least amount of traffic.
To schedule a transfer:
First select the source, destination and files for the transfer as you would normally.
Click Transfer and timer options between the source and destination search boxes in the File Manager screen.
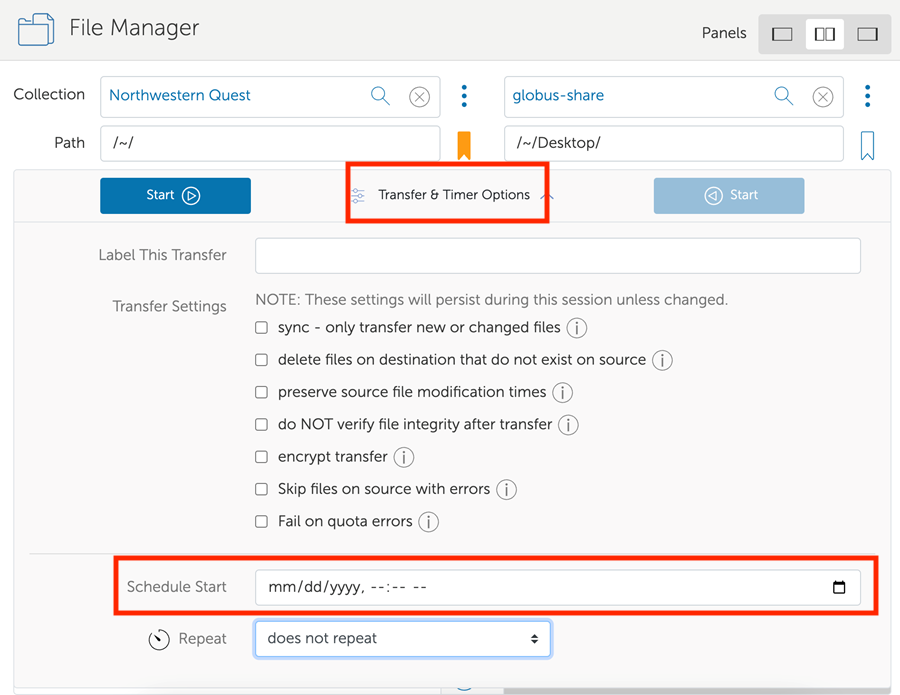
Specify a time in the Schedule Start field then hit the Start button. Your transfer will start at the specified time.
Recurring Transfers#
Recurring transfers can be used when synchronizing files between systems or automating moving data from instrument machines to more long term storage. This feature is very similar to setting recurring meeting invitations in Microsoft Outlook.
To schedule a transfer that occurs at a regular interval:
Select the source, destination and files for the transfer as you would normally.
Click Transfer and timer options between the source and destination search boxes in the File Manager screen.
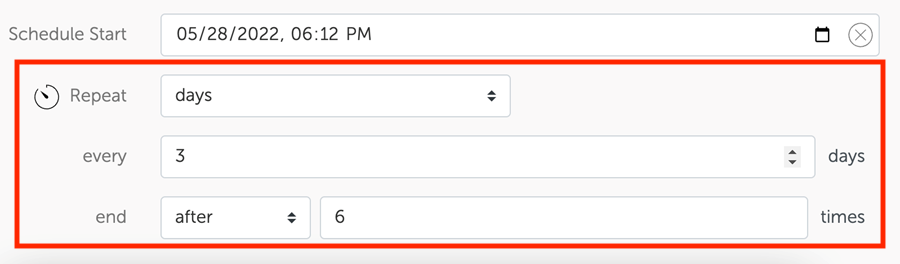
Choose the interval you would like (days, hours, minutes) from the Repeat dropdown menu.
Specify the frequency (eg: every 3 days) and when you would like the recurrence to end, on a certain date or after a given number of times.
Once the transfer has been submitted by hitting the start button, you can view and/or remove their scheduled transfer via the Timers Tab on the Activity page.