Installing Google Cloud Command Line Tools#
Google Cloud CLI#
The Google Cloud CLI (gcloud) is a secure command line tool used to interact with Google Cloud services inside an SDE environment. gsutil is a utility tool specifically for working with storage buckets.
These tools are used to:
Transfer data between SDE VMs and storage buckets (see Managing Buckets)
Create a connection between your managed endpoint (laptop) and a VM (see Working with VMs)
Access project resources from VMs without using the web-based Google Cloud Console, which is inaccessible from SDE VMs
Installation#
gcloud and gsutil are both already installed on any SDE VMs. They accessible through the Terminal once you are connected to a VM or through the SSH-in-browser connection run through your web browser from the Google Console on your managed device.
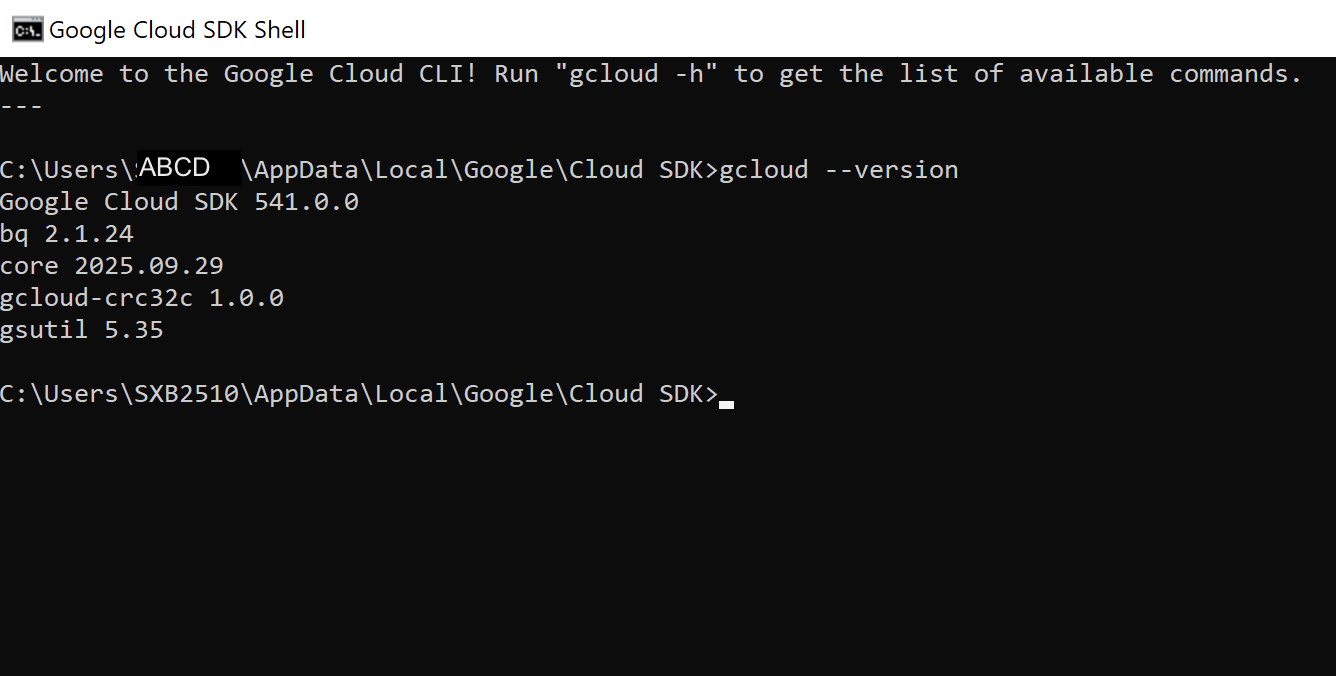
Some operations can also be run from the terminal on your managed device. To check to see if gcloud and gsutil are installed on your device, run the following commands in a Terminal (Mac) or Command Prompt (Windows) window:
gcloud --verison
The command should return output similar to:
If your laptop or workstation does not have Google Cloud CLI installed, follow the instructions below.
To install Google Cloud CLI on your Mac, go to the Google Cloud SDK download page and follow the instructions there.
You will need to whether your Mac has an Intel or Apple Silicon chip:
Click the Apple menu in the top-left corner of your screen.
Click About This Mac.
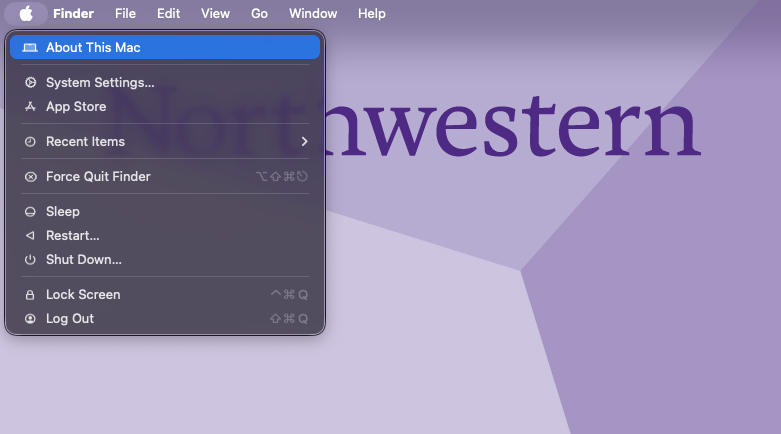
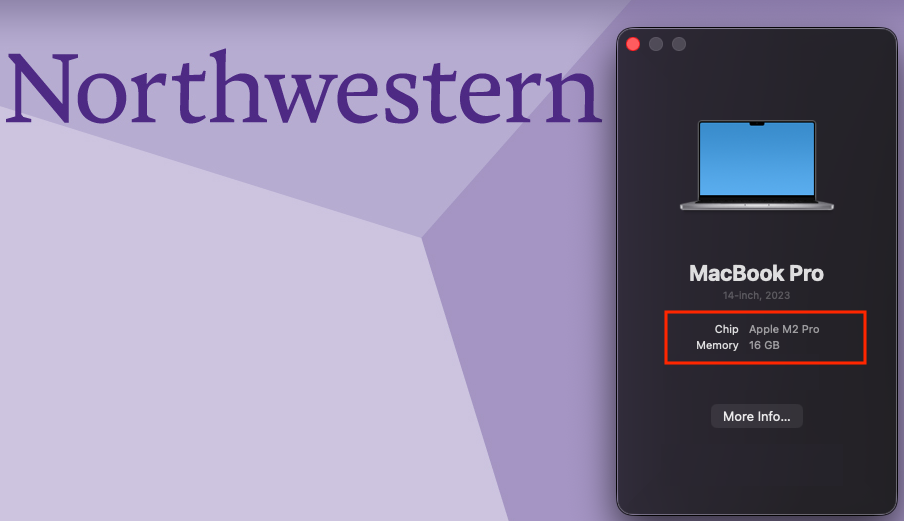
In the window that opens, look for the Chip or Processor field:
If it says Apple M1/M2/M3/M4, your Mac has an Apple Silicon chip.
If it says Intel, your Mac has an Intel processor.
If you have:
Apple Silicon (M1/M2/M3/M4) → choose the
macOS 64-bit (ARM64, Apple silicon)download option.Intel Macs → choose the
macOS 64-bit (x86_64)download option.
Once the installation completes, close your Terminal window. Then open a new Terminal and run:
gcloud --version
This confirms that the Google Cloud CLI was installed successfully.
To install Google Cloud CLI on Windows:
Go to the Google Cloud SDK download page and follow the instructions there.
Run the installer and follow the setup steps.
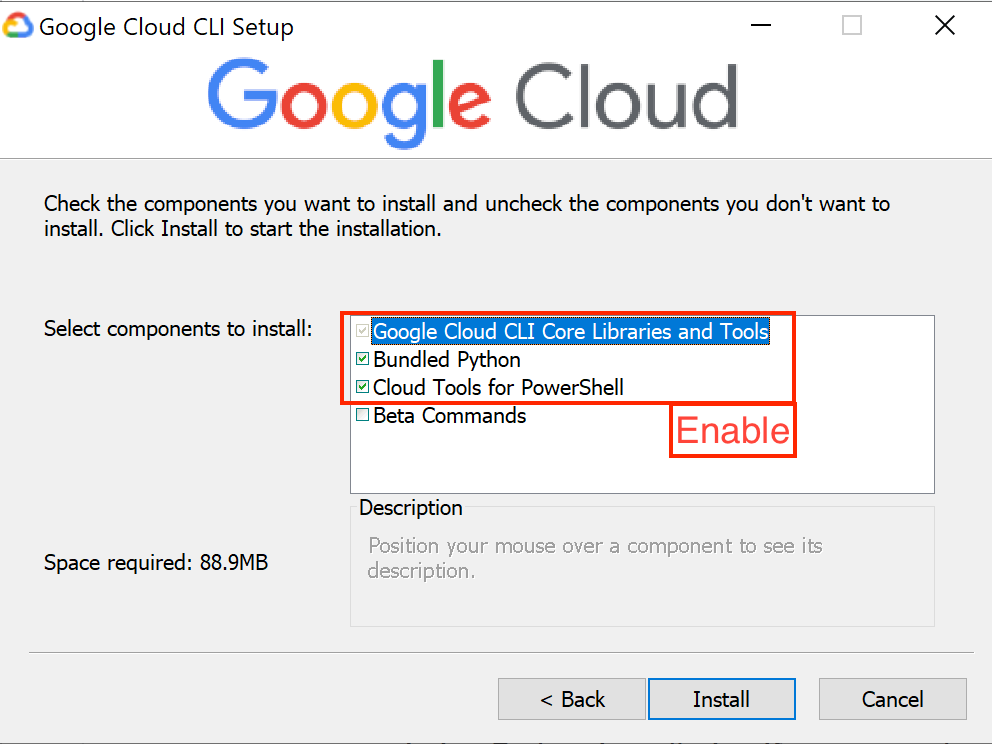
During the installation, you will be prompted to “Select components to install”.
Select the “Cloud Tools for PowerShell” option as shown in the image below:
Once the installation completes, open Command Prompt or the Google CLI application and run:
gcloud --version
This confirms that the Google Cloud CLI was installed successfully.
Help setting up Google Cloud CLI
If you need help setting up Google Cloud CLI, requesting support.
Local Authentication#
If you’re running the Google Cloud CLI from your device (not from a VM in the SDE), you will need to authenticate before accessing any resources.
Run:
gcloud auth login
This will open a browser window for you to sign in to Google. Log in with your Northwestern account.
If you’re using gcloud or gsutil from a VM, you will already be authenticated.