ColdFront Resource Management#
ColdFront is used to manage access to HPC resources. The specific resources available depend on the HPC cluster you are requesting access to, but they are generally distinguished by type (compute or storage) and access model (General Access or Priority Access).
For information on the resources available on Quest, see Quest Resources.
How to Request Resources#
Resources are requested from a Project page.
Important
Only users with management roles (Project Lead, Project Sponsor, Project Manager) can request resources for their Projects. Without a management role, you can view active resources but cannot request them.
From the “ColdFront: Home” landing page, choose the Project for which you would like to request resources.
From the resulting Project page, scroll down to the “Manage Resources” section and click on the purple “+ Request a Resource” button.
After clicking “+ Request a Resource”, use the drop down menu on the new page to choose from General Access or Priority Access resources.
If your Project already has all of the available General Access resources, you will only be able to choose Priority Access.
If your Project is a Classroom Project, you do not need to choose between General Access and Priority Access as Classroom Projects can only request classroom resources.
Select the resource you would like to request from the next drop down menu. For information on the specific resources available for Quest, see Quest Resources.
Provide the required information for the resource you are requesting. This minimally includes a chartstring (which will not be charged if the resource is General Access) and a justification or description of how the resource will be used.
Users with Project Lead, Project Sponsor, or Project Manager roles are automatically granted access to all Project resources. If you are requesting a General Access or Classroom resource, you may also select regular users to add to the resource at the time of the request. Users can only be added to Priority Access resources after they are active.
When you have completed all of the resource request form items, click “Submit” to submit your request. By clicking submit, you agree to the Terms and Conditions of the system on which you are requesting resources.
General Access Activation Workflow#
Once your request for a General Access resource has been submitted, the resource will appear under “Manage Resources” with the status “Requested”. The request will be reviewed by the Research Computing Support team. If there are no issues with your request, it will be approved and the status of your General Access resource will change from “Requested” to “Approved”.
If additional information is required, the request will be Denied with staff comments. If the request is denied, you will need to submit a new request with additional information.
When a new General Access resource for your Project is ready to be used, the status in the “Manage Resources” section will change from “Approved” to “Active.” General Access resources will be activated within 24 hours of being approved. Email notifications will also be sent indicating that the resource is active. Users can submit jobs or access the file system only once a resource is active.
Priority Access Activation Workflow#
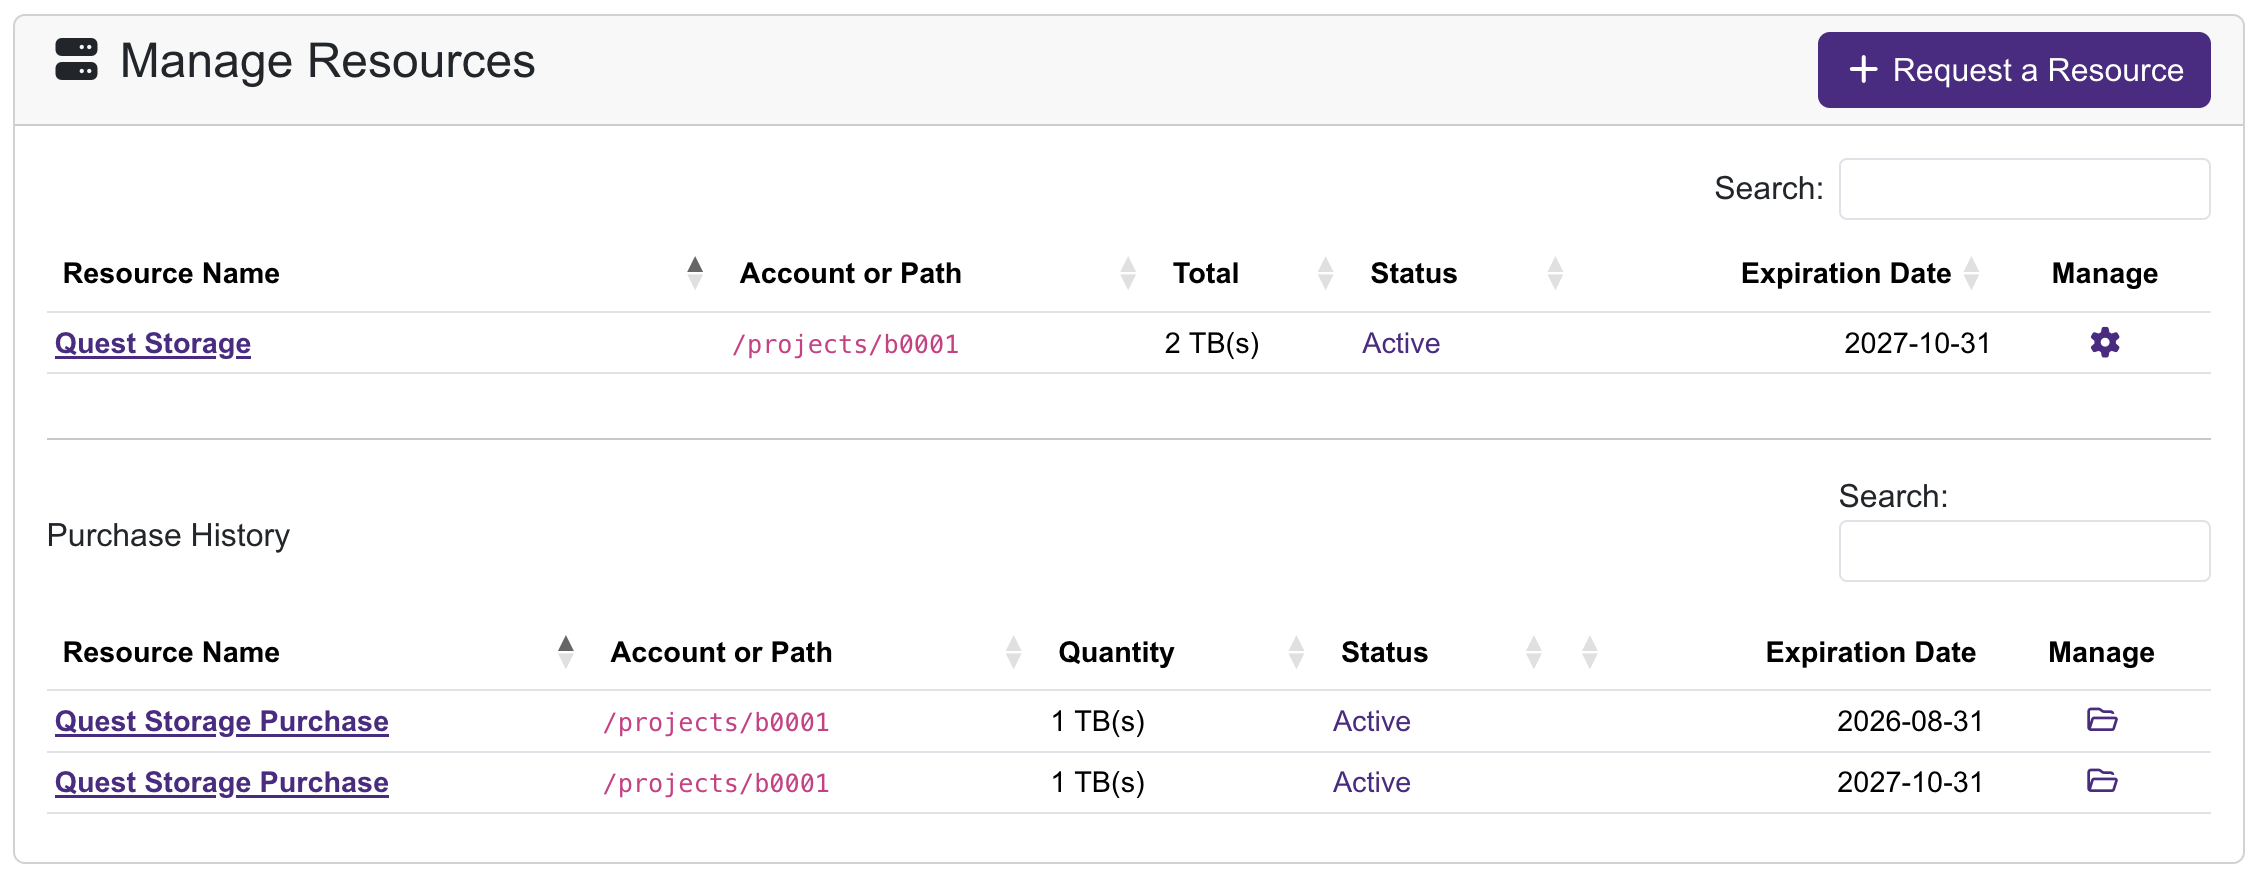
When you request a Priority Access resource, it creates a “Purchase History” subsection in the “Manage Resources” section on your Project page. This section tracks individual purchases and expiration dates, while the general “Manage Resources” section summarizes the total resources of each type that you have. For example, the image below shows two separate “Quest Storage Purchase” items that are both contributing capacity to a single “Quest Storage” resource. The expiration dates in the overall resource section correspond to the date the final resource expires; portions of the resource may expire sooner.
Storage Purchase Workflow#
Initial storage resource purchase requests appear in the “Requested” state.
After RCDS reviews and approves your submission, the resource status appears as “Pending Chartstring Approval.”
When the chartstring is verified and the purchase is submitted, storage resources move to the “Approved” status.
When the resources are ready for use, their status is updated to “Active.” Storage resources move from “Approved” to “Active” within 24 hours. The “Manage Resources” section will list the path to the new storage location once it is active.
Compute Node Purchase Workflow#
Initial compute node purchase requests appear in the “Requested” state.
After the Research Computing and Data Services (RCDS) team reviews and approves your submission, the resource status appears as “Pending Chartstring Approval.”
When the chartstring is verified and the purchase is submitted, the resource moves to the “Approved” status.
Once a Slurm account has been created for your Priority Access compute usage, the status of the request changes to “Pending Node Assignment.”
When the new node is added to the Slurm account, the status of the resource changes to “Active” and the resource is available for use. In-stock compute nodes are activated within 10 business days of reaching the status “Approved.” Custom and out-of-stock node purchases have a longer lead time and could take 3-6 months to become available.
The “Manage Resources” section will display the account associated with your Priority Access compute once your resources are active.
Resource Expiration and Renewal#
Every resource has an expiration date that is visible from the Project page in the “Manage Resources” section. Expiration dates are also visible from each resource’s page, which can be opened by clicking on the resource name. As resources get close to expiring, a yellow “Resources: Expiring Soon” icon will appear next to the corresponding Project on the landing page. Visit the Project page to see which resources are expiring and take steps to renew or repurchase resources as needed.
General Access and Classroom Resource Renewal#
General Access and Classroom resources can be renewed from the “Manage Resources” section on the Project page. In the “Manage” column there will be a yellow “Click to Renew” button for resources that are expiring soon or a red “Expired - Click to renew” button for resources that have already expired. Click on this button and then fill out the renewal justification on the next page to renew. You must click the purple “Submit” button to submit your renewal request. Submitting a request constitutes agreement with the Terms and Conditions of use of the system on which you are requesting resources.
See Quest Resources for details on resource expiration and renewal.
Priority Access Resource Expiration#
Priority Access resources are purchased for one to multiple years. Priority Access resources cannot be renewed. Replace expiring resources by purchasing a new Priority Access resource. Expiration dates are listed in the Purchase History subsection of Manage Resources.